EB 8015 EN 9-7
Servicing
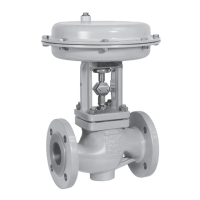
9.4.1 Replacing the gasket
Risk of control valve damage due to incor-
rect servicing.
Î The gasket can only be replaced when
all the following conditions are met:
− The valve size is ≤DN150.
− The valve does not have a balanced
plug.
Î To replace the gasket in other valve ver-
sions, contact our after-sales service.
a) Standard version
1. Undo the body nuts (14) gradually in a
crisscross pattern.
2. Lift the ange (2) and plug with plug
stem (5) off the body (1).
3. Remove the gasket (17). Carefully clean
the sealing faces in the valve body (1)
and on the ange (2).
4. Insert a new gasket (17) into the body.
5. Place the ange (2) onto the body.
Version with V-port plug: place the
ange (2) onto the valve body, making
sure that the largest V-shaped port of the
V-port plug faces towards the valve out-
let.
6. Firmly press the plug (5) into the seat (4).
Fasten down the ange (2) with the body
nuts (14). Tighten the nuts gradually in a
crisscross pattern. Observe tightening
torques.
b) Version with insulating
section or bellows seal
1. Undo the body nuts (14) gradually in a
crisscross pattern.
2. Lift the insulating section (21) with valve
bonnet (2) and plug with plug stem (5)
off the body (1).
3. Remove the gasket (17). Carefully clean
the sealing faces in the valve body (1)
and on the insulating section (21).
4. Insert a new gasket (17) into the body.
5. Place the insulating section (21) with
valve bonnet (2) and plug with plug stem
(5) onto the body.
Version with V-port plug: place the as-
sembly onto the valve body, making sure
that the largest V-shaped port of the
V-port plug faces towards the valve out-
let.
6. Firmly press the plug (5) into the seat (4).
Fasten down the insulating section (21)
with the body nuts (14). Tighten the nuts
gradually in a crisscross pattern. Ob-
serve tightening torques.
NOTICE
!

 Loading...