EB 8359-2 EN 33
Operating the positioner
move from its end position earlier;
turning it clockwise causes it to move
from its end position later.
Upper range value (span), e.g. 4 mA
3. Once the starting point has been set, in-
crease the input signal to 4mA at the
ammeter.
At exactly 4mA, the plug stem must
stand still, having moved through 100%
travel (watch the travel indicator at the
valve).
4. If the upper range value is incorrect,
move the pin (2) to correct it. Readjust
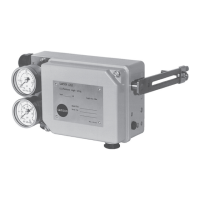
20mA and turn the zero adjustment
screw (4) until the pressure gauge indi
-
cates the required signal pressure.
If no pressure gauge has been installed,
set the starting point to 19.5mA instead.
6.4 Exchanging the range
spring
If the range is to be altered or changed to
split-range operation, replace the range
spring as shown in Fig.1 on page15 as
follows:
1. Unscrew screw (7) on the range spring.
Undo hex socket screw (5) and pull out
the lever together with shaft.
2. Exchange range spring. Slide lever with
shaft through sleeve (3), positioner hous-
ing and bracket (6.1).
3. Secure range spring with the screw (7).
4. Move bracket and shaft until the screw
(5) sits on the attened part of the shaft.
Tighten screw (5). Allow for a play of
0.05 to 0.15mm between the lever (1)
and the sleeve (3) as well as between the
range spring (6) and the positioner hous-
ing.