Do you have a question about the Samsung AM080 XV Series and is the answer not in the manual?
Guidelines for safe and correct service procedures, including part selection and connections.
Handling sensitive components like PCBs and ensuring safe installation environment.
Essential safety measures to prevent electric shock and fire hazards during operation and maintenance.
Safety and environmental considerations for handling refrigerants, including gas release and container safety.
Safety guidelines for welding air conditioner pipes, including removing flammable objects and using nitrogen gas.
Proper procedures for calculating and adding refrigerant to avoid product damage and safety hazards.
Important post-installation checks and procedures for refrigerant withdrawal to prevent damage.
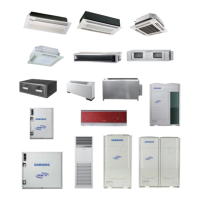
Overview of product features, including Dual SSC and Dual Smart Inverter systems.
Details on changes made to cabinets and control boxes/PCBs compared to basic models.
Internal structure diagrams for Heat Pump models in small and large sizes.
Internal structure diagrams for models with 460V, 60Hz, 3-phase power supply.
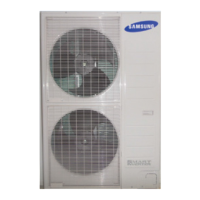
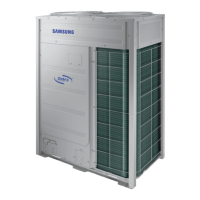
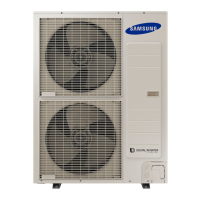
Detailed specifications for outdoor units, including electrical, capacity, and dimension data.
List of essential tools required for disassembly and reassembly procedures.
Step-by-step procedures for disassembling and reassembling various outdoor unit models.
Detailed steps and precautions for safely exchanging a compressor, including oil management.
Procedure for disassembling and separating the MCU components.
Procedure for disassembling and separating the EEV kit components.
Explanation of functions displayed on the outdoor unit's 7-segment display.
Detailed procedures for special operations like refrigerant charging and pump down.
Troubleshooting guides for various symptoms, including communication errors and sensor issues.
Troubleshooting steps for CH wire breaking errors, including sensor and connector checks.
Diagnostic steps for compressor overcurrent errors, focusing on PCB and compressor checks.
Troubleshooting steps for overvoltage or low voltage errors related to input wiring and EMI PCB.
Diagnostic procedures for fan motor overcurrent errors, including checks for wiring, motor, and PCB.
Troubleshooting steps for input/output current sensor errors related to inverter and fan PCBs.
Detailed diagram and pin assignments for the main PCB assembly.
Diagram and pin assignments for the AC and DC main hub PCB assemblies.
Diagram and pin assignments for the inverter PCB assembly.
Diagram and pin assignments for the fan PCB assembly (1-FAN and 2-FAN chassis).
Diagram and pin assignments for the EMI PCB assembly.
Diagram and pin assignments for the Sub-Comm unit.
Wiring diagram for specific FXV, JXV, and KXVA series outdoor units.
Wiring diagram for specific HXV, JXV, KXV, KXVA, KXVG, and KXV S series outdoor units.
Wiring diagram for the AM080JXVAFH model.
Wiring diagram for the AM100/120JXVAFH models.
Wiring diagram for the AM140/160/180/200JXVAFH models.
Refrigerant cycle diagram for AM080/100/120XVH models.
Refrigerant cycle diagram for AM140XVGH models.
Refrigerant cycle diagram for AM160/180/200/220XVH models.
Refrigerant cycle diagram for AM080/100/120XVGR models.
Refrigerant cycle diagram for AM140XVGR models.
Refrigerant cycle diagram for AM160/180/200/220XVGR models.
Refrigerant cycle diagram for AM080/100/120FXWA models.
Refrigerant cycle diagram for AM200FXWA models.
Refrigerant cycle diagram for AM080/100/120MXVA*C models.
Refrigerant cycle diagram for AM140/160/180MXVAGC models.
Refrigerant cycle diagram for AM200/220MXVAGC models.
Refrigerant cycle diagram for AM240/260/280/300MXVAGC models.
Refrigerant cycle diagram for AM140/160/180/200MXVAFC models.
Cycle diagram illustrating cooling operation in Heat/Refrigeration mode.
Cycle diagram illustrating main cooling operation in Heat/Refrigeration mode.
Cycle diagram illustrating heating operation in Heat/Refrigeration mode.
Cycle diagram illustrating main heating operation in Heat/Refrigeration mode.
Cycle diagram illustrating cooling operation in Heat Pump mode.
Cycle diagram illustrating heating operation in Heat Pump mode.
Explanation of the function of various components within the refrigerant cycle.
Guide to setting DIP switches on the outdoor unit for various operational options.
Instructions on setting outdoor unit functions using tact switches and displays.
Procedure for navigating view modes and checking settings using tact switches.
Overview and preliminary checks for conducting the Auto Trial Operation.
Synopsis explaining the purpose and process of Auto Trial Operation.
Flowcharts and methods for performing Auto Trial Operation and troubleshooting.
Troubleshooting steps for 'Undetermined' status related to temperature sensors.
Procedure for automatically checking the refrigerant amount using test operation.
Explanation of the model naming convention for DVM S series units.
| Brand | Samsung |
|---|---|
| Model | AM080 XV Series |
| Category | Air Conditioner |
| Language | English |