10
3. Disassembly and Reassembly
3-2
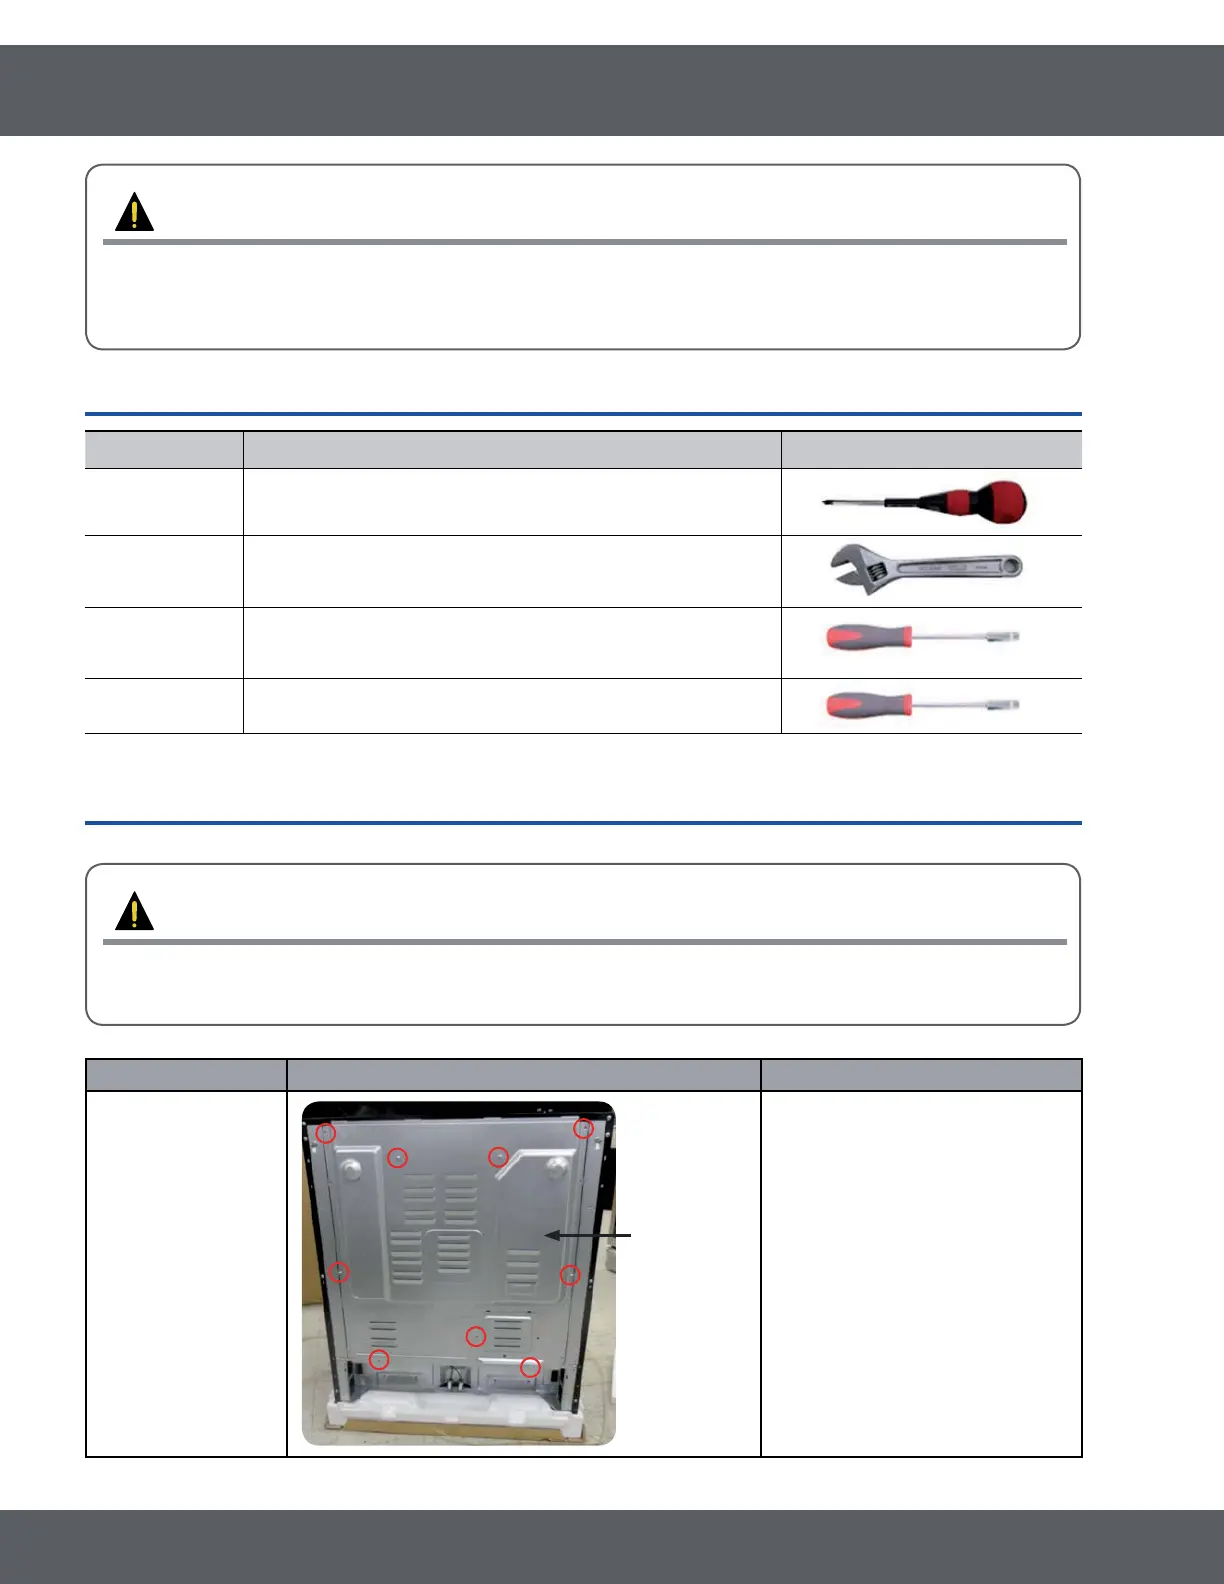
5HPRYLQJ&RYHU%DFN0DLQ:LUH&RYHU%DFN*XDUG:LUHDQG3&%0DLQ
PRECAUTION
When you work on the electric range, be careful when handling the sheet metal parts. Sharp
edges may be present, and you can cut yourself if you are not careful.
Parts Explanation Photo Explanation
Cover-Back
Main wire
Cover-Back
Main Wire
1. Turn off the electrical supply
going to the range.
2. Pull the range away from the
wall so that you can access the
rear panel.
3. Remove the 9 screws from the
Cover-Back Main Wire and
remove the panel.
* Reassembly of All part is the reverse order of disassembly.
3-1 Removing the Assy-Frame Cooktop
Item How to use Pictures
Screw driver Use for assembly and disassembly of all screws
Tubing Wrench Use for assembly and disassembly of tubing to the burner cup
7mm Vox Driver
8VHIRUDVVHPEO\DQGGLVDVVHPEO\RILQMHFWRUQR]]OHV
&RRNWRS%URLO%DNHEXUQHU
9mm Vox Driver
Use IRUDVVHPEO\DQGGLVDVVHPEO\RILQMHFWRUQR]]OHV
(Convection Fan)
WARNING
ELECTRICAL SHOCK HAZARD
Disconnect power before servicing the range. Replace all panels before operating range. Failure to do so
can result in death or electrical shock.