
A
Ashley OwensAug 20, 2025
What to do if I forgot my Samsung SRD-852D password?
- PPatricia RodgersAug 20, 2025
If you forgot the password for your Samsung DVR, contact the DVR administrator for assistance.
What to do if I forgot my Samsung SRD-852D password?
If you forgot the password for your Samsung DVR, contact the DVR administrator for assistance.
What to do if the alarm button doesn't work on my Samsung DVR?
If the alarm sound doesn't stop when you press the [ALARM] button on the front panel of your Samsung DVR, try pressing the [MENU] button. You can release the alarm by: 1) Setting the event monitoring duration to Off in Monitoring Mode. 2) Deactivating the alarm sound in Event Record Mode for Alarm (Motion Detection/Video Loss). 3) Setting the mode to Off in Event Record Mode for Alarm (Motion Detection/ Video Loss).
How to improve recording quality on Samsung DVR?
If the image quality of your Samsung DVR recording is not good, increase the resolution and quality level in Menu – Record – Quality / Resolution. Select a bigger size when specifying the recording size (4CIF>2CIF>CIF). Specify a bigger level for the recording quality. Keep in mind that higher resolution and quality increase the data size, filling the HDD faster and leading to overwriting existing data at shorter intervals.
Why is recording not working on my Samsung SRD-852D?
If recording isn't working on your Samsung DVR, first ensure you see an image on the screen. Recording may fail if settings aren't configured correctly. To start recording manually, press the [REC] button on the front panel or remote. For scheduled recording, specify a time in Menu – Record - Recording Schedule. Recording will start at the specified time. Options include Continuous (always records), Event (records only during alarms, motion, or video loss), and Continuous/Event (records continuously, switches to event recording when an event occurs).
Why are some channels black on my Samsung SRD-852D?
If some channels display only a black screen on your Samsung DVR, first check if the camera connected to the system properly displays the image. Also, verify that the camera is properly supplied with power. You can input the video source of the camera directly into the DVR to help identify and resolve the problem.
Why won't backup data play from my Samsung SRD-852D DVR?
If backup data from your Samsung DVR isn't playing on your PC or DVR, ensure you've selected the correct player (PC or DVR) during backup. If using a PC, the backup file format should be AVI or SEC. If using the DVR, formatting should be done by the DVR.
How to fix a Samsung DVR that won't turn on?
If the system of your Samsung DVR does not turn on and the indicator on the front panel does not work, check if the power supply system is properly connected. Check the system for the input voltage from the power source. If the problem persists, check the power supplier and replace it if necessary.
Why does my Samsung SRD-852D DVR keep showing the logo?
If the screen of your Samsung DVR repeatedly displays the logo image, this may be due to a problem with the main board or corrupt software. Contact the nearest service center for more information.
Why isn't my new HDD recognized by my Samsung SRD-852D?
If you have installed an additional HDD on your Samsung DVR, but it is not recognized, check the compatibility list to ensure the HDD is supported by the DVR.
Why doesn't my external HDD work with my Samsung SRD-852D?
If you've connected an external storage device (external SATA HDD) to your Samsung DVR, but it's not recognized, check the compatibility list of external storage devices to ensure the connected device is supported by the DVR.
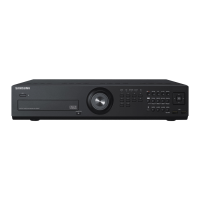
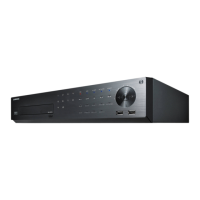
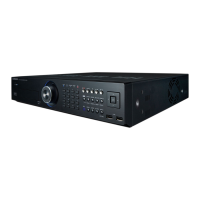
Key features and capabilities of the SRD DVR series.
Important notices on battery, shutdown, temperature, and port usage.
Information on regulatory compliance and certifications.
List of items included in the product package.
How to use numeric buttons for channel selection and system ID.
Procedure to set or change the remote control's ID for proper operation.
Recommendations for ensuring a suitable environment for DVR installation.
Precautions for adding HDDs to prevent data loss and ensure proper function.
How to connect video, audio, and monitor outputs.
Connecting USB devices like HDDs, memory, or mice to the DVR.
Connecting a POS device via RS-232C port for data integration.
Details on connecting alarm input and output devices.
Setting up network connection using Ethernet and routers.
Procedures for powering the DVR on and off safely.
Logging into the DVR to access features or restricted menus.
How to lock and unlock all DVR control buttons.
Understanding icons and configuring the live screen layout.
Troubleshooting common error messages displayed on the live screen.
Navigating menus in live mode, including split and single screen views.
Changing display layouts like 16-split, 9-split, 4-split, and auto sequence.
Navigating between different split screen modes manually.
Customizing channel display within split screen layouts.
Selecting a single channel view from a split screen.
Configuring spot out for event-driven video output.
Using zoom for detail and controlling audio on/off.
Temporarily pausing the live video feed.
Accessing and navigating the main system setup options.
Configuring date, time, time zone, and interface language.
Setting specific dates as holidays for recording or alarm schedules.
How to use the calendar for setting dates and viewing log information.
Setting the administrator ID and password for system access.
How to use the virtual keyboard for inputting data.
Setting up user groups and their permissions.
Assigning permissions to group users for menu access.
Limiting user access to default menus and changing passwords.
Procedure for users to change their own passwords.
Adding new users and configuring their network viewer settings.
Restricting access to menu items for general users.
Accessing system management functions like updates and initialization.
Viewing current system version, MAC address, and software status.
Copying and importing DVR settings using storage media.
Viewing system logs, event logs, and backup logs.
Reviewing recorded events such as alarms and motion detections.
Viewing backup history, including time, channel, and device.
Configuring video, audio, channel name, and dwell time for cameras.
Saving, renaming, and deleting PTZ camera presets.
Optimizing PTZ camera settings through the DVR interface.
Checking status, usage, and capacity of connected storage devices.
Procedure for formatting storage devices like HDDs.
Configuring alarm outputs and durations for HDD errors.
Setting up RS-485 communication for PTZ cameras and keyboards.
Configuring POS device connection, channel, and port settings.
Setting dwell time, display items, and sharpness for monitors.
Adjusting the display position of DVR information on the monitor.
Setting specific channels and dwell times for spot out monitoring.
Selecting split screen layouts for live and playback views.
Scheduling recordings for specific dates and times.
Setting start and end times for event-triggered recordings.
Configuring resolution, frame rate, and quality for recordings.
Setting resolution, quality, and IPS for event recordings.
Configuring disk end mode and auto delete for HDD management.
Setting up sensor operation, connected camera, and alarm outputs.
Setting motion detection mode, sensitivity, and alarm output.
Configuring alarm output for camera video loss.
Scheduling alarms based on time and day of the week.
Configuring backup range, channel, device, and file format.
Configuring network connection route and protocol.
Configuring DDNS site for remote network access.
Setting up Static IP, Dynamic IP, and ADSL connection modes.
Specific settings for DDNS and protocol types.
Adjusting image quality for network transfer.
Setting up the SMTP server for sending emails.
Creating and managing email recipient groups.
Adding and managing individual email recipients.
Initial steps to activate and access PTZ camera controls.
Saving, renaming, and deleting PTZ camera presets.
Optimizing PTZ camera settings through the DVR interface.
Accessing search functions by time, event, backup, POS, or motion.
Searching recorded video data by specific date and time.
Searching for recorded events based on event type and date.
Searching for backed-up data from connected devices.
Searching for data related to POS transactions.
Searching for recorded video based on motion detection areas.
Controlling video playback using the web viewer interface.
Understanding the capabilities and features of the Web Viewer.
Minimum hardware and OS requirements for running the Web Viewer.
Understanding displayed information like IP address, time, and status.
Selecting different screen layouts (single, quad, nine, sixteen) via web viewer.
Configuring OSD time display to DVR time or PC time.
Controlling live screen sequence, previous, and next views.
Selecting different channels for the live view.
Controlling PTZ cameras remotely through the web viewer.
Changing display modes in the search viewer.
Viewing the status of the connected DVR in the search viewer.
Searching video by selecting dates from a calendar.
Searching video by navigating a timeline.
Controlling video playback using the web viewer interface.
Configuring DVR settings remotely through the web viewer.
Configuring time sync, display format, DST, language, holidays, and permissions.
Managing users, groups, permissions, and system information.
Configuring camera and PTZ settings via the web viewer.
Managing storage devices through the web viewer interface.
Configuring HDD alarms and remote device parameters.
Configuring POS devices and monitor output settings.
Configuring spot out output and switching between live/play modes.
Setting up recording schedules for specific dates and times.
Setting event recording duration, quality, and resolution.
Configuring disk end mode, record options, and sensor detection.
Configuring motion detection and video loss detection settings.
Scheduling alarms based on time and day of the week.
Configuring network connection modes and protocols.
Setting up DDNS and adjusting live transfer quality.
Configuring SMTP server and events for email notifications.
Information about the Web Viewer and its version.
Overview of the mobile viewer application and its features.
Playing backup files in SEC format and system requirements.
Detailed terms for copying, distribution, and modification of GPL software.
Introduction to the LGPL and conditions for library usage.
Guidelines for responsible disposal of electronic waste and batteries.
| Product color | Black |
|---|---|
| Channels quantity | 8 channels |
| Video compression formats | H.264 |
| Operating system installed | Embedded LINUX |
| Analog signal format system | NTSC, PAL |
| Display frame rate | 240 fps |
| Display resolution | 720 x 480 pixels |
| BNC input ports | 1 |
| USB 2.0 ports quantity | 3 |
| Ethernet interface type | Fast Ethernet |
| Supported network protocols | TCP/IP, UDP, DHCP, PPPoE, SMTP, NTP, HTTP, DDNS, RTP, RTSP, SNMP |
| Optical drive type | DVD-RW |
| Optical drive included | Yes |
| HDD interface | Serial ATA |
| Number of HDDs supported | 4 |
| Power requirements | 100 - 240V AC ±10%, 50/60Hz |
| Power consumption (typical) | 55 W |
| Operating temperature (T-T) | 0 - 40 °C |
| Operating relative humidity (H-H) | 20 - 85 % |
| Weight | 7500 g |
|---|---|
| Dimensions (WxDxH) | 440 x 426.8 x 88 mm |