6
REPLACING A BAD DRIVE
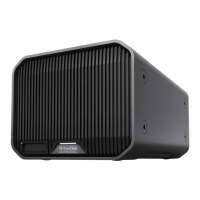
The G-RAID Shuttle RAID Controller continually monitors the health of
each disk drive in the G-RAID Shuttle device. In the event of a disk failure,
you will be alerted based on the notification settings you entered in Set Up
Alert Notifications. G-RAID Shuttle will report the failed drive and help you
locate its physical position in the G-RAID Shuttle device enclosure.
MUTING THE ALARM
By default, G-RAID Shuttle has the audible alarm enabled. If a drive fails
or other critical events occur, the alarm will become audible. To mute
the audible alarm, you can press the Alarm Mute button on the back of
the enclosure or you can launch the G-RAID Software Utility. In the utility
under the controller settings, there is a Buzzer section you can use to mute
the alarm.
This same area can be used to test the alarm by simply clicking on Sound.
NOTE:
If your G-RAID Shuttle was configured in RAID 1 or RAID 5 mode, a
drive failure does not necessarily result in data loss. However, the
array will now operate in a degraded and unprotected state. The
failed drive should be replaced as soon as possible to avoid data loss.
IDENTIFYING AND REPLACING FAILED A DRIVE
1. Launch the G-RAID Software Utility.
2. Select the Physical Drive.
3. The Physical Drive List will show all of the drives and next to its name
the status will indicate Dead.
4. Right-click on the failed drive and select Locate.
WARNING
: Make absolutely sure that you remove the correct drive as indicated in
the steps below. REMOVING THE WRONG DRIVE CAN RESULT IN LOSS OF
THE ARRAY AND ALL CONTENT STORED ON YOUR G-RAID Shuttle.
5. The failed drive’s LED will begin to blink in the G-RAID Shuttle
enclosure, making it easy to identify which drive needs to be replaced.
Be certain to remove the correct drive, as removing the wrong drive
could cause data loss.
NOTE
: It is possible for the failed drive to be completely offline. In this case, the drive’s
activity LED will be entirely turned off, indicating the failed drive.
6.
Remove the failed drive by pressing the release button and sliding the
drive out of the enclosure.
7.
Replace the failed drive with a new disk module and secure the
module in place. Once the drive is connected, the G-RAID Software
Utility will indicate that the array is rebuilding. Rebuild time is
approximately two hours per terabyte.
Replacing a Bad Drive
G-RAID Shuttle 4/8/SSD
User Manual
18
 Loading...