8
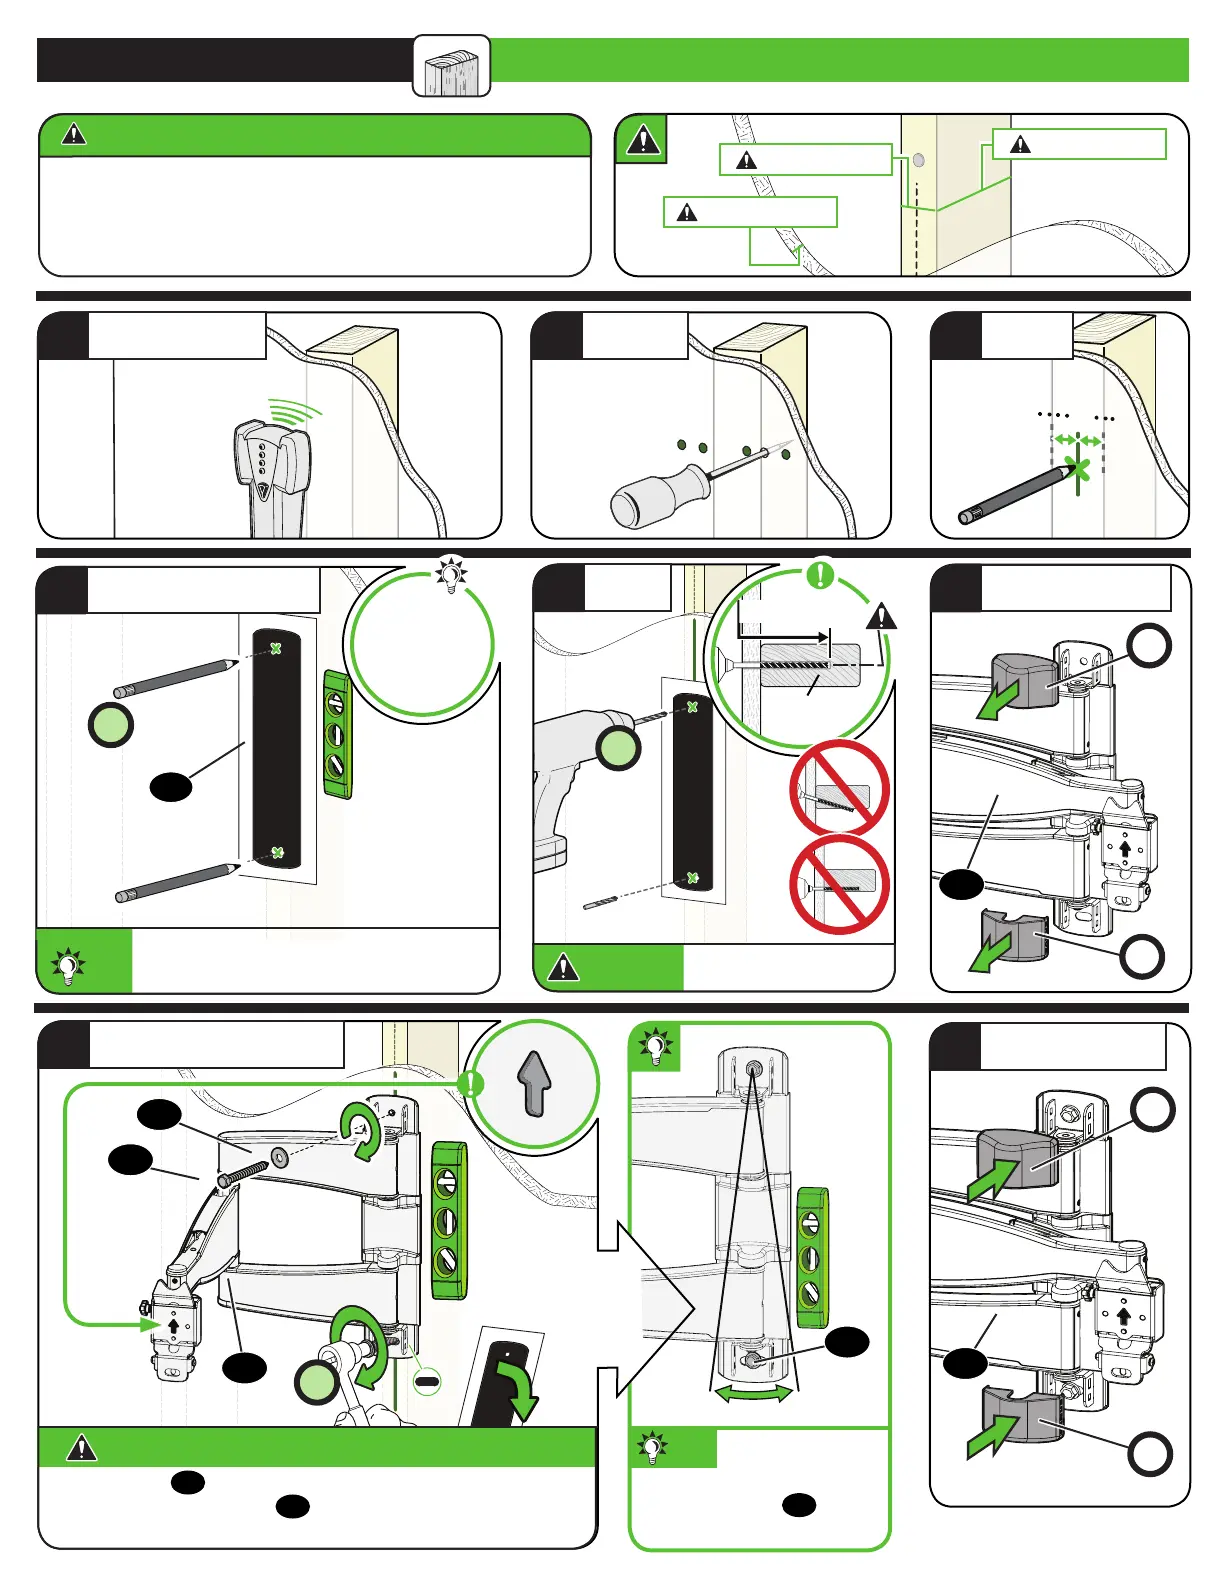
STEP 2A Attach Wall Plate
Wood Stud Installation
Min. 3 ½ in. (8.9 cm)
Min. 1 ½ in. (3.8 cm)
Max. 5/8 in. (1.5 cm)
CAUTION: Avoid potential personal injury or property damage!
● Drywall covering the wall must not exceed 5/8 in. (1.5 cm)
● Minimum wood stud size:
nominal 2 x 4 in. (5.1 x 10.2 cm) actual 1 ½ x 3 ½ in. (3.8 x 8.9 cm)
● Stud center must be verified
1
LOCATE STUD
2
VERIFY
3
MARK
2X
2X
2
¾ in. (7.0 cm)
1/8 in.
(3 mm)
5
DRILL
CAUTION:
Be sure you drill into the
CENTER of the stud.
07
6
REMOVE COVERS
08
P
P
TIP:
To calculate your precise wall plate location,
check out our HeightFinder at sanus.com
[www.sanus.com/1172].
sanus.com
/1172
HeightFinder™
Visit
4
POSITION TEMPLATE
7
SECURELY TIGHTEN
8
INSERT COVERS
2X
08
09
Go to STEP 3 on PAGE 10.
P
P
TIP: You can make small
level adjustments by loosening
the bottom lag bolt
09
and
shifting the wall plate until level.
Both lag bolts
09
MUST BE firmly tightened to prevent unwanted
movement of arm assembly
08
.
Ensure the wall plate is securely
fastened to the wall before continuing on to the next step.
CAUTION:
Avoid potential personal injury or property damage!
09
10
08