-14-
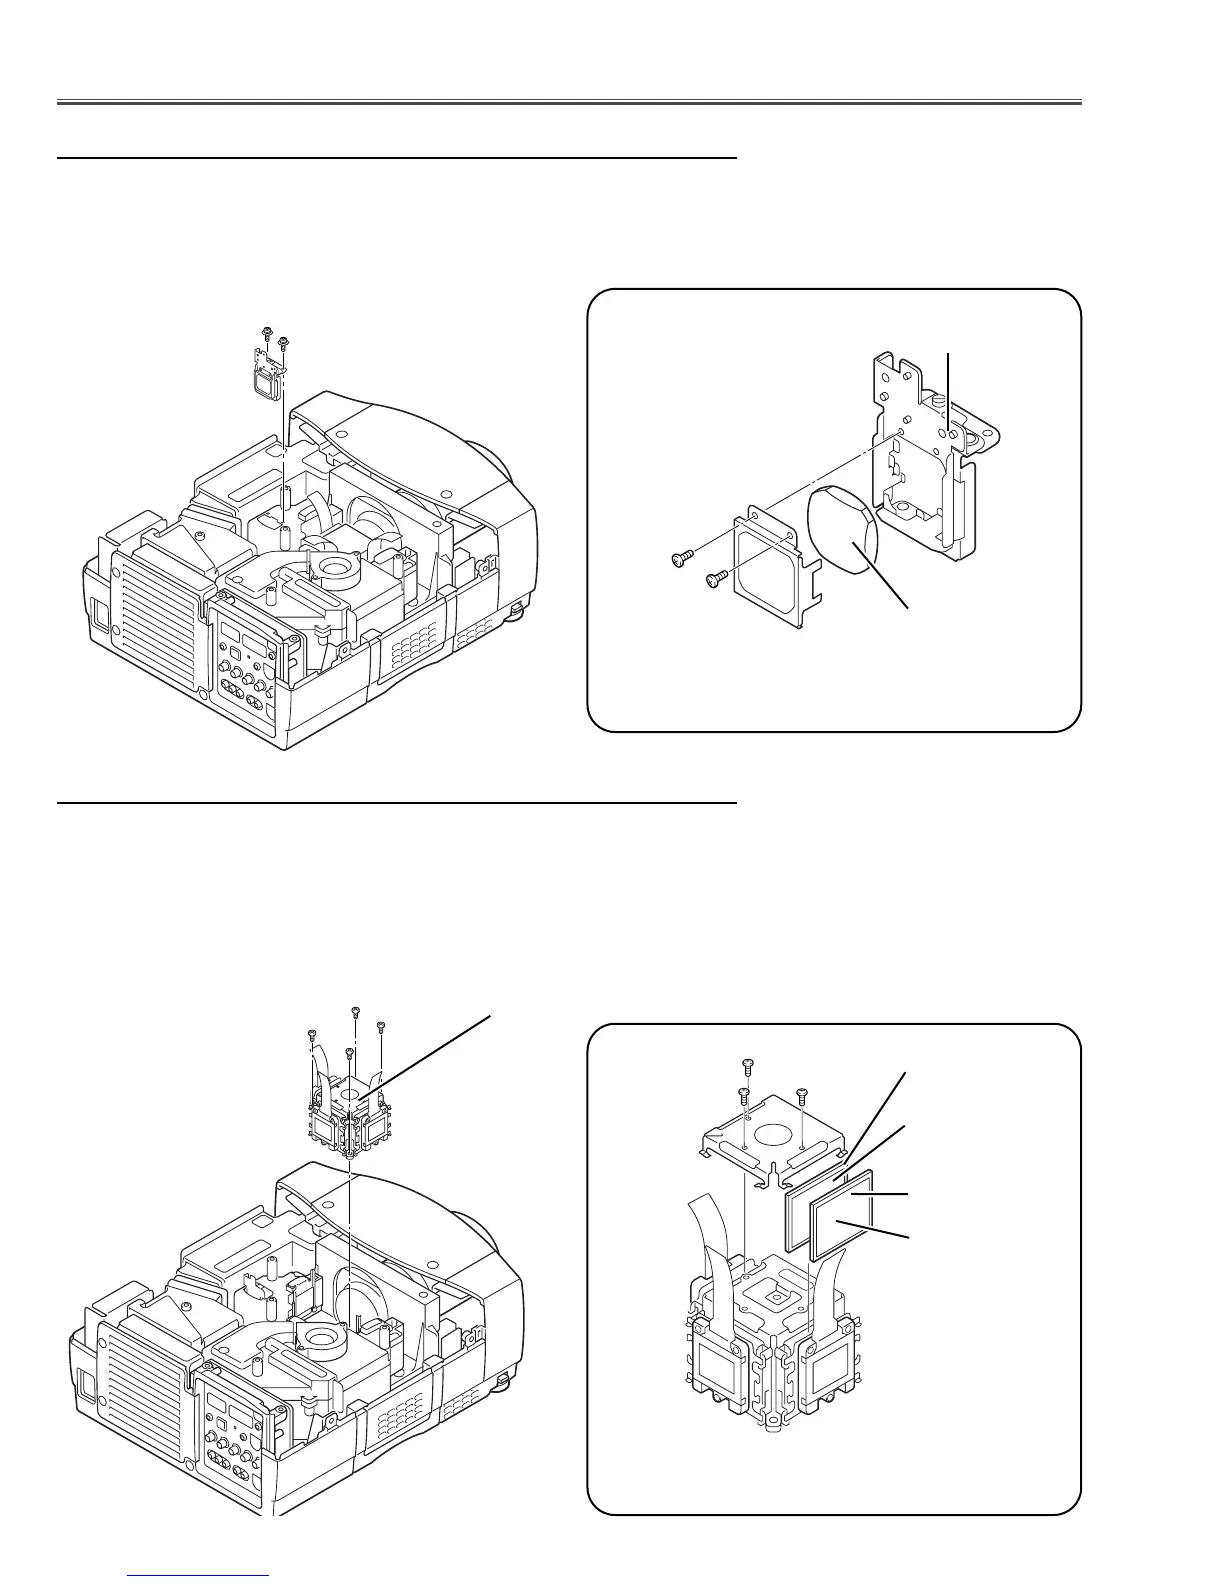
1 Remove 4 hex screws A and take the LCD/Prism ass’y off upward.
2 Remove 3 screws B and take the Glass Holder, and then pull the polarized
Glass-Out and the wide view glass upwards off. These glasses are mount-
ed for R, G and B LCD panels respectively.
Note:
To avoid the CG and focus alignments slipping off, please be careful to han-
dle the LCD/Prism ass'y.
LCD Panel/Prism Ass’y
* Glasses should be placed as the
sheet attached side comes to the
LCD panel side.
Note:
Do not replace the LCD panel
separately otherwise it can
not obtain proper picture.
Fig.4-1
Polarized Glass-Out and Wide view Glass removal
A
A
A
Optical Pats Disassemblies
1 Remove 2 hex screws A and pull the Relay Lens ass’y upward.
2 Remove 2 screws B to take the Lens off from the holder.
Note:
There is no mounting direction of the lens.
A
Fig.3-2
Fig.3-1
B
B
Holder
Relay Lens
A
Relay Lens disassembly
Fig.4-2
B
B
B
Polarized Glass-
Out
Phase Sheet
Wide view Glass
Phase Sheet
 Loading...