English 88
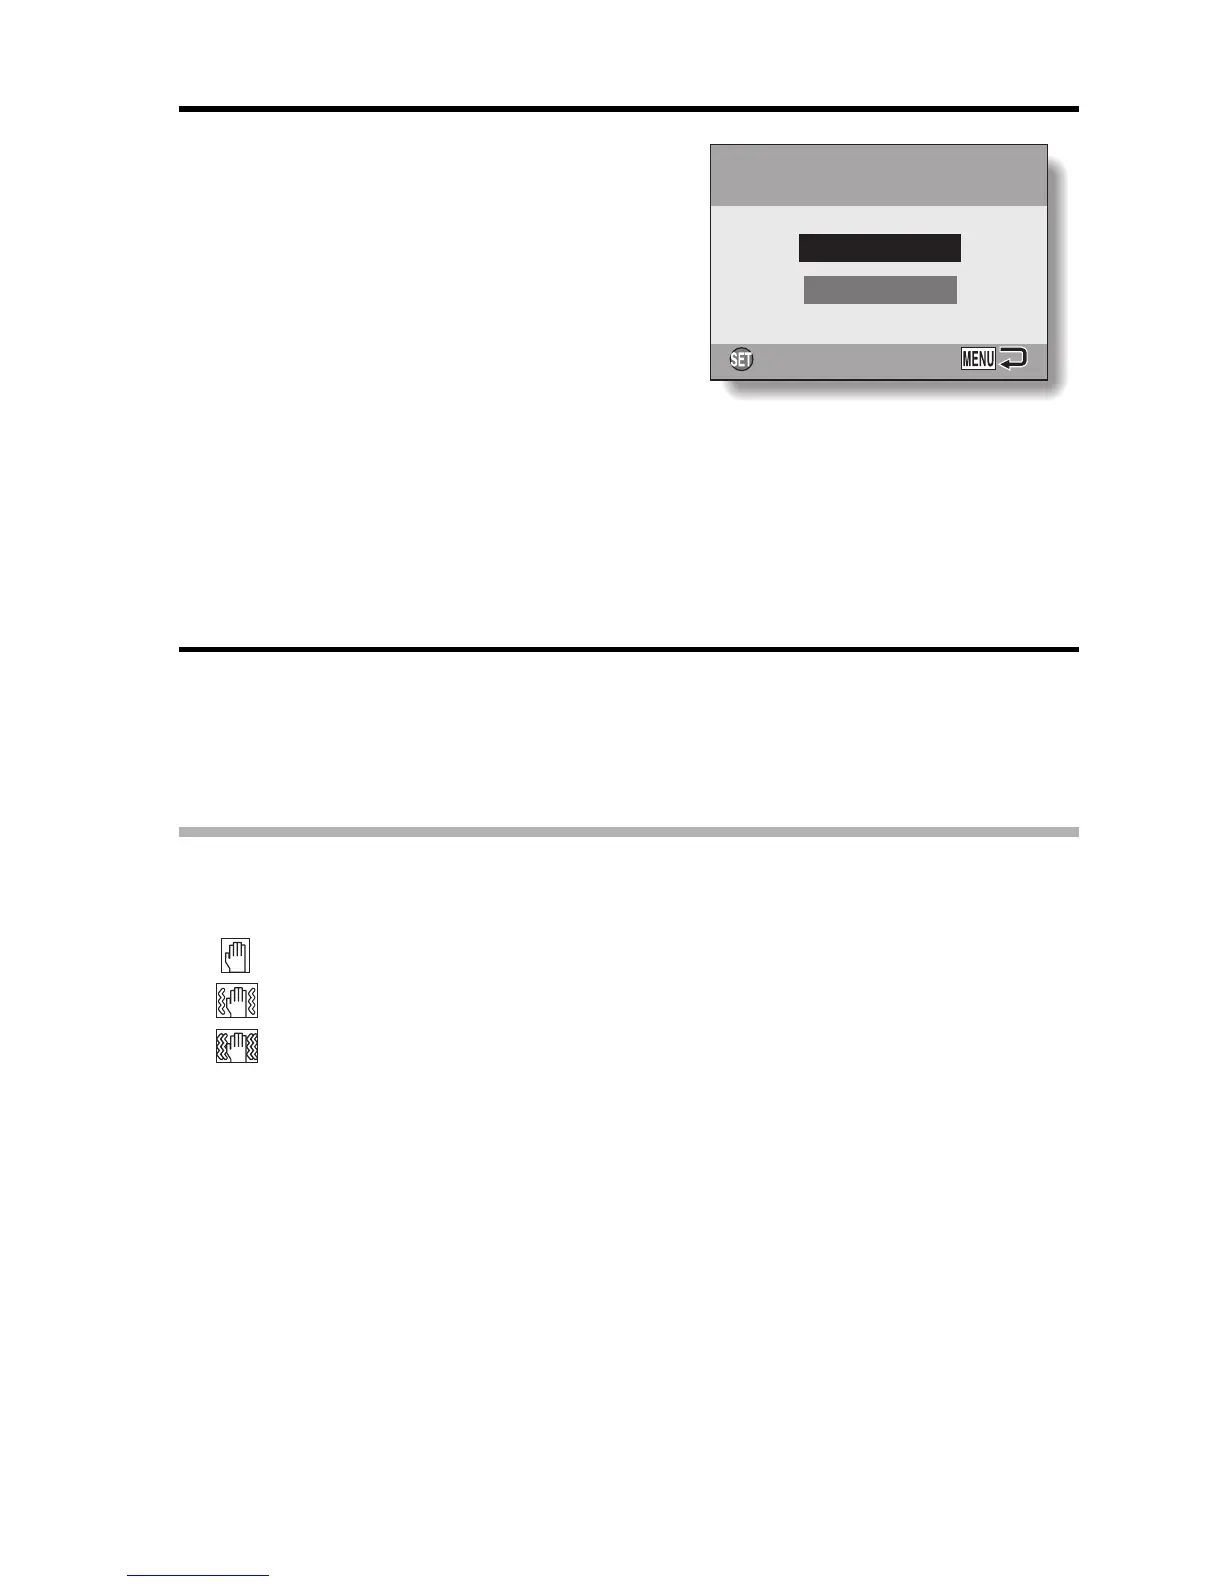
4 If the modified image is satisfactory,
press the SET button.
h The screen to save the corrected
image appears.
h To discontinue the procedure, press
the MENU button. The modified
image is discarded, and you are
returned to the Blur Correction
Screen.
SAVE AS NEW:
The modified image is saved as a
separate image, and the original
image is preserved.
OVERWRITE:
The original file is deleted, and only
the modified image is saved.
5 Select the desired method to save the modified image, and press the
SET button.
h The modified image is saved, and you are returned to the Blur
Correction Screen.
HINT
About the blur correction icon
i
On the Blur Correction Screen, an icon indicating the degree of blur appears.
: Blur correction unnecessary or blur correction completed.
: Blur correction possible
: Blur correction not possible
If the “Blur correction not successful” message appears...
i The camera was not able to successfully repair the image.
i The correction function works to automatically edit flaws that the camera
detects in captured images. In some cases, the camera may not be able to
repair the image.
i
Blur correction is not possible for images captured at a shutter speed of 1/8
sec or less, for resized images, or for images captured using a different
digital camera. Also, blur correction may not be possible in cases of
extreme blur.
Concerning the date and time information for the modified image
i The date display that is shown when an edited image is played back is the
date that the image was saved after it was modified.
OK
 Loading...