EasyManua.ls Logo

Savant PAV-VIM8S - User Manual

Savant PAV-VIM8S
28 pages
Print Icon
To Next Page IconTo Next Page
Loading...
Copyright 2020 Savant Systems, Inc 45 Perseverance Way, Hyannis, MA 02601
- 1 - Savant.com | 508.683.2500
Savant® IP Video Deployment Guide
Document Number: 009-1977-00
Document Date: September 2020
Document Supports: da Vinci 8.7 or higher
This document will guide the installer through the process of installing, configuring, and adding Savant IP Video to a RacePoint Blueprint™ configuration.
Savant ProAV 8 Video Input IP Transmitter 4K UHD with Control [PAV-VIM8S]
Savant ProAV 4 Video Input IP Transmitter 4K UHD with Control [PAV-VIM4S]
IP Video 8 Input Transmitter 4K UHD with Audio Processing and Control [PAV-VIMAP8S]
IP Video 4 Input Transmitter 4K UHD with Audio Processing and Control [PAV-VIMAP4S]
Savant IP Video Single Input Transmitter 4K UHD with Control - Fiber [PAV-VIMVP1F]
Savant IP Video Single Input Transmitter 4K UHD with Control - Copper [PAV-VIMVP1C]
IP Video SINGLE Input Transmitter 4K UHD with Control (Copper) [PAV-VIM1C]
Savant ProAV Single Port 4K UHD Video Output IP Receiver with Video Processing and Control (Fiber) [PAV-VOMVP1F]
Savant ProAV Single Port 4K UHD Video Output IP Receiver with Video Processing and Control (Copper) [PAV-VOMVO1C]
IP Video Single Output Receiver 4K UHD with Control (Copper) [PAV-VOM1C]
Question and Answer IconNeed help?

Do you have a question about the Savant PAV-VIM8S and is the answer not in the manual?

Overview

This document outlines the installation, configuration, and integration of Savant IP Video products into a RacePoint Blueprint™ configuration, supporting da Vinci 8.7 or higher. It serves as a comprehensive guide for installers, covering wiring, network setup, and system monitoring.

Function Description

The Savant IP Video system enables the distribution of high-definition (HD) and ultra-high-definition (UHD) video and audio signals over an IP network. It comprises various components designed to transmit and receive video and audio, manage network traffic, and integrate with a Savant host for centralized control. The system supports a range of input and output devices, including video transmitters, receivers, and network switches, facilitating a scalable and flexible video distribution solution for residential and commercial environments.

The core function of the Savant IP Video system is to convert traditional HDMI video and audio signals into an IP-based format for transmission over a 10G Ethernet network. This allows for long-distance distribution and flexible routing of content to multiple displays without signal degradation. The system also supports advanced features like audio processing, EDID management, and integration with AVB/TSN switches for synchronized audio and video.

Usage Features

Wiring and Connections

The guide details various wiring and connection types essential for the Savant IP Video system.

  • HDMI Cables: High-quality HDMI cables are crucial for passing UHD, deep color, and HDR signals.
  • 10G Ethernet (Fiber SFP+): Enhanced small form-factor pluggable connections are used with Savant certified Direct Access Copper (DAC) SFP+ cables or fiber and fiber connectors with SFP+ modules. Supported transport distances include 6 ft (2 m) for DAC cable and 984 ft (300 m) for OM3 multi-mode Fiber.
  • 10G Ethernet (Copper RJ-45): Standard RJ-45 10G Ethernet connections support various cable types with specific transport distances: Cat5e (98 ft / 30 m), Cat6 (98 ft / 30 m), Cat6a (328 ft / 100 m), and Cat7 (328 ft / 100 m). For homerun (single unbroken length) cables, Cat5e/Cat6 can extend up to 147 ft (45 m).
  • 1G Ethernet/LAN: A standard RJ-45 port provides 1G reserved data bandwidth for connecting network-compliant devices to transmit data onto the Ethernet network by sharing the 10G network link. This is a courtesy port and does not support spanning tree devices. It is explicitly stated not to connect this port to a network switch.
  • IR Wiring:
    • PAV-VIMxS/PAV-VIMAPxS: Uses a 3-pin Control Connector where wires are secured with a screw. Pin 1 is not used, Pin 2 is IR+, and Pin 3 is IR-.
    • PAV-VOMVP1x/PAV-VOM1C/PAV-VIMVP1x/PAV-VIM1C: Uses a 3.5 mm IR Emitter supplied with the device.
    • Precautions: Ensure IR emitters are within 15 feet (4.6 meters) of the controller. Avoid using 3rd party blinking IR emitters with Talk Back, as they can degrade IR performance by drawing voltage from the IR signal.
  • RS-232 Wiring:
    • PAV-VIMxS/PAV-VIMAPxS: Uses a 3-pin Control Connector. Pin 1 is Receive, Pin 2 is Transmit, and Pin 3 is Ground.
    • PAV-VIMVP1x/PAV-VOMVP1x/PAV-VIM1C/PAV-VOMIC: Uses a 4-pin Control Connector. Pin 1 is 12V (Do Not Use), Pin 2 is Transmit, Pin 3 is Receive, and Pin 4 is Ground.
  • Network (PAV-VIMxS/PAV-VIMAPxS/VOMVP1x):
    • PAV-VIMxS: Uses a standard RJ-45 port (IEEE 802.3 Ethernet) for communication with the Savant Host.
    • PAV-VIMAPxS: Uses a standard RJ-45 port (IEEE 802.3 Ethernet) supporting AVB/TSN for communication with the Savant Host and Savant IP Audio devices. If down-mixed audio is used, this port must connect to a Savant qualified AVB switch.
    • VOMVP1x: Uses a shared Ethernet connection from its 10G connection.
  • AC Power: IP Audio Products have an AC Power connection. Surge protection is recommended for all components. The source power outlet and power supply input sockets should be easily accessible for electrical hazard or malfunction. A pure sine wave uninterruptible power supply (UPS) is recommended to shut down the Savant Host before battery depletion. Power should never be removed from Savant IP Video devices before proper shutdown.

Installation

  • PAV-VIMxS/PAV-VIMAPxS: These Savant IP Video Transmitters are designed for 3U rack mounting and are compatible with standard 19-inch NEMA rack mounts. Rack ears must be attached before installation.
  • PAV-VIMVP1x/PAV-VOMVP1x: These Savant IP Video Receivers or Transmitters can be placed on a flat surface or wall-mounted using included brackets. For installations behind a display, ensure vertical alignment of the unit's grooves to maximize heat dissipation.
  • PAV-VIM1C/PAV-VOMIC (Wall Mounted): To wall-mount, remove two chassis screws from each side, align the mounting brackets using the top holes (leaving an air gap behind the device), and replace the screws to secure the brackets. For vertical mounting, align the device with the rear facing down for optimal heat dissipation.
  • PAV-VIM1C (Rack Install):
    1. Remove brackets from all PAV-VIM1C units.
    2. Remove four case screws from one end of each PAV-VIM1C.
    3. Align case screws with the bracket.
    4. Replace screws to attach the bracket.
    5. Repeat for each PAV-VIM1C.
    6. Align the handle with screw holes.
    7. Attach the handle with provided screws.
    8. Repeat for the second handle.
    9. Install the shelf in the rack (rack screws not supplied).
    10. Install each PAV-VIM1C with attached brackets using captive screws.
    • Tip: Savant recommends spacing out PAV-VIM1C units when using the RCK-PAVVM8 if the rack mount is not full.

Blueprint Configuration

The guide outlines steps for configuring the Savant IP Video system within RacePoint Blueprint™.

  • Required Devices: Savant Host, IP Video Transmitter, IP Video Receivers, 10G Network Switch, Video Sources, HD/UHD Displays.
  • Adding PAV-VIMxS/PAV-VIMAPxS:
    1. Open Show Library.
    2. Search for the device SKU (e.g., PAV-VIM8S).
    3. Drag the Video Input IP Transmitter into a Shared Equipment zone (recommended for A/V switches to allow outputs to leave the zone).
    4. Name the device.
    5. Place the device in the layout window.
    6. Select the device.
    7. Open Inspector.
    8. Enter the Unique ID (UID).
  • Adding an IP Video Receiver:
    1. Open Show Library.
    2. Search for the device SKU (e.g., PAV-VOMVP1F).
    3. Drag the IP Video Receiver into the desired User zone.
    4. Name the device.
    5. Place the device in the layout window.
    6. Select the device.
    7. Open Inspector.
    8. Enter the UID.
  • Adding a 10G Switch (NetGear ProSafe M4300):
    1. Open Show Library.
    2. Search for "M4300".
    3. Drag the 10G switch into a Shared Equipment zone.
    4. Name the device.
    5. Place the switch in the layout window.
    6. Make a Control Connection.
    7. Select the Control Connection.
    8. Open Inspector.
    9. Enter the IP Address of the switch in the Host address field.
    • Notes: Control connection is required for services and System Monitor information (da Vinci 8.8+). The physical control connection uses one of the RJ-45 10G connections (the switch's uplink port).
  • Making 10G Connections:
    1. Select the VIM8S.
    2. Right-click on the first 10GbE (SFP) port.
    3. Highlight the M4300 8x8F and select the desired SFP port.
    4. Repeat for each input.
    5. Select the first PAV-VOMVP1F.
    6. Right-click on the 10GbE (SFP) port.
    7. Highlight the M4300 8x8F and select the desired SFP port.
    8. Repeat for each output.
    • Note: Blueprint 10G connections do not need to match physical connections on the 10G Switch.
  • Source Profiles: Some device profiles require an "AVoIP" version for compatibility with Video over IP device control connections. Select the AVoIP tagged version if the unit is controlled via an Audio/Video over IP port. AVoIP Profiles are only required with da Vinci 8.7.1 and lower runtime software.
  • Expansion: The Savant IP Video system offers unlimited scalability, limited only by the number of ports on the 10G switch (e.g., 96-port switch: 1x95, 2x94, etc.). Each source and display requires a port on the 10G switch.
  • AVB Expansion: Savant IP Audio devices and IP Video devices with Audio Processing can connect via a Savant certified AVB/TSN switch. The maximum number of AVB devices depends on the da Vinci version; refer to the Release Readme for specifics.
  • External AVB Sources: The Savant IP Video with Audio Processing Input chassis can pass AVB audio to IP Video endpoints (4-stream limit per PAV-VIMAPxS). PAV-VOM1C does not support this feature.
    1. Open the Services Window.
    2. Select a zone using a PAV-VOMVP for audio routing and an AVB source device service.
    3. Expand Service Paths.
    4. Select the PAV-VIMAP8S in Service Resources.
    5. Highlight each service path to view input/output details.
    6. Select the desired Service path.
    • Tip: Service paths are generated randomly; use the same slot number for a given service in every zone.

System Monitor

The System Monitor's AVoIP Info tab provides information and settings for Video over IP devices.

  • Chassis: Lists Video over IP devices in the configuration.
  • Logical IOs: Lists inputs or outputs of the selected device.
  • Settings: Allows changes to video and audio settings, downmixing, and scaling.
  • Status: Displays current status of selected I/O.
  • Video/Audio Status:
    • Video Format: Active video resolution and frame rate.
    • HDCP Protected: Indicates if HDCP is enabled.
    • HDMI 2.0 Supported: Indicates if the connected device supports HDMI 2.0.
    • Source HDCP Version: HDCP version from source content.
    • Color Space: Color format used in current video.
    • Color Depth: Active number of bits for color data.
    • Source Stable: Indicates if video is received from the source.
    • Current Audio Format: Current audio format (not supported on PAV-VIMxS, PAV-VIMVP1x, and PAV-VIM1C).
  • Video/Audio Settings (Output Only): These settings are available only on output chassis.
    • Resolutions:
      • Use Input: Passes received video resolution.
      • 4K: Scales to UHD (3840x2160).
      • 1080p: Scales to Full HD (1920x1080).
      • 720p: Scales to HD (1280x720).
    • Frame Rates:
      • Use Input: Passes received video frame rate.
      • 60 Hz, 50 Hz, 30 Hz, 25 Hz, 24 Hz: Fixed frame rates.
    • Path Policy (PAV-VIMAPxS only):
      • Dynamic: Uses EDID from the endpoint. If the endpoint EDID supports the source's audio format, pass-through is used; otherwise, downmix.
      • Pass-thru: Passes HDMI audio format.
      • Downmix: Downmixes audio to 2-channel PCM.
    • Path Policy (PAV-VIMxS/PAV-VIM1C/PAV-VIMVP1x):
      • Dynamic: Enables multi-channel to 2-channel PCM.
      • Pass-thru: Passes HDMI audio format.
      • Downmix: Enables multi-channel to 2-channel PCM.
    • Important: Downmixes only Multi-channel PCM to Stereo PCM; not compatible with encoded Bitstream audio. Routing Bitstream audio from non-audio processing devices to a PAV-VOM with Dynamic or Downmix audio setting will result in no audio. For Bitstream audio, configure PAV-VOM with Pass-through audio setting in AVoIP Info tab.
    • Note: Scaling HDCP 2.2 sources to an HDCP 1.4 sync device requires the HDCP 2.2 source resolution input to be 4K 60 4:2:0 8Bit or below.
    • Use Input resolution and frame rate: Virtually no switching latency (<120 microseconds), output colorspace matches source, video latency depends on display-source synchronization, HDR supported, 3D modes supported.
    • Scale video output resolution only: Very low switching latency (<4ms), output colorspace is always RGB 8bit, video latency depends on display-source synchronization.
    • Fixed Frame Rate used: Display timing is constant (no resync on input changes), switching time depends on network switch (<0.1 seconds with IGMP FASTLEAVE), output colorspace is always RGB 8bit, latency is 1-2 frames, video stutter may occur due to frame rate conversion frame slips.
  • NetGear Switch Information: M4300 switches display status in System Monitor (requires control connection and IP address in Blueprint, da Vinci 8.8+).
    • Logical IOs: Lists port number and connected device name (1/0/x, SFP+ ports start at 1).
    • Port Information: Displays connection status for troubleshooting.
  • EDID Settings: For more information on EDID settings, refer to the System Monitor - EDID Settings on the Savant Customer Community.

Maintenance Features

Checking and Replacing the Fuse

Only the PAV-VIMxS/PAV-VIMAPxS models have a field-replaceable fuse. Refer to the Quick Reference Guide for specific fuse information.

  • Electric Shock Hazard: Disconnect the device from AC power by removing the power cord before checking or replacing the fuse.
  • Important: Note the orientation of the cartridge and fuse location within the cartridge before removal for proper operation.
  • Steps:
    1. Disconnect the unit from AC power.
    2. Open the fuse cover on the AC power input using a flat head screwdriver or similar thin flat head tool to access the fuse cartridge.
    3. Gently loosen and pull out the cartridge, noting its orientation.
    4. Remove and discard the old fuse.
    5. Gently place the new fuse in the cartridge, aligning it as defined in the diagram (connection pins towards unit, open side of cartridge towards power switch).
    6. Gently press the cartridge until it seats into the terminals. If strong resistance is encountered, remove, check orientation, and repeat.

Best Practices

After installation and configuration upload, follow these best practices for testing:
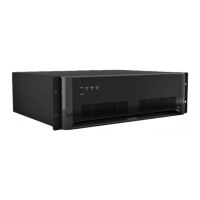
  • PAV-VIMxS/PAV-VIMVP1x/PAV-VIM1C: Initial audio and video setup/testing should use the default Extended Display Identification Data (EDID), which supports PCM audio up to 8 channels and video resolutions up to 4K 60Hz 4:2:0 8-bit.
  • PAV-VIMAPxS: Initial audio and video setup/testing should use the default EDID, which supports video resolutions up to 4K 60Hz 4:2:0 8-bit and most encoded audio formats.
  • Testing Procedure: Test each source with every A/V zone, one at a time.
    1. Activate the first video source to a single zone.
    2. Does Video pass?
      • NO: Check System Monitor for input/output resolution. If using a video processing VOM, scale it to 1080p. If 1080p passes, the TV or HDMI cable may not support the current source resolution.
      • YES: Proceed to audio check.
    3. Does Audio pass?
      • NO: In System Monitor, set the PAV-VOM audio path policy to "Downmix." If no audio, verify audio is enabled on the source.
      • YES: Continue to the next zone.
    4. Repeat with the same source for all video zones.
    5. Repeat the entire process for all other video sources.
    6. After initial testing, add more advanced EDIDs and retest.

Savant PAV-VIM8S Specifications

General IconGeneral
ModelPAV-VIM8S
CategoryTransmitter
Video Inputs8 HDMI
Video Outputs1x HDMI
Audio InputsHDMI embedded audio
Audio Outputs1x HDMI
Resolution SupportUp to 4K@60Hz
ControlIR, RS-232
Input Voltage100-240V AC
Operating Temperature0°C to 40°C (32°F to 104°F)
Humidity Range10% to 90% RH (non-condensing)
Dimensions17.3 x 9.8 x 1.7 inches
CompatibilitySavant systems

Related product manuals