SawStop 10” Contractor Saw 69
Adjusting Your Saw
Adjusting the Rear Lock Down Screws
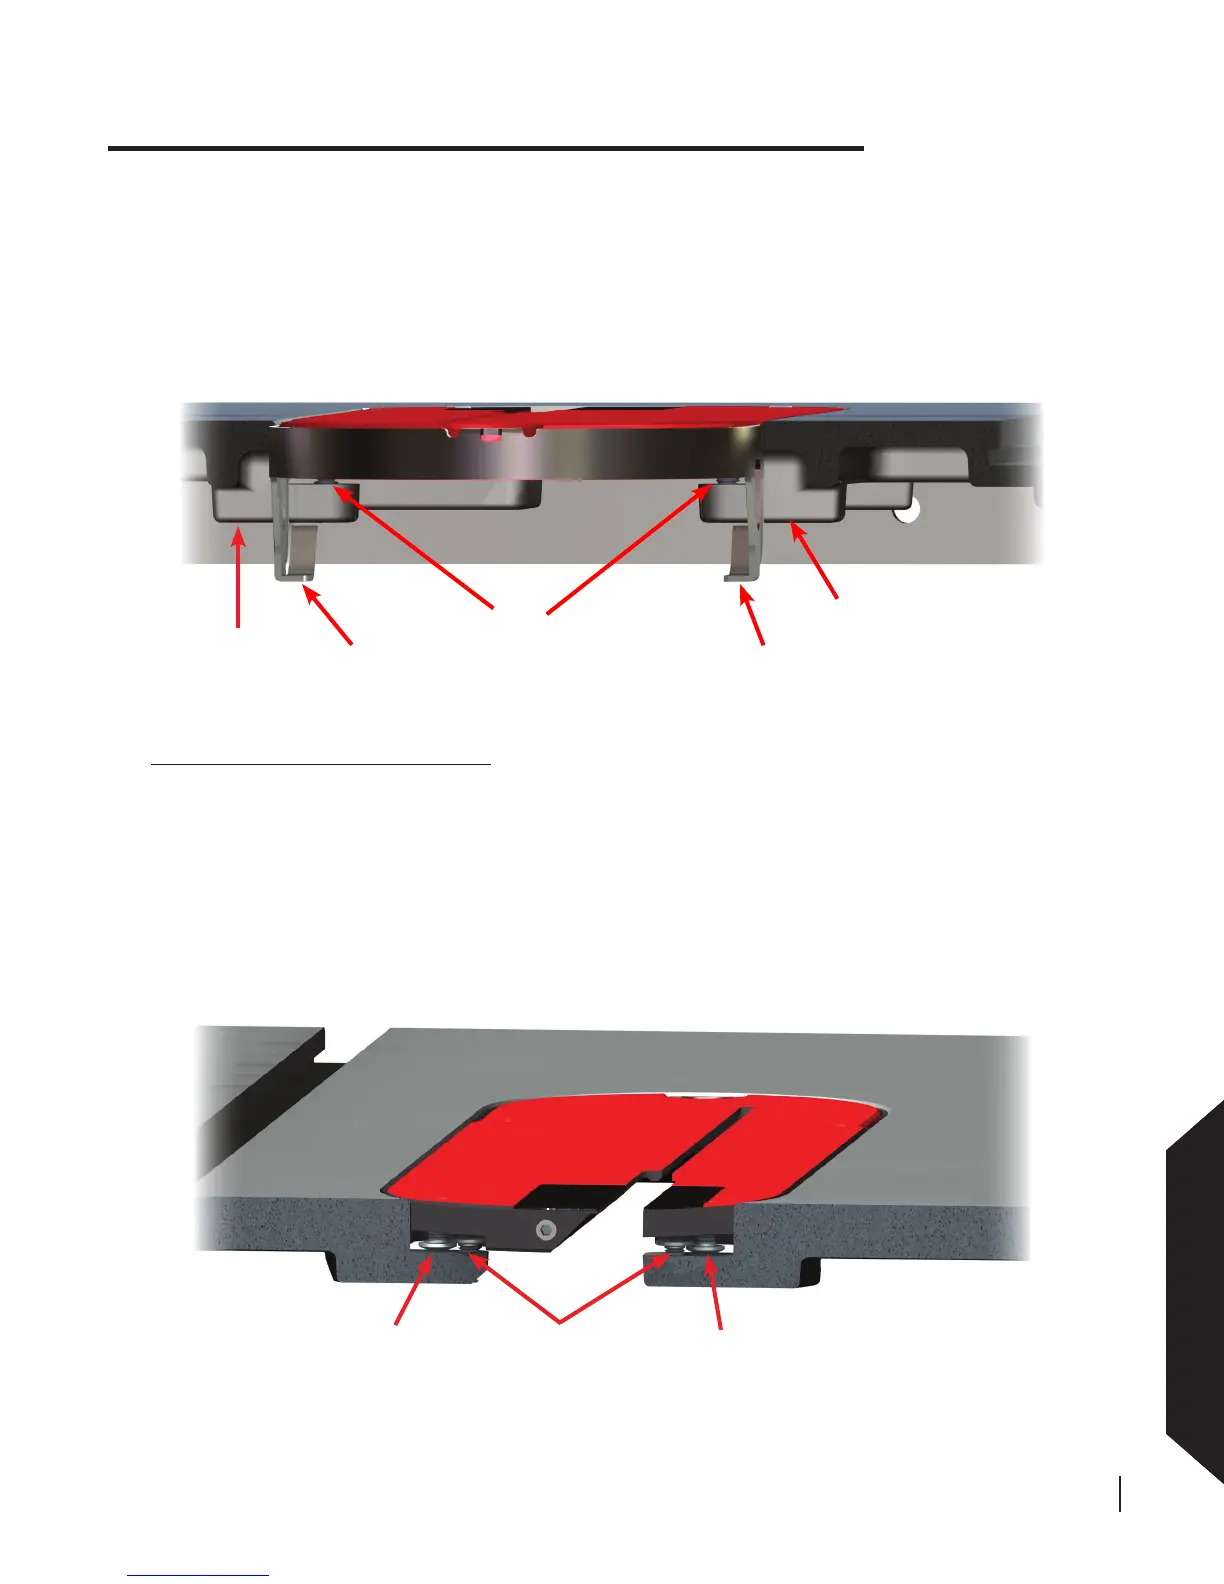
The rear of the table insert is held down by a pair of lock down screws mounted in the table at the rear of the
table opening. As shown in Fig. 92, the lock down screw heads overlap the heads of the rear leveling screws
extending down from the insert. The overlapping screw heads hold down the table insert.
The height of the lock down screws should be adjusted to t close above the leveling screws, while allowing
enough clearance to install and remove the table insert without difculty. The height of the lock down screws
can be adjusted using the included 3 mm hex key.
To set the height of the insert, use the included 3 mm hex key to adjust the front and rear leveling screws until
the insert is just below the surface of the table. The lower end of each front leveling screw should rest on the
corresponding support ledge on the table (see Fig. 91). When the lock-down lever is in the down and locked
position, latching arms extend under each of the support ledges to prevent the insert from rising up.
Making Adjustments to Your Saw
table lock down
screws
rear
leveling
screw
rear
leveling
screw
Fig. 91
front
leveling
screws
support
ledge
support
ledge
Fig. 92
latching arm
latching arm