5
RETURN TO TABLE
OF CONTENTS
4. Unbolt and remove the two metal straps (1) from around the table base.
5. Remove the shipping plug (2) from the table’s hydraulic fluid reservoir and
install the vent plug (3) in it’s place; then install the hole plug (4).
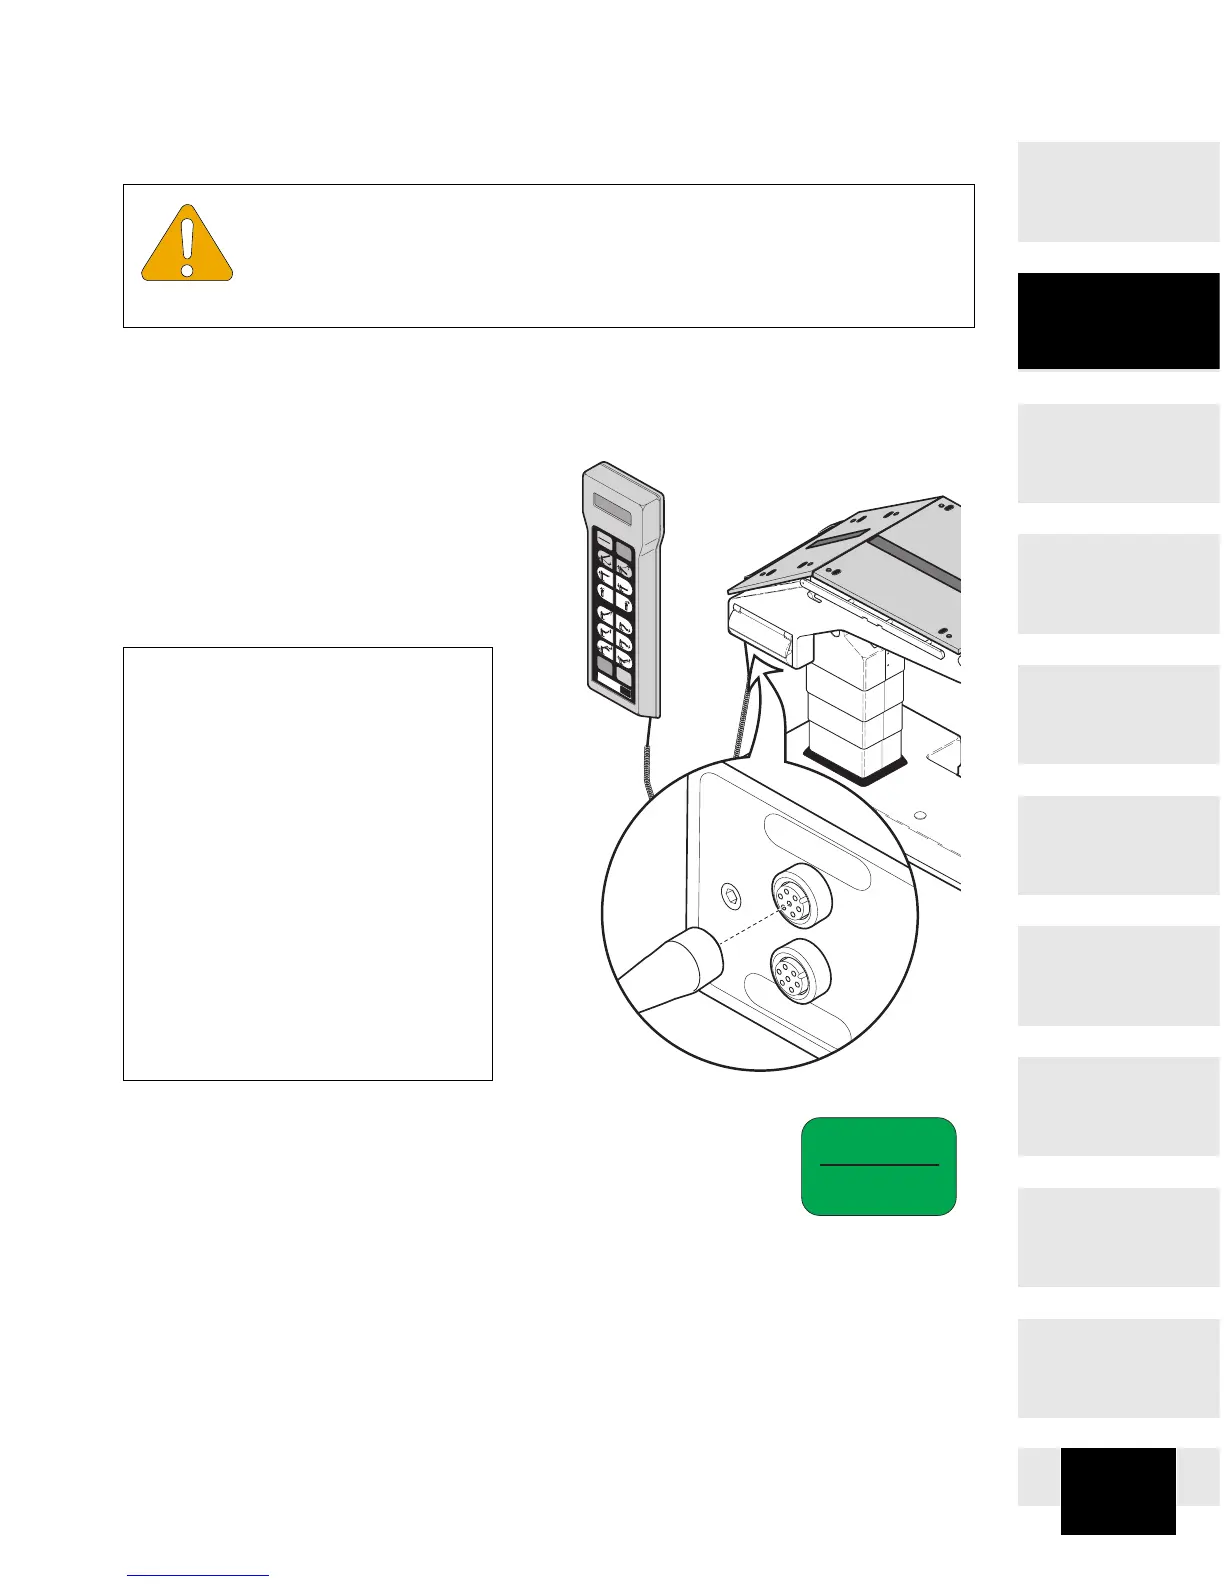
6. Locate the hand control that
has been packaged with the
table and plug the cord of the
hand control into the port
labeled HAND CONTROL
located on the bottom, patient’s
right side of the table top.
7. Press the
ENABLE
/
LOCK
button. The display should read,
“
N
ORMAL
P
OSITION
...L
OCKING
FLOOR
”.
The floor locks
and outriggers will function, locking the table to the skid.
8. Remove the two wood slats (5, Figure 1) from beneath
the table base.
9. Unbolt and remove the wood block (6) at the foot end base of the table.
EQUIPMENT ALERT
Do
not
operate the table until the shipping plug has been removed
from the hydraulic reservoir and the vent plug has been installed in
its place.
NOTE
If the hand control does not re-
spond when turned on, it may
mean the table’s battery system
needs to be charged. Using the
table’s power cord, connect the
cord to the table and then plug
the cord into a 115 VAC, 60 Hz,
hospital grade power recepta-
cle. Allow the batteries to
charge for 1/2 hour; then re-
move the power cord and con-
tinue with unpacking
procedures.
7100
LEVEL
UNLOCK
ENABLE
LOCK
DISABLE
7100
MIDOMIARK