25
GB
Einbau
1) Lesen sie die Anleitung sorgfältig.
2) Das Garagentor muss für die Verwendung des Torantriebs geeignet sein.
3) Das Tor muss leichtgängig sein und sich widerstandsfrei bewegen lassen.
4) Das Tor muss ausbalanciert und mit der Hand leicht zu bewegen sein.
1) Schiene 5) Einstellungsdisplay
2) 24V Warnlampe (optional) 6) Stromanschluss
3) Wandtaster (optional) 7) Torantrieb
4) Lichtschranke (optional)
Es ist ein Mindestplatzbedarf von 30 mm erforderlich (Fig. 2).
Die Schiene muss horizontal zur Antriebswelle montiert werden. Stellen sie sicher, dass die Befestigungsschiene
fest sitzt (Fig.3).
Achtung:
Fehlerhafte Befestigung des Garagentorantriebs kann zu Personen- und Sachschäden führen.
6
Fig.1
Fig. 2
Fig.1
Fig. 3
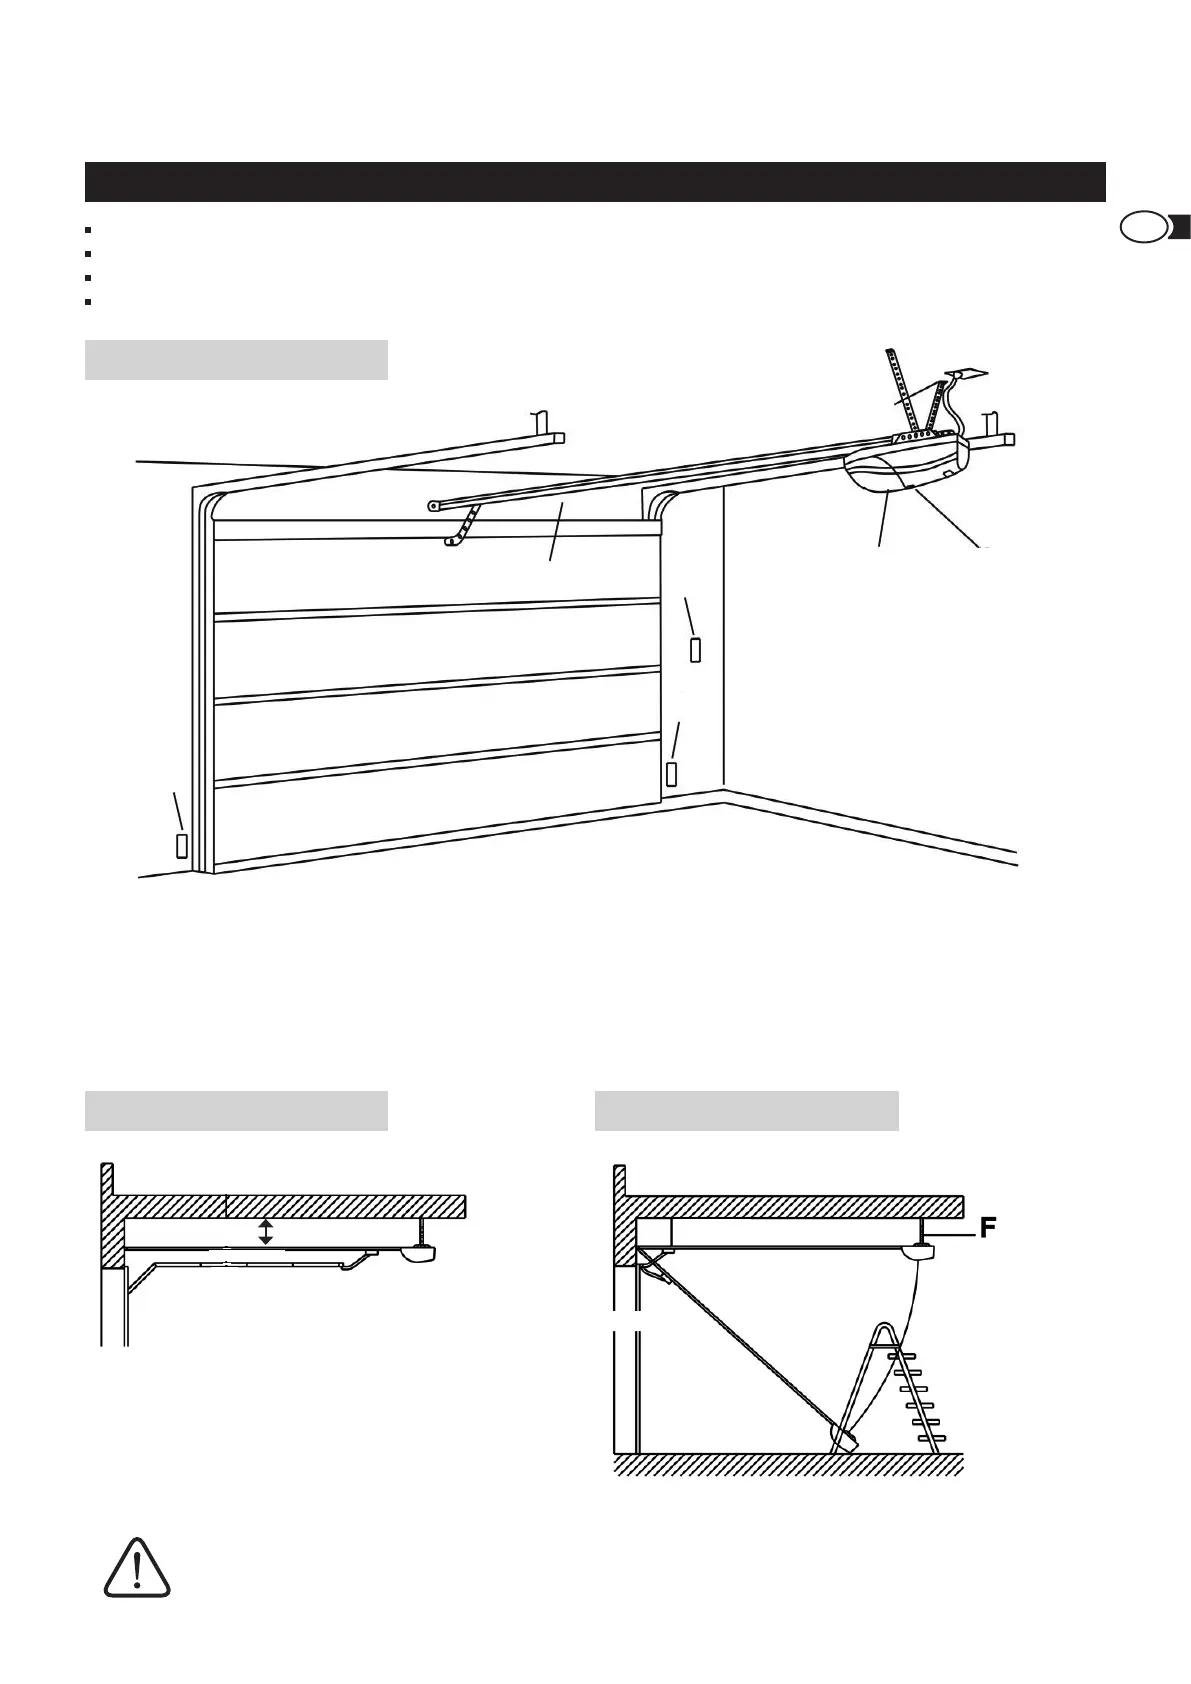
A INSTALLATION
Read the instructions carefully.
The garage door must be suitable for the use with the door drive.
The door must be able to move lightly and freely.
The door must be balanced and easy to move with the hand.
1
2
3
3
4
5
6
Fig. 1
Fig. 2 Fig. 3
1 Rail
2 Wall button (optional)
3 Light barrier (optional)
4 Settings screen
5 Power connection
6 Door drive
A minimum space requirement of 35 mm is required (Fig. 2). The rail must be mounted horizontally to the drive
shaft. Ensure that the mounting rail (F) is securely installed (Fig.3). Faulty attachment of the garage door drive
can lead to personal injury and property damage.
max. 400 mmmin. 35 mm