30
E BASIC FUNCTIONS, SETTING AND APPLICATION
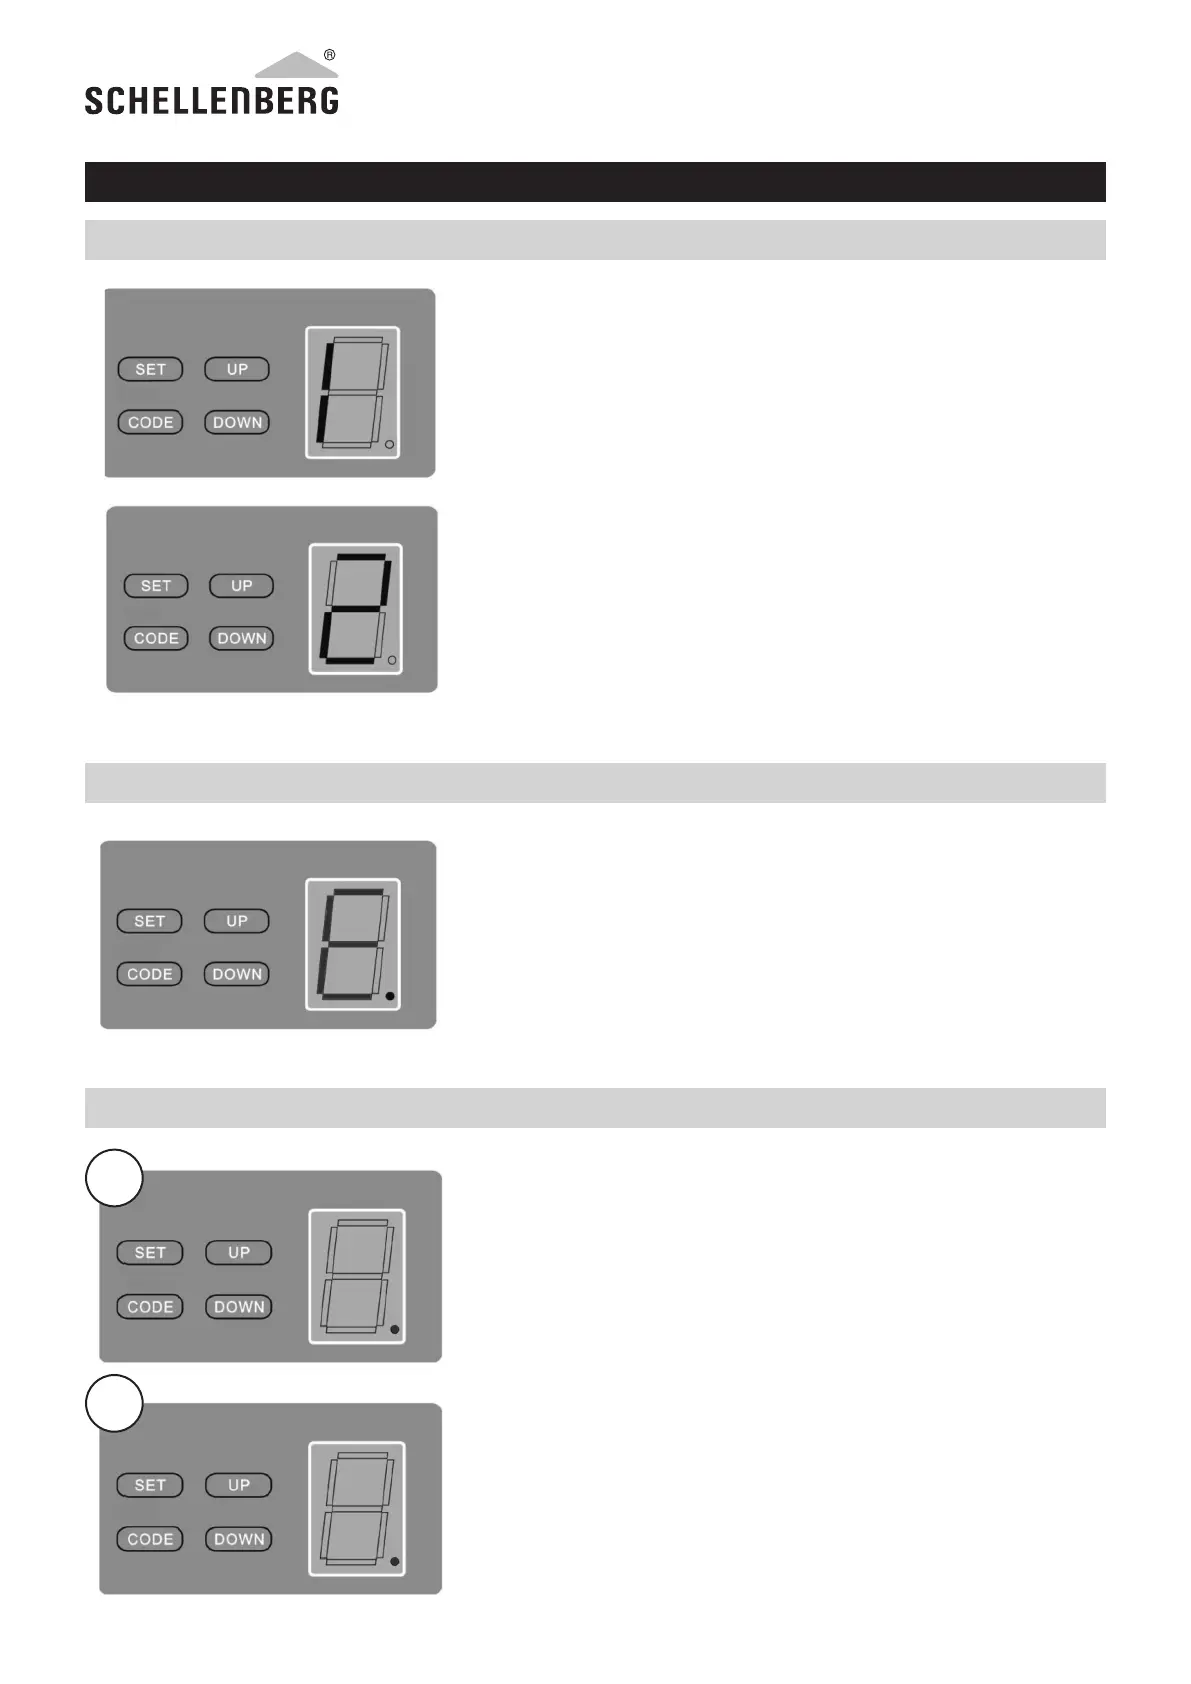
SETTING OF THE END POSITION
INCORRECT SETTING OF THE END POSITION
Automatic force setting
Press the SET button until the display shows „1“. Set the upper end position
of the door by pressing the UP button. Wait approx. 10cm before the upper
door position is reached, release the UP button. Now, press the UP button
several times to move the door to the desired upper door position and com-
plete the process by pressing the SET button.
The display will now show „2“. Now, set the lower end position of the door
by pressing the DOWN button. Wait approx. 10cm before reaching the lower
door position, release the DOWN button. Now, press the DOWN button
briey to bring the door to the desired lower door position, and then press
the SET button to complete the operation.
Your door drive will now perform a complete movement cycle independently,
learn the positions and set the automatic force setting.
Please open and close the door another 5 times.
If the door drive does not perform an independent learning movement, an
„E“ will be shown in the display. The lower door position is set incorrectly.
The door presses too strong onto the oor, the closing force of the door is
too high.
Please disconnect the garage door drive for 10 seconds from the pow-
er supply, and repeat the settings for the automatic force setting, and
slightly lower the door less when setting the lower door position.
SETTING THE RECEIVER AND HAND-HELD TRANSMITTER
Press the CODE button until the LED dot is illuminated (Fig. A). Now press
any button on your hand-held transmitter. The LED dot will switch o. Press
the menu button on the hand-held transmitter again. The LED will now ash
quickly and the LED display will show „ii“ (g. B).
If you have several hand-held transmitters, repeat the procedure
accordingly.
To clear all codes, press the CODE button on the unit for approx. 8 seconds
until the LED display shows „C“.
A
B