83
IT
IMPOSTAZIONE DELLA BARRIERA LUMINOSA
COLLEGAMENTO DI UN SOSTEGNO A PARETE
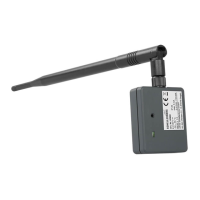
1. Per collegare un ulteriore tasto a parete utilizzare lo
schema elettrico (Fig. 11).
2. per collegare una barriera luminosa utilizzare lo
schema elettrico (Fig. 12).
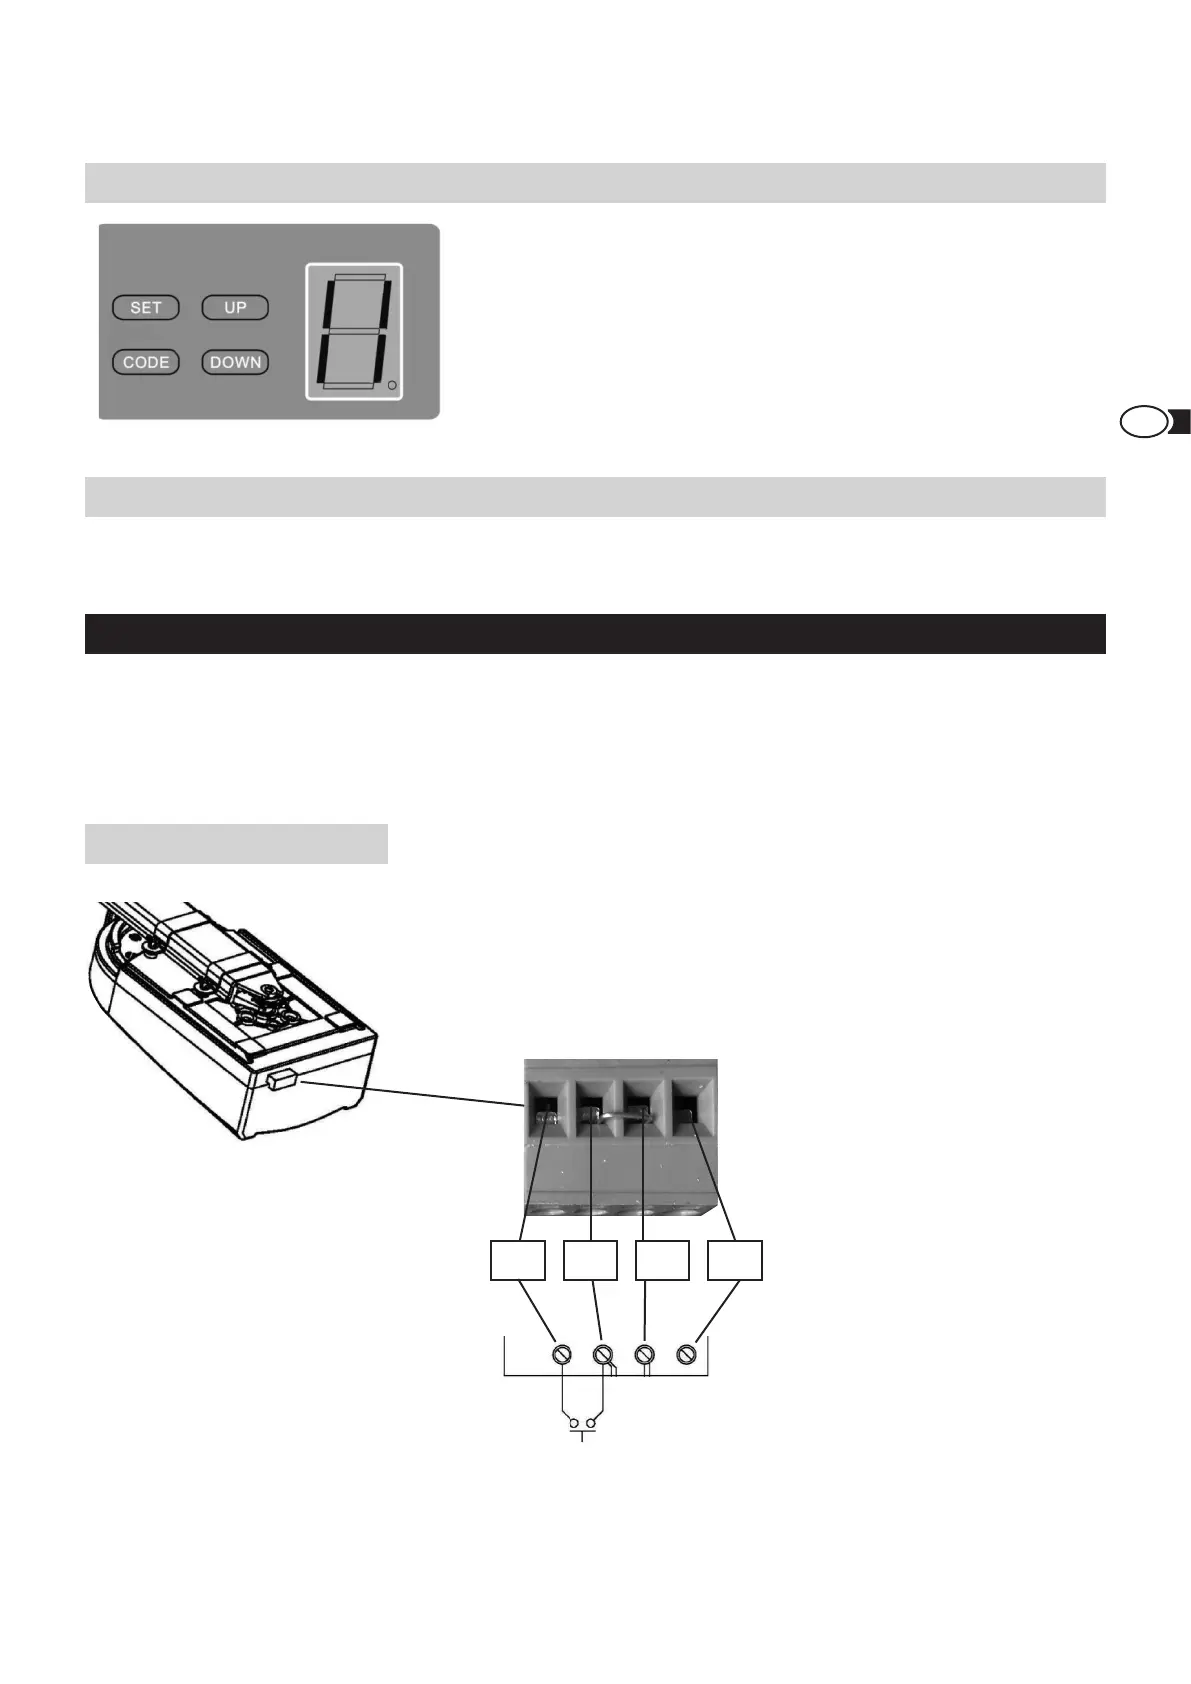
Premere il tasto DOWN no a quando il LED segnala „II“. Premere il tasto
UP per attivare la funzione della barriera luminosa. Il LED segnala „H“. Per
la disattivazione, premere il tasto DOWN. Il LED segnala „II“.Per confermare
premere il tasto SET. Collegare la barriera luminosa come descritto nella
g. 12.
Importante: se non si utilizza alcuna barriera luminosa è necessario
che la funzione di barriera luminosa sia disattivata. Altrimenti l’auto-
matismo del portone non funziona.
Collegare il tasto a parete opzionale all’automatismo del portone (Fig. 11).
F ULTERIORI FUNZIONI ED APPLICAZIONI
Fig. 11
Weitere Funktionen und Anwendungen
1. Einen weiteren Wandtaster anschließen
Verwenden Sie Anschluss-Schema (Fig. 11)
2. Anschluss Lichtschranke
Verwenden Sie das Anschluss-Schema Fig. 12.
Fig. 11
Anschluss Lichtschranke
Fig. 12
13
Torantrieb
Wandtaster Kontakt
PB GND PE +24 V
Contatto tasto a parete