www.scheppach.com
36
|
GB
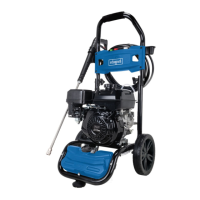
14.2.2 Air lter (Fig. 1)
1.
2.
3.
it out with compressed air at low pressure.
4.
(21).
14.2.3 Spark plug (Fig. 14)
Check the spark plug / spark plug connector (31) for
hours and clean it with a copper wire brush if neces-
hours.
1. Remove the spark plug connector (31) from the
2. Remove the spark plug with the enclosed spark
plug wrench (35).
3.
14.3 Service information
-
wear, or that the following parts are required as con-
sumables.
Wearing parts*: Spark plug, high-pressure hose,
15. Storage
m CAUTION
• Note the weight of the device during transport.
and frost-free place that is inaccessible to children.
The optimum storage temperature is between 5 and
Cover the device to protect it from dust or moisture.
Store the operating manual with the device.
15.1 Preparation for storage
Note:
1.
2. To ensure that no petrol remains in the carburet-
tor, the remaining petrol in the carburettor must be
drained out. To do this, place a suitable container
carburettor and open the petrol drain screw (41).
Fig.16:
14.1 Maintenance intervals
Before commissioning:
1. Check the oil level on the oil tank cover with oil
dipstick (12.1).
2. -
3. Check the high-pressure hose (2) for dam-
age (danger of bursting). Replace a damaged
Every 25 operating hours:
1. Check the oil level on the oil tank cover with oil
dipstick (12.1).
2. -
Every 50 operating hours:
1. Check the oil level on the oil tank cover with oil
dipstick (12.1).
2. -
3.
4. Check the fasteners between the engine and the
frame for cracks and have cracked fasteners re-
14.2 Maintenance work
14.2.1 Changing the engine oil (Fig. 10/14)
Note:
manner!
The engine oil change should be carried out while
the engine is at operating temperature.
1. Provide a collecting container for approx. 1 litre
of oil.
2. Place the device on a suitable surface.
3. Open the oil drain screw (39) (Fig. 14).
4. Drain the engine oil into the collection container
provided.
5.
open the oil tank cover with oil dipstick (12.1).
6. After the used oil has drained out, close the oil
drain screw (39) and put the device back on level
ground.
7. Fill engine oil up to the top marking on the oil dip-
stick (12.1).
For oil type and lling quantity, see Technical
Data.
ATTENTION
• To check the oil level, do not screw in the oil tank
the thread.
 Loading...