www.scheppach.com
GB
|
37
9.3 Riving knife
m WARNING
Danger of injury due to unexpected start-up of the ma-
chine
- Pull the mains plug out of the outlet.
You need to remove the table inlay (5) before you can
install and adjust the riving knife (6).
9.3.1 Removing the table inlay (g. 8)
1. Set the saw blade (7) to the max. cutting depth,
move to the 0° position and lock in place (see 11.2).
2. Remove the countersunk head screw (5a).
3. Remove the table inlay (5) from the saw table (2).
9.3.2 Installing and adjusting the riving knife
(g. 8, 9)
1. Loosen the xing screw (6a).
2. Push the riving knife (6) into the holder.
NOTE: This step can be skipped if the riving knife (6)
has already been installed.
3. Align the riving knife (6) such that
a) the distance between the saw blade (7) and the
riving knife (6) is max. 5 mm (g. 9),
b) the saw blade (7) is parallel to the riving knife
(6) and
c) the recesses on the riving knife (6) engage in
the pins of the riving knife holder.
4. Tighten the xing screw (6a) again.
9.3.3 Fitting the table inlay (g. 8)
1. Place the table insert (5) in the recess.
2. Tighten the countersunk screw (5a).
9.4.1 Fitting the saw blade guard (g. 10)
1. Place the saw blade guard (8) on the riving
knife (6) from above so that the screw (C) is
rmly placed in the slot of the riving knife (6).
Attention: Press the quick locking button (A) in
order to place the saw blade guard (8) on the riv-
ing knife (6).
2. Do not tighten the bolt (C) too much; the saw
blade guard (8) must be able to move freely.
3. Ensure that the saw blade guard (8) can move
freely.
4. Disassembly takes place in reverse order.
m WARNING
Danger of injury due to incorrect tted saw blade guard
- Before starting sawing, ensure that the saw blade
guard (8) automatically lowers onto the material
to be sawn.
9.4.2 Checking the saw blade guard
After tting, check that the saw blade guard (8) is
functioning properly.
1. Lift the saw blade guard (8) and then release it.
2. The saw blade guard (8) should automatically
move back to its starting position.
2. Fit the four legs (18) into the recesses of the ma-
chine housing.
9.1.2 Fitting table width extensions (g. 4)
1. Insert the rail connectors (A) into the guide rail (28)
of the table extensions (10).
2. Mount both table width extensions (10) loosely
on the saw table (2) with a total of four hexagon
screws M6×12, four washers and fours nuts M6
(a). To do so, use the corresponding holes drilled
into the saw table (2).
9.1.3 Fitting the table supports (g. 5)
1. Mount both short table supports (25) loosely on
the right table width extension (10b) with a total of
two hexagon screws M6×12, two washers and two
nuts M6 (a). Mount the table supports (25) loosely
on the machine housing with two hexagon screws
M6x30 and two washers (b), as shown.
2. Mount both medium table supports (24) loosely on
the left table width extension (10a) with two hexa-
gon screws M6×12, two washers and two nuts M6
(a). Mount the table supports (24) loosely on the
machine housing with two hexagon screws M6x30
and two washers (b), as shown.
3. Align the table width extensions (10) and the table
extension (3) so that they are level in relation to
the saw table (2).
4. Tighten the threaded connections on the table
width extensions (10) and on the saw table (2).
5. Leave the threaded connections on the machine
housing loose for the time being.
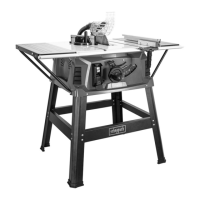
9.2 Fitting the base frame (g. 6, 7)
1. Fasten the front legs (17) on the machine housing
with two Allen screws M6x30 and two washers (c)
(g. 7).
2. Position one long centre strut (17) respectively
between two legs (18) on the front side (crank
wheel 15) and rear side (extraction port 21) of the
circular table saw (see g. 6).
3. Secure the long centre struts (17) to the legs (18)
with a total of eight coach bolts M6×12, eight
washers and eight nuts M6 (d).
4. Position a short central strut (20) between two
support legs (18). Fix them to the support legs (18)
with a total of eight M6×12 carriage bolts, eight
washers and eight M6 nuts (d).
5. Push one rubber foot (19) onto each leg (18).
6. Carefully turn the saw table (2) over and stand it
on its legs (18) on the oor.
7. Now tighten all previously established threaded
connections.
8. NOTE: During this step, ensure that the table
width extensions are correctly aligned with the
saw table (2).
9. Tighten both pre-mounted nuts (B) on the rail joiners
(A).
 Loading...