TBS, TBS-LH stationary power chucks
58 02.00|0889073_ROTA TB-TBS-EP |en
Assembly
The chuck is assembled in the same way, but in reverse order.
Observe the following points when doing this:
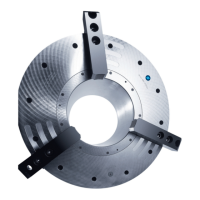
1 Both the base jaws (2) and the base jaw guides in the chuck
body (1) are numbered 1, 2, and 3. Insert the base jaws (2)
from the chuck bore hole back into the corresponding jaw
guide in the chuck body (1) in order to achieve the same run-
out accuracy.
2 Allow the piston with the O-rings (36 and 37) to snap into the
base jaw wedge hooks and push them in up to the end of the
stroke.
NOTE
The piston wedge hook with the dot marking on the inside is
aligned using jaw guide 1.
3 Insert the sealing disk (5) with the O-rings (38 and 39) into the
chuck body and, if you are working on an EP chuck, evenly
tighten the screw with the copper sealing rings (23 and 48)
beneath it.
4 Push the piston cover (6) with the O-rings (36 and 40) into the
piston (3) and tighten the cylindrical screws (22) evenly.
5 Insert the O-ring (35).
6 Before inserting the profile ring seals (47) in the slots in the
distributor ring, rub them with grease by hand so that they
remain elastic. There must be no visible grease residue.
When re-inserting the profile ring seals (47), ensure the that
air passage openings do not overlap with the pneumatic
connections on the distributor ring.
7 Mounting the distributor ring (see chapter “ Mounting with a
2-piece clamping ring" ( 7.2, Page 36)
).
8 Using the supplied eye bolt, hold the cylinder (10) in front of
the spindle on the cargo crane, together with the O-ring (41).
Screw the cylinder onto the spindle or intermediate flange
using the matching cylindrical screws. Install the locking
screws with the copper sealing rings beneath them into the
cylinder. Insert the three small O-rings (42) into the cylinder.
9 Using the cargo crane, hold the chuck body in front of the
spindle nose together with the other accessories, and screw it
onto the cylinder using the cylindrical screws (21).
10 Slide the bushing (4) into the chuck and secure it using
cylindrical screws (24).