C4. Assembly Guide
4.1 Disassembly Guide
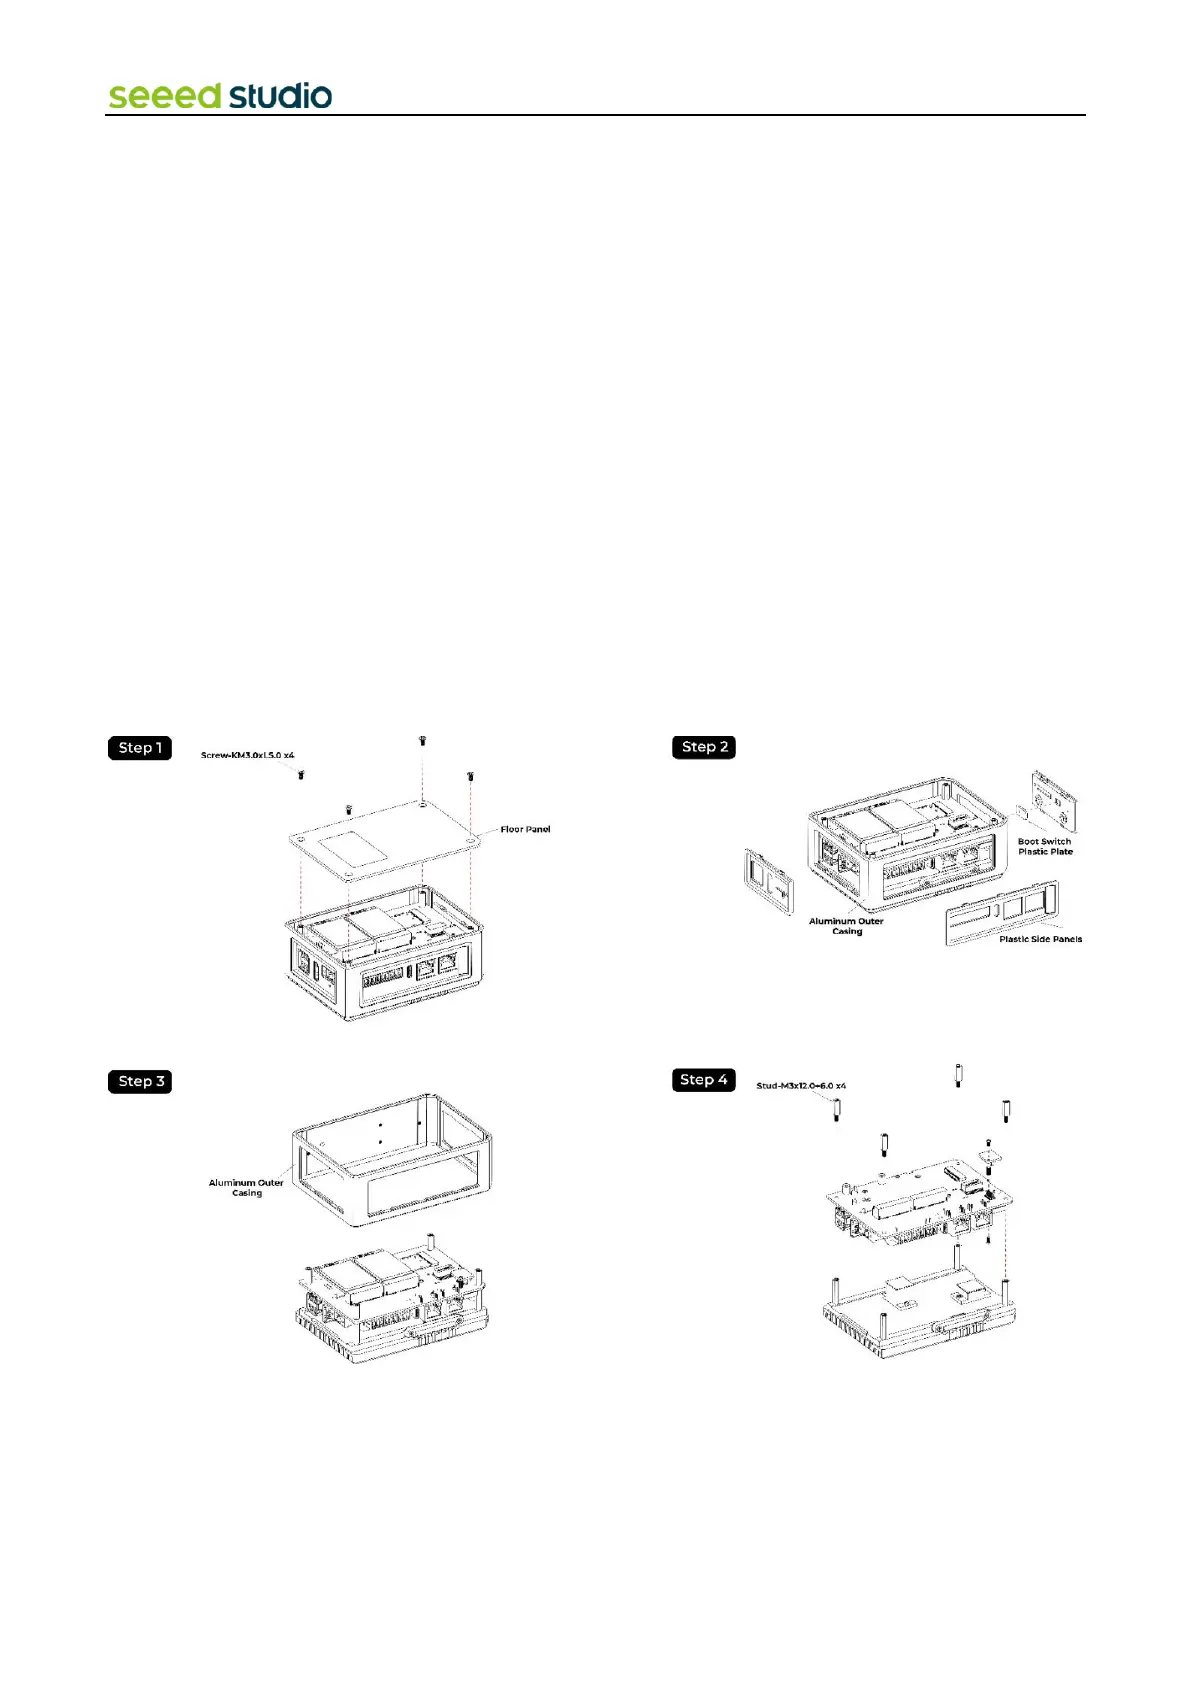
Following these steps should help you disassemble the device without any issues.
Step 1: Remove the Four Screws at the Bottom:
⚫ Locate and unscrew the four screws located at the bottom of the device using an appropriate screwdriver.
Step 2: Take Off the Floor Panel:
⚫ Once the screws are removed, carefully lift off the floor panel from the device.
Step 3: Remove the Plastic Side Panels:
⚫ Identify the plastic side panels on three sides of the device.
⚫ Gently pry or unsnap each side panel from the device. If they are tight, you may need to use tools, but be careful not to
damage the panels.
Step 4: Be Mindful of the Boot Switch Plastic Plate:
⚫ Note the boot switch on one of the panels; it may have a small plastic plate attached.
⚫ Ensure this plate doesn't fall off or get lost during the disassembly process.
Step 5: Take Down the Aluminum Outer Casing:
⚫ Once the side panels are removed, you can access the aluminum outer casing.
⚫ Carefully lift and remove the aluminum casing from the device.
Step 6: Remove the four screws that secure the PCB in place