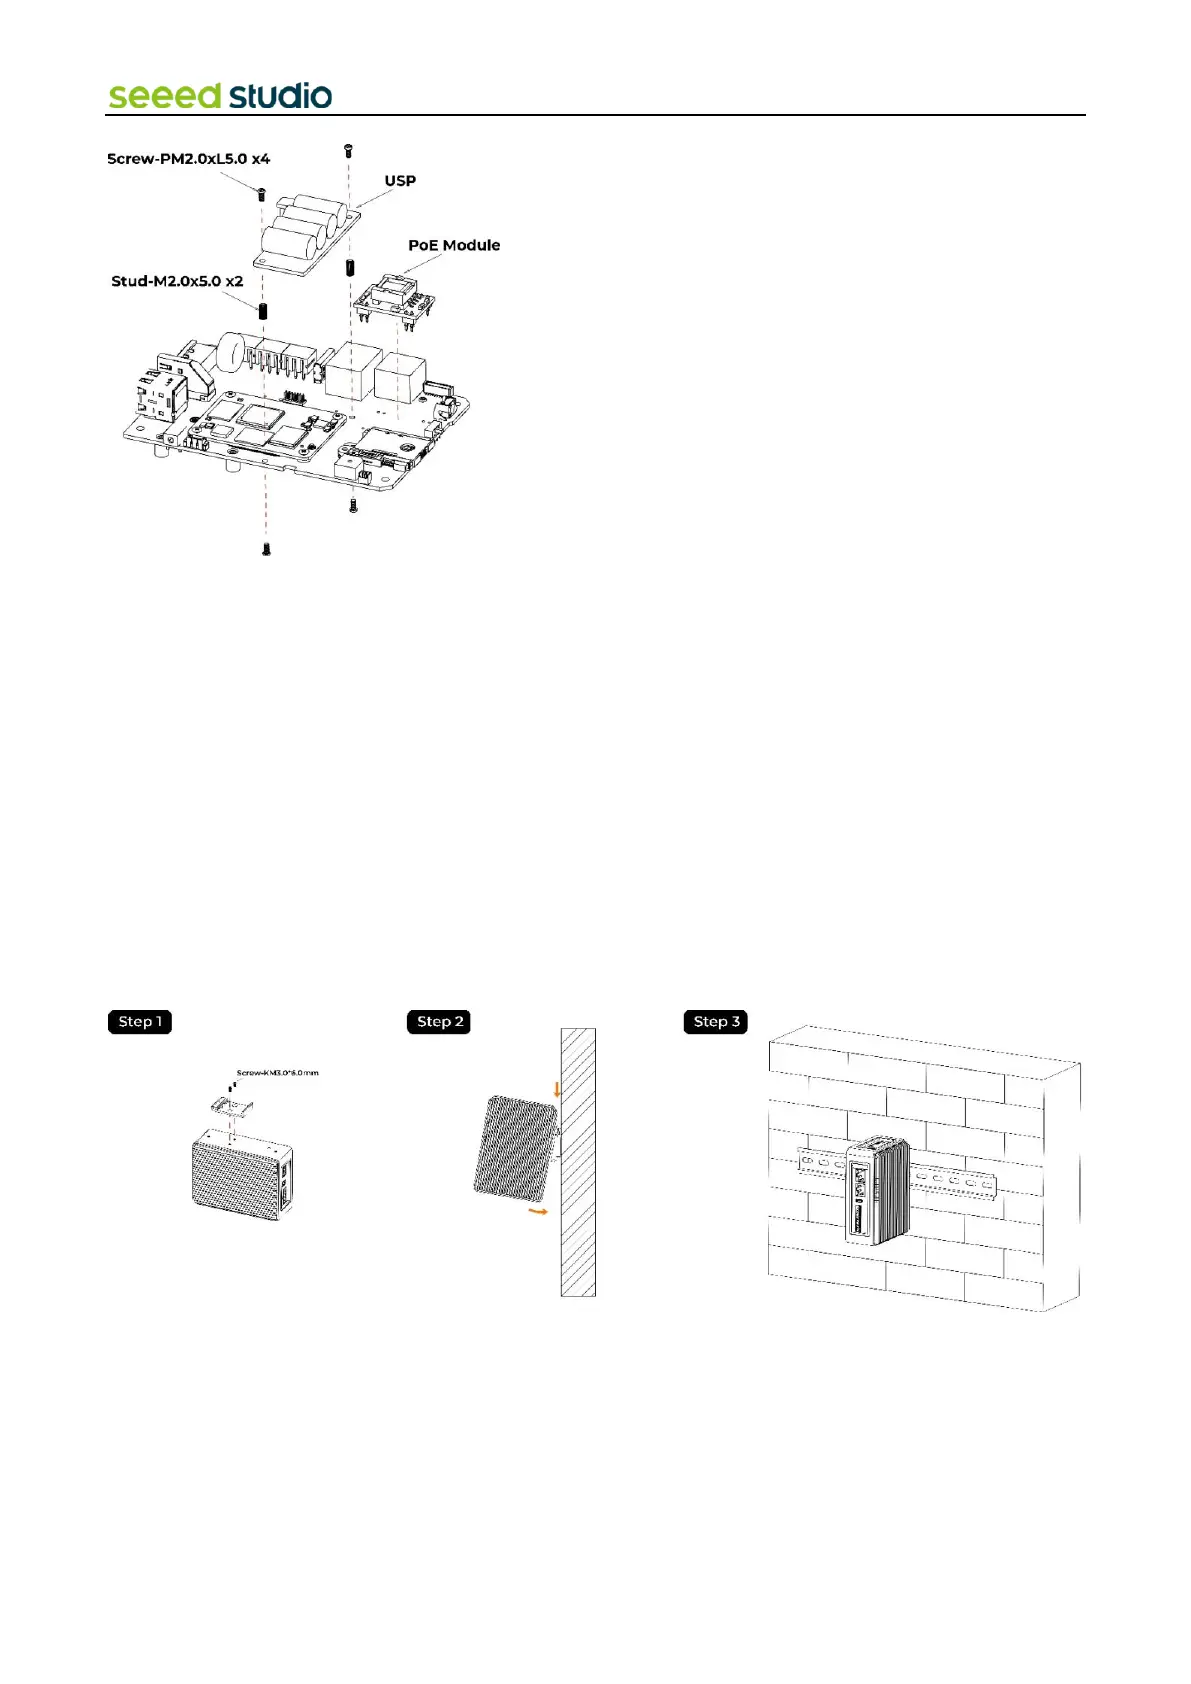
4.7 Mounting Guide
4.7.1 DIN-rail Mounting Guide
reComputer R1000 offers various installation methods. The DIN-rail clip and installation screws are included in the
packaging. Follow the diagram to correctly attach the DIN-rail clip to the mounting holes on the side of the device. Once
the screws are securely fastened, you can then install the device onto the mounting rail.
Step 1: Place the device and rail clip on the upper edge of the standard profile rail at the position shown and push the
device down.
Step 2: Swing the rail clip of the device from below through the standard profile rail.
Step 3: Push the device in the direction of the standard profile rail. You will hear the device click into place.
Removing
Step 1: Push down the device until it is released by the rail clip.
Step 2: Swing the device out of the standard profile rail.
Step 3: Lift the device up and off.
4.7.2 Wall Mounting Guide
Vertical mounting method is also suitable for reComputer R1000, however the mounting brackets are not included in box,
that need additional purchase.
Step 1: Lay the mounting brackets on the rear of the device.
Step 2: Fasten the brackets with supplied screws.
Step 3: Mark the bore holes, drill the required holes in the wall and fasten the device to the wall using two screws.