72
4
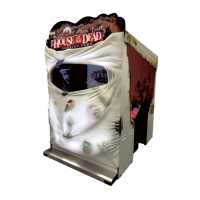
Carefully pull out the plastic rivet to release the RGB LED from the Disc housing..
5
Disconnect the connectors either side of the REG LED PCB and remove.
6
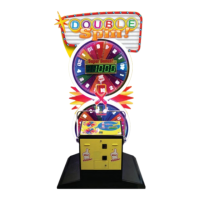
Fit the replacement RGB LED PCB to the Disc Housing making sure the alignment of the LEDs are correct
with the holes and secure with the Push Rivet..
7
Reconnect the harness to both ends of the RGB LED PCB.
8
Connect power to the machine. Enter the Test and Service menu and check the operation on the LED PCB
before retting the rear cover bracket. To ret the rear cover bracker follow steps 1 and 2 in reverse order.
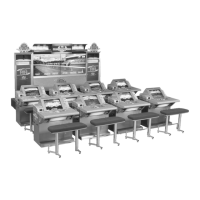
IMPORTANT: Make a note of the orientation of
the RGB LED PCB before removal.
Align the individual LEDs
IN
Plastic Rivet