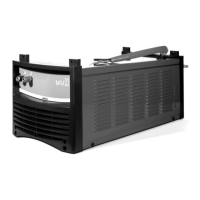
10 Description of operation of the power sources and technical dates
The first time the torch button is pressed, the pre-gas time is
run, the arc is struck and welding is performed with the initial
current.
The first time it is released, slope-up to current "I1" occurs. If
the welder presses and quickly releases the button, the
machine will go to "I2"; by pressing and quickly releasing the
button it returns to "I1" and so on.
If the button is pressed for longer, the current slope-down
begins which leads to the final current.
When the button is released the arc goes out while the gas
continues to flow for the post-gas time.
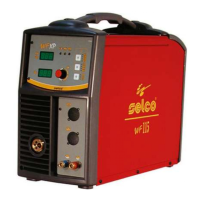
* S4: Welding procedure selection key.
Permits selection of the welding procedure.
Switch-on of the led at the side of the symbol confirms the
selection.
Procedures:
- MMA (electrode)
- TIG DC
- TIG AC
* S5: SET-UP/parameters key.
Permits access to the SET-UP and welding parameter values.
When pressed at switch-on, it permits access to the set-up
parameters while the software version appears on “D1”.
If pressed after the end of the welder switch-on procedure, it
selects in sequence the welding parameters presented in the
graph “G1” with value shown by “D1” and variable with “E1” .
Tu Slope-up time
l Welding current
lb Basic current in pulsed and medium frequency
welding
Tp Peak time in pulsed and medium frequency welding
Tb Basic time in pulsed and medium frequency welding
Td Slope-down time
lf Final current
Pg Post-gas time
l2 Second welding current in BILEVEL
When in MEDIUM FREQUENCY operation, the leds
Tp and Tb come on simultaneously and the pulse
frequency value appears on the display “ D1” .
By keeping the key "S5" pressed for 1 second, you access
adjustment of the following parameters:
- frequency in AC (Led L4);
- electrode diameter setting in AC (Led L5);
by setting this value on the power source the Genesis
302/382 AC/DC can optimise (using the FUZZY LOGIC )
the welding start parameters in AC;
- balance AC (Led L6); adjustment in % of the positive wave
value during the AC period.
A higher value indicates greater cleaning action of the elec-
tric arc on the weld pool; a lower value indicates greater
penetration and melting action of the arc.
* Set-up parameters.
When “S5” is pressed after switch-on, the set-up menu is
accessed (confirmed by a central "0" on the display “D1”)
while the software version appears on “ D1”. Via E1 the set-up
line is varied, via “S5” the required line is confirmed, via “E1”
the value is varied, via “S5” the value is confirmed and so on.
0 Quit and save
1 Initial current as a percentage with respect to
welding current
2 Pre-gas time
3 HOT-START percentage
4 ARC-FORCE percentage
5 Waveform in AC
The following table shows the correspondence between the
numbers and the half waves:
Number Half wave - Half wave +
0 Sine Sine
1 Triangle Triangle
2 Square Square
3 Sine Triangle
4 Sine Square
5 Triangle Sine
6 Triangle Square
7 Square Sine
8 Square Triangle
6 Min current value in TIG EXT
7 Max current value in TIG EXT welding
8 LIFT start in TIG DC (1) or HF start (0)
(default= 0)
9 Reset of parameters
12 Welding in DC+ (1) or DC - (0) (default= 0)
14 Pulsed TIG basic l setting mode (0= in amps,
1= percentage of peak l) (default= 0)
15 HF first pulse polarity (1= on same side as current,
0= inverted, improved sparking)
16 Cooling unit activity time from end of welding (s);
if 0 is set, the unit never comes on.
17 With "1" in AC in the fastpulse position the mix AC/DC
procedure is enabled.
18 Current reference during the HF start in TIG DC
19 Current reference during HF start in TIG AC
20 Extra energy (% of positive wave amplitude in respect of
negative wave amplitude)
23 TIMER mode setting
(23 = 0: 2-stage mode, 23 ≠ 0: welding time)
99 Reset of all parameters
If we enter lines "9" and "99" and press “ S5” , all the
set-up parameters will go to the factory-set values.
To quit set-up and save the set values, return to
line “ 0” and press “ S5” .