24 Sentry Equipment Corp
Conguration
Selecting ‘Setup/Congure’ from the top menu takes you to the Conguration Page. From here all conguration
options for the sequencer are laid out.
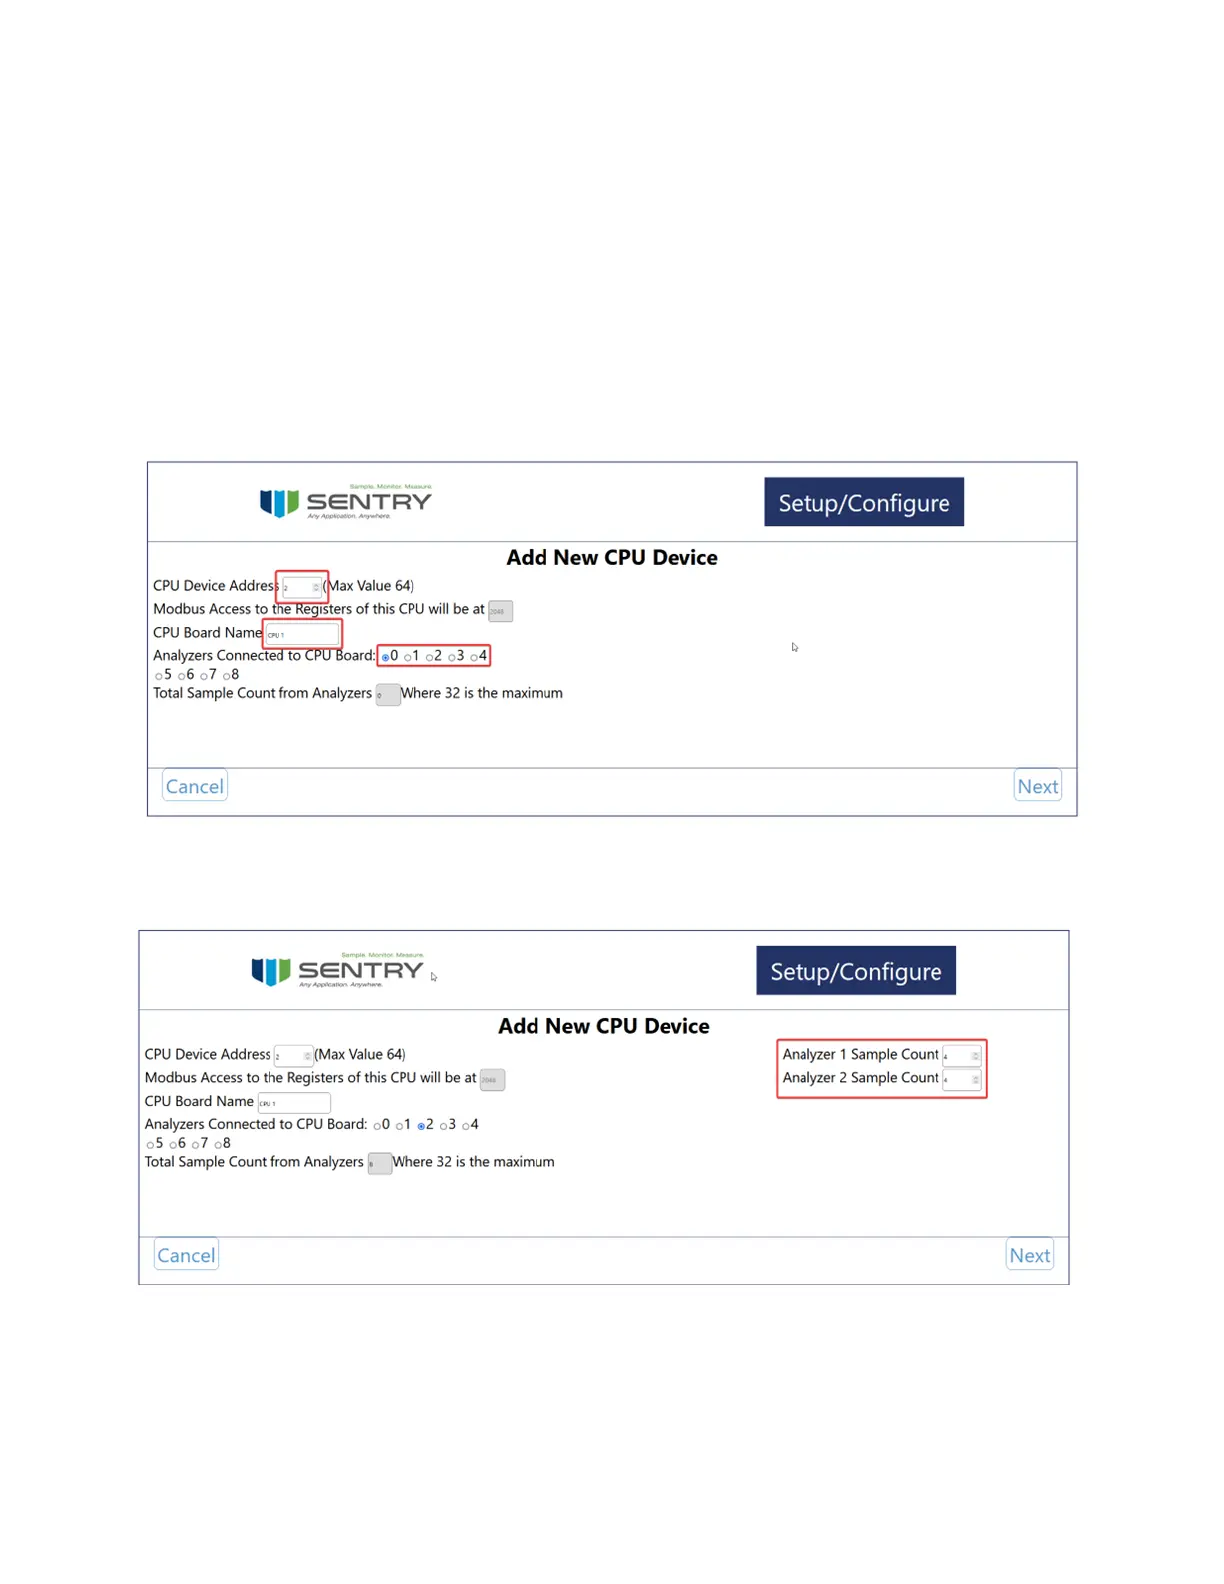
Add Connected Device
When no devices are congured select Add Connected Device to congure new analyzers
If a CPU is properly connected the CPU address should ll in automatically. The CPU Address is based on the jumpers
located on the CPU board. For more information visit Jumpers on page 20.
Enter a name for your CPU and select the number of analyzers connected to that CPU. Note that IO Extender boards
still work o of one central CPU.
After selecting the number of analyzers new elds will appear to the right. Enter the number of samples for each of
your analyzers and press ‘Next’
The next page allows conguration of the rst Analyzer. Set a name, type, and curve points in order to advance to
the next page. Conguration of the digital outputs is also set here. The options are Disabled, Point Indication, Alarm
Indication, or both Alarm and Point Indication.
Disabled will keep all the digital outputs o