Service Manual
Integra E-Z Oxygen Concentrators
Chart SeQual Technologies Inc. Page 23 of 34 P/N 2917
6. Repair Procedures
WARNING:
Observe all safety precautions during maintenance. Unplug the
unit unless power is required for observation of operation,
adjustment, power readings or leak checks.
WARNING:
At the completion of any procedure which disturbs any air
or oxygen carrying hose or tube, conduct a leak check of the
affected area prior to returning the unit to service.
WARNING:
There are no fan guards on the compressor. Keep fingers clear
of the fan blades!
6.1 Removal and Installation of Covers
6.1.1 Remove the five screws holding the cover halves together, two in each side and one in the
handle.
6.1.2 Tilt the front cover forward and lift clear.
NOTE:
Ensure any attachments are removed from DISS adapter fitting.
6.1.3 Tilt the back cover rearward and lift clear.
6.1.4 Re-install the back cover first by seating the back flange over the base. Ensure that the wiring
harness power cord plate is properly seated in the base.
6.1.5 Re-install the front cover by aligning the two tabs with the openings in the base. Ensure the
front cover seats properly over the POD Assembly. Seat the molded flange over the edge of the
rear cover.
NOTE:
Do not allow the tabs to contact the electrical wiring harness.
6.1.6 Re-install the five screws. Torque side cabinet screws to 18 inch-pounds. Hand tighten the
smaller screw in the handle to snug fit.
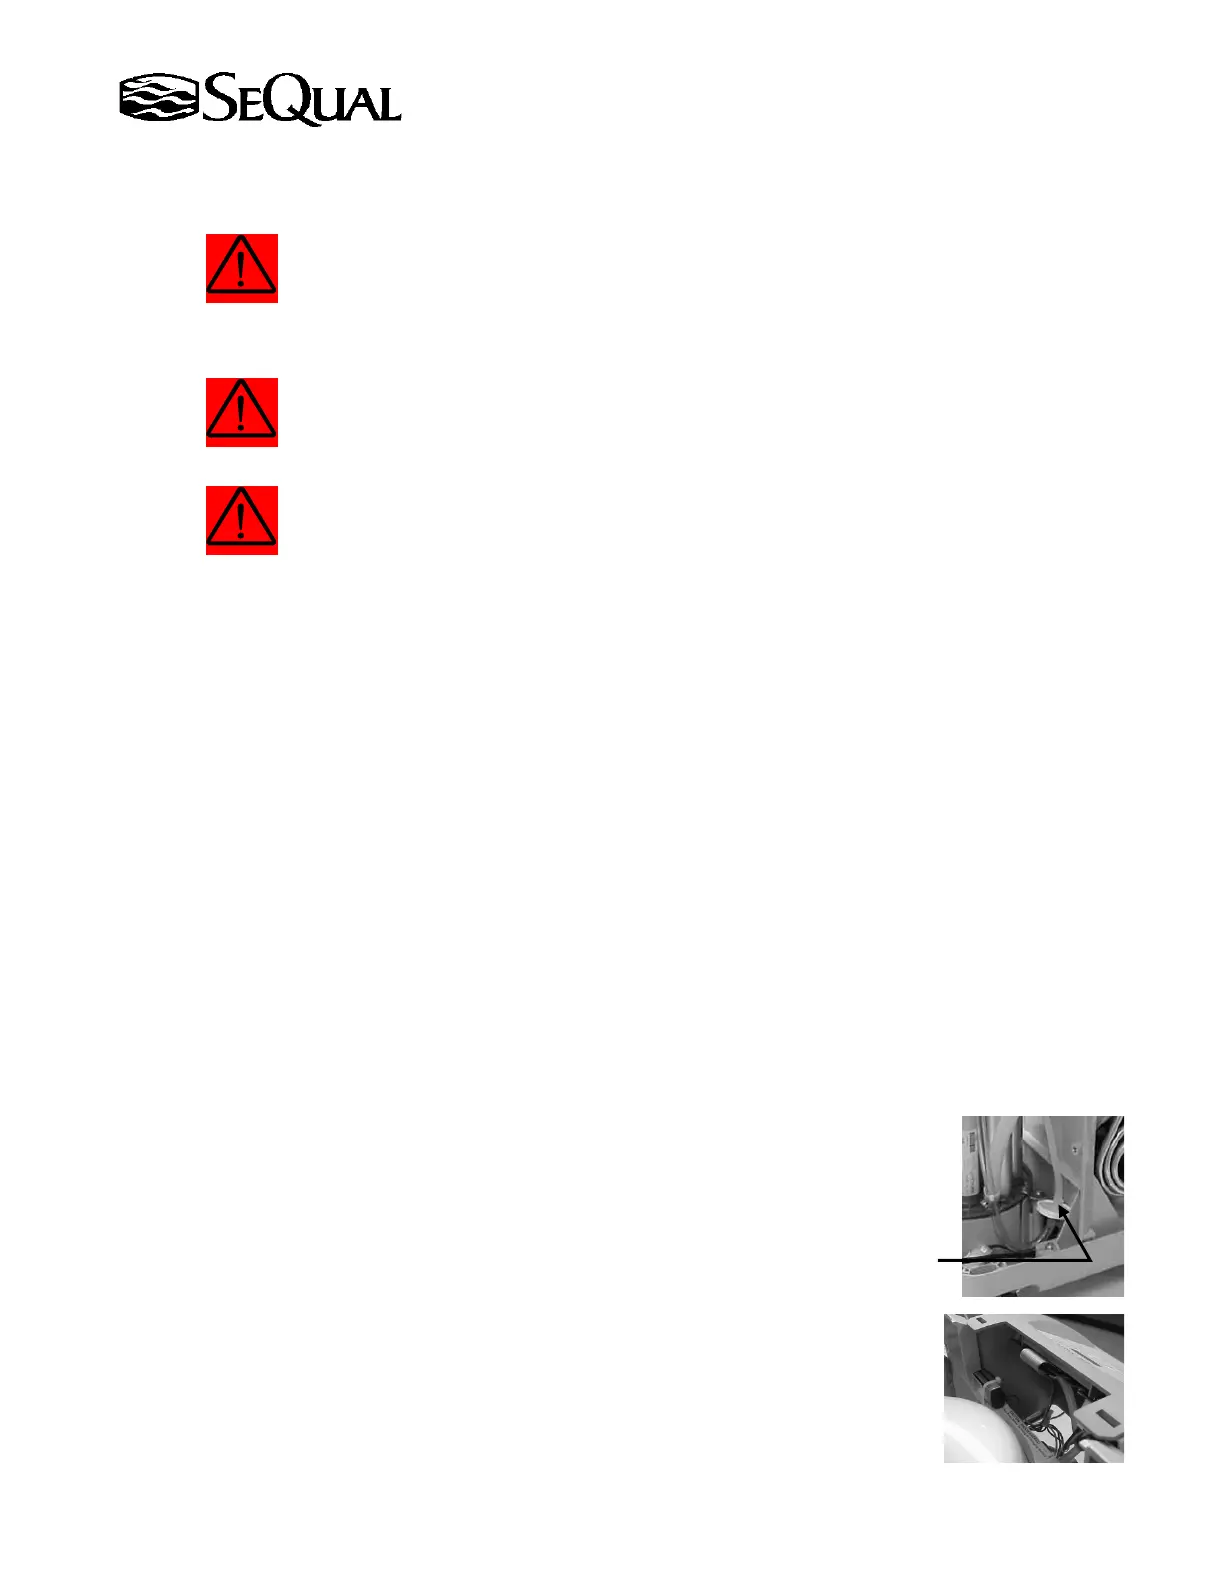
6.2 Removal and Installation of POD Assembly
6.2.1 Unplug unit from the AC power source. Confirm that Flow Indicator
Backlight is off.
6.2.2 Remove the covers.
6.2.3 Cut the Zip Tie and disconnect the oxygen supply tube coming from the
ATF at the HEPA filter. Temporarily plug over the opening (using tape or
a cap) in order to keep the filter clean.
6.2.4 Disconnect the 9V battery strap.
6.2.5 Remove the 8-pin plug (J10) from the circuit board by pressing down on
the side catch and pulling gently. It may be necessary to rock the connector
slightly.