8
LOADING CASSETTE TAPES
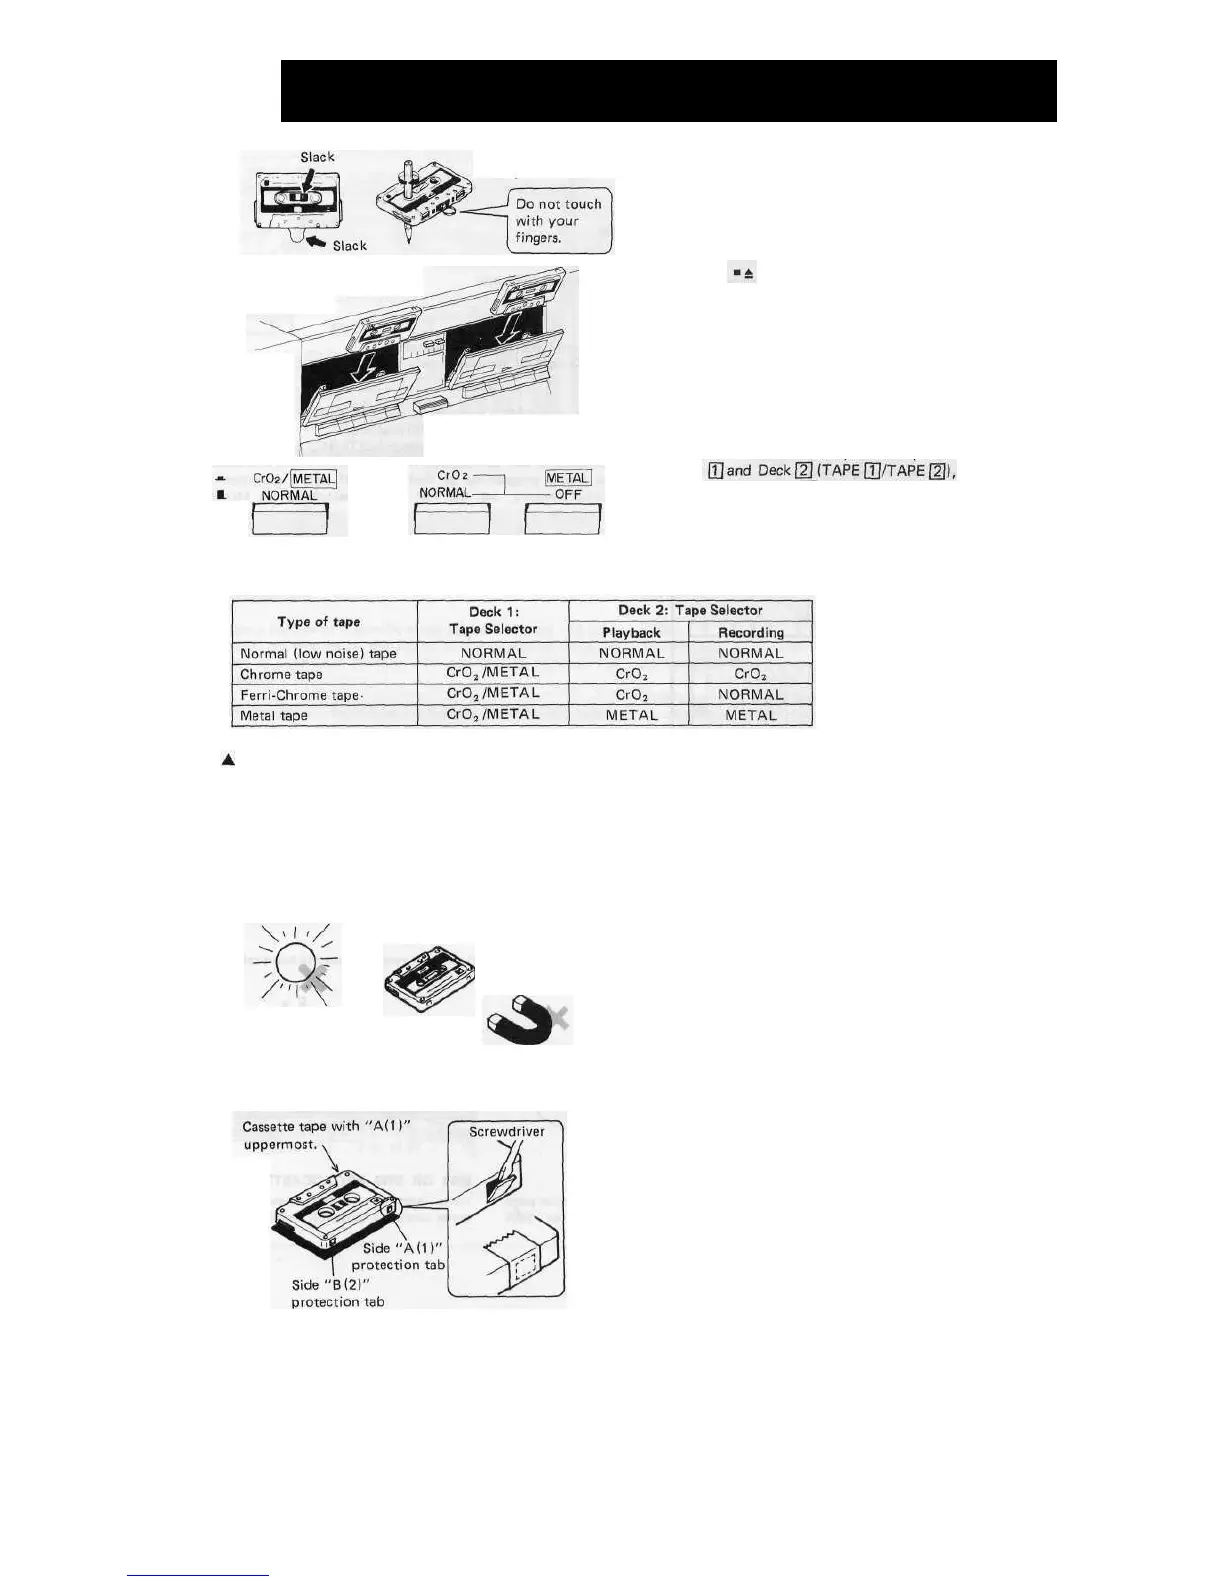
TAPE SLACK
Tighten any loose tape with a pencil or ball-point pen before
inserting the cassette into the unit, as shown at the left
figure.
LOADING
1 Press the STOP/EJECT button of Deck 1 or Deck 2
respectively.
2 Load a cassette tape into the compartment so that the
title of the tape to be used is facing outwards.
Close the compartment lid.
SETTING OF TAPE SELECTORS
The unit is furnished with independent tape selector switches
for Deck respectively.
According to the deck to be used, the designated switch
should be set to the proper position before beginning play-
back or recording, in order to match the bias and equaliza-
tion circuits with the cassette tape being used.
• Refer to the following chart, and set the switch to the appropriate settings.
The unit has been adjusted to
match the following cassette
tapes.
• Normal and low-noise tapes
.... Sharp SD, Maxell UD
• Metal tape .... Sharp MX,
Maxell MX
Cassette Tape Selection
• Use only well-known brands of tape.
• Use of C-120 (120 minutes) cassettes is not recommended.
The extreme thinness of this tape may result in breakage
or other problems.
• Stretched tapes will run at uneven speed and will distort
anything recorded on them.
NOTES FOR STORING CASSETTE TAPES
• Do not leave cassettes near the objects with strong magnetic
field, such as radio, TV sets or loudspeakers. Strong
magnetic field may reduce the tape sensitivity or even
damage the recordings.
• Do not store cassettes for extended period of time in hot,
moist or dusty places.
All cassette tapes are provided with tabs which, when in
place, allow tape erasure. If the tab (A or B/1 or 2) is
removed, the tape on that side cannot be recorded or erased.
(The • RECORD button will not function.)
The tape can be re-recorded or erased by covering the tab
holes with tape.
PROTECTING CASSETTE TAPE AGAINST ERASURE
11