R-775(W)R-785(AL) - 29
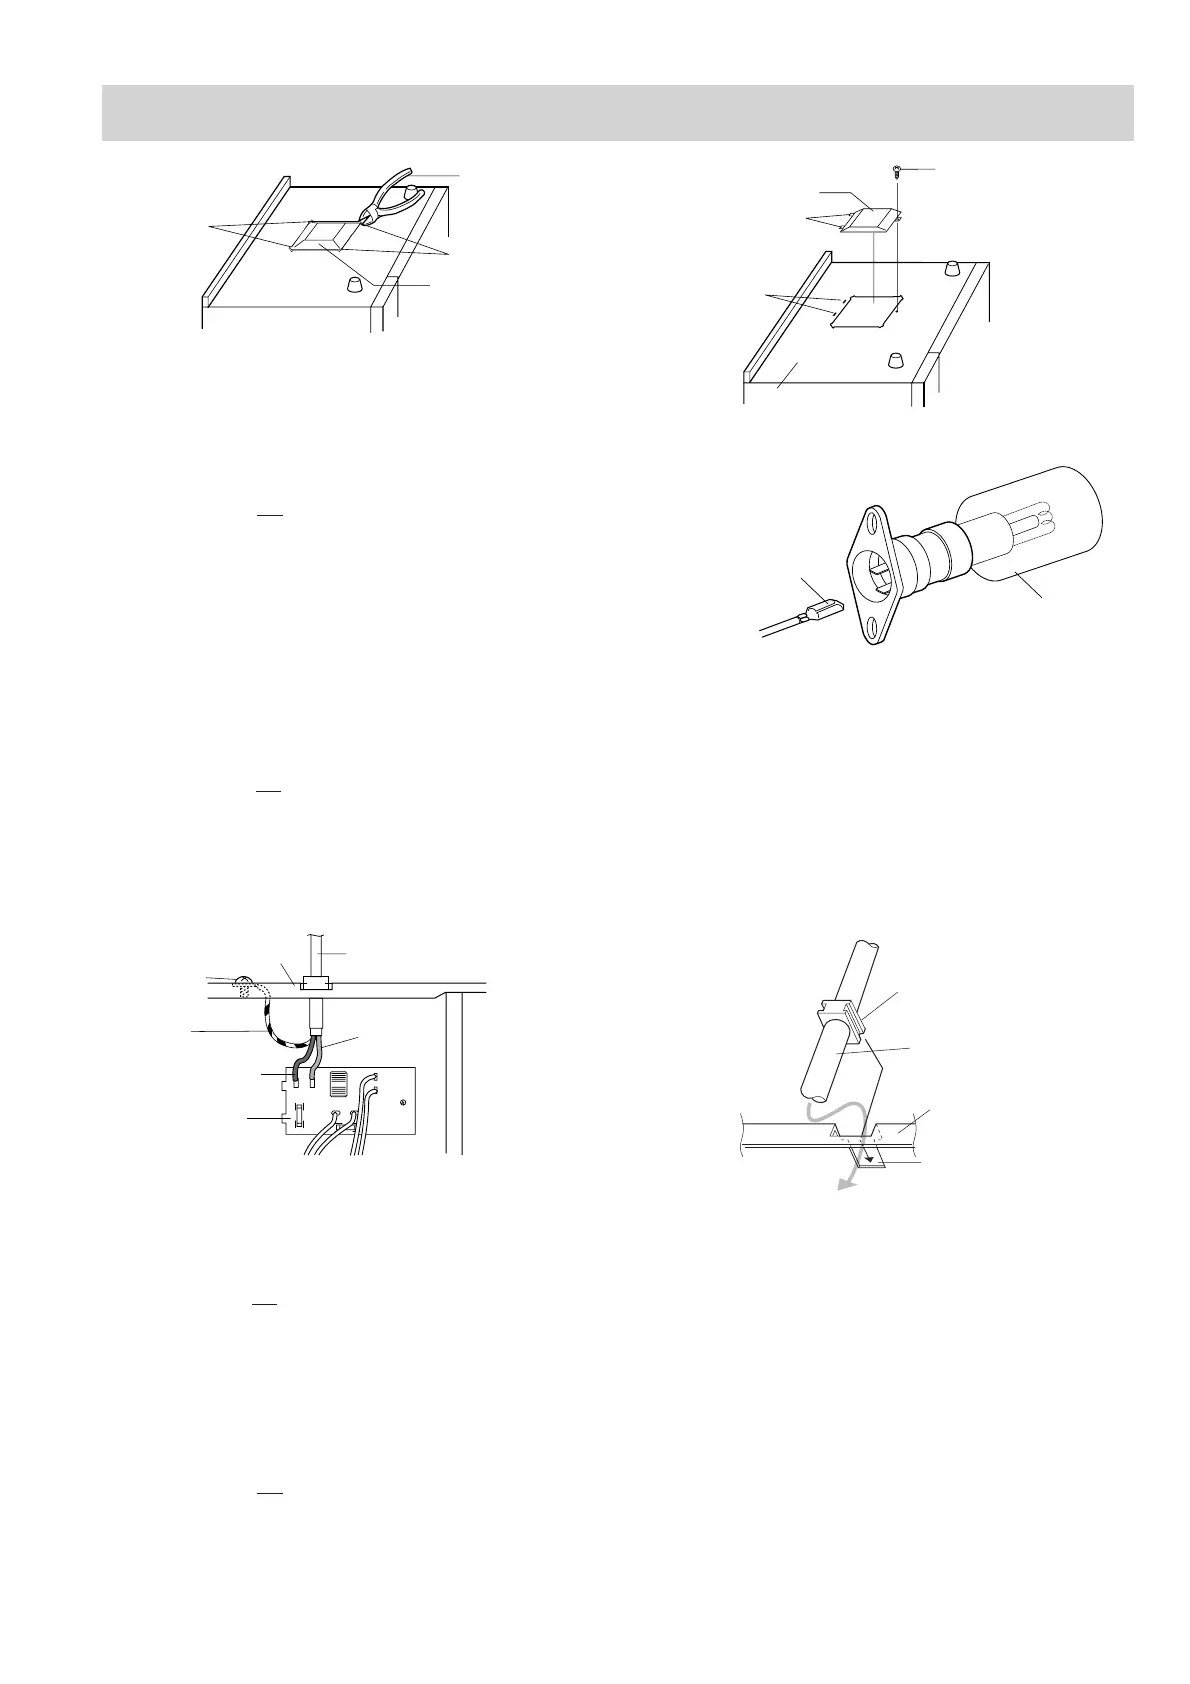
BULB
LOCK
Figure C-3. Oven lamp
2. Remove the two (2) wire leads as Positive lock
®
connector removal above.
3. Lift up the oven lamp from its retaining clips.
4. Now, the oven lamp is free.
Power supply cord
Green/ Yellow
wire
Brown wire
Oven cavity back plate
Blue wire
Noise filter
Screw
L
TP
F 8 A
TL
RED
20 A
WHT
N
POWER
SUPPLY CORD
MOULDING
CORD STOPPER
OVEN CAVIT
BACK PLATE
SQUARE HOLE
Cutting pliers
Bridges
Bridges
Turntable motor
cover
Screw;
LX-EZA045WRE0
Turntable motor cover
Base plate
Tabs
Slits
COMPONENT REPLACEMENT AND ADJUSTMENT PROCEDURE
OVEN LAMP SOCKET REMOVAL
Removal
1. CARRY OUT 3D CHECKS.
2. Remove the one (1) screw holding the green/yellow
wire to the cavity back plate.
3. Disconnect the leads of the power supply cord from
the noise filter, referring to the Figure C-4(a).
4. Release the power supply cord from the rear cabinet.
5. Now, the power supply cord is free.
Re-install
1. Insert the moulding cord stopper of power supply cord
into the square hole of the cavity backplate, referring to
the Figure C-4(b).
2. Install the earth wire lead of power supply cord to the
oven cavity with one (1) screw and tight the screw.
3. Connect the brown and blue wire leads of power supply
cord to the noise filter correctly, referring to the Pictorial
Diagram.
1. CARRY OUT 3D CHECKS.
2. Remove the two (2) screws holding the two (2) termi-
nals of the main wire harness to the top heating
element.
3. Remove the two (2) screws holding the two (2) grill
heater angles to the top of the oven cavity.
1. CARRY OUT 3D CHECKS.
2. Remove the turntable motor cover from the base plate,
referring to "TURNTABLE MOTOR REPLACEMENT".
3. Disconnect the wire leads from the bottom heating
element.
4. Remove the two (2) nuts holding the heater cover and
heater packing to the bottom heater.
Figure C-4 (a) Replacement of Power Supply Cord Figure C-4(b). Power Supply Cord Replacement
4. Remove the two (2) grill heater angles from the oven
cavity.
5. Remove the top heating element from the top of the
oven cavity.
6. Now the top heating element is free.
TOP HEATING ELEMENT REMOVAL
BOTTOM HEATING ELEMENT REMOVAL
5. Remove the heater cover and the heater packing from
the bottom heating element.
6. Re-move the two(2) nuts holding the bottom heating
element to the oven cavity.
7. Remove the bottom heating element from the oven
cavity .
1. CARRY OUT 3D CHECKS.
Figure C-2(a). Turntable motor cover removal FigureC-2(b). Turntable motor cover re-install
POWER SUPPLY CORD REPLACEMENT