Service and Maintenance Manual 3-124 960714-02B © 2007 I2407
SECTION 3 – COMPONENT REPAIR
STRIPPER PLATE ASSEMBLY (con’t)
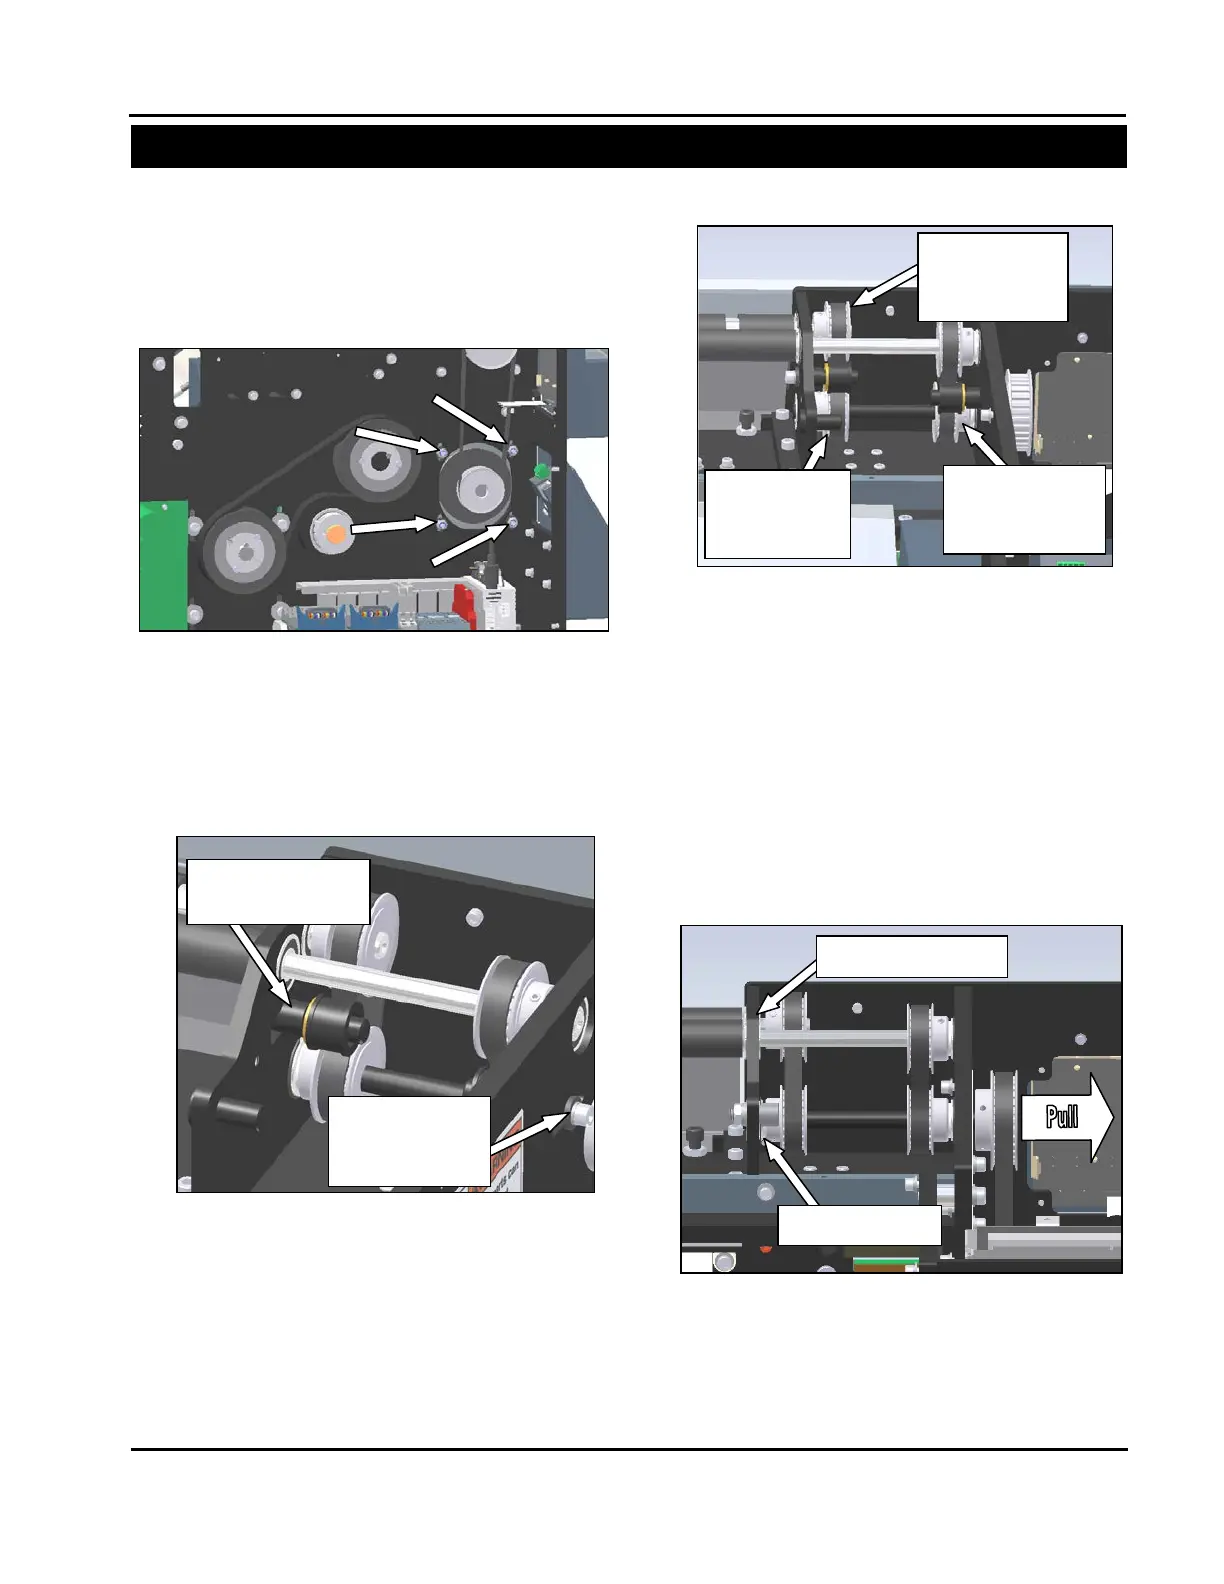
2. Loosen the four film feed motor mounting
screws. Slide the motor upward and remove
the belt (Figure 3-311).
3. Remove the take-up shaft for the film feed
roller drive belt. Note: if the Sharp SX is
equipped with a printer, also remove the take-
up shaft for the platen roller drive belt (Figure
3-12).
4. Loosen the set screws on the film feed drive
pulley on the transfer shaft, and the film feed
driven pulley on the roller shaft. Note: if the
Sharp SX is equipped with a printer, also
loosen the set screws on the platen roller drive
pulley (Figure 3-313).
5. Pull the transfer shaft out of the machine,
sliding the film feed driven pulley with it in
unison until the roller pulley is clear of the roller
shaft. The transfer shaft does not need to be
removed, only slid back until access to the
spring block mounting screws is obtained.
Note: there is a nylon washer between the left
bearing plate and the film feed drive pulley. Do
not misplace this washer, as it is needed for
proper machine operation (Figure 3-314).
Figure 3-311. File Feed Drive Motor Mounting
Take-Up Shaft
Take-Up Shaft
(Optional)
Figure 3-312. Film Feed Belt Take-Up Shaft
Note: Viewed from Rear; Cradle Removed for Clarity
Roller Driven
Pulley
Roller Drive
Pulley
Drive Pulley
Figure 3-314. Clearing the Transfer Shaft
Note: Viewed from Rear; Cradle Removed for Clarity