32
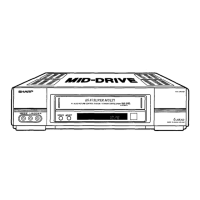
VC-A565U/VC-H965U (26-36)
Dimensions: 257 ⳯ 182 mm
Recording with the Timer
& Press SET.
• To programme the additional timer settings, press SET
and repeat steps @–&.
* Press MENU to finish settings.
The display shown to the left appears on the screen for 5
seconds, after which the normal screen returns.
( Press POWER to enter the timer standby mode. Be sure
that “ ” is lit up on the multi-function display.
TURN VCR POWER OFF
FOR TIMER RECORDING.
佡
Normal
Screen
佡
佡
1/2
8/10 07 9:05
PM
10:35
PM
SP
--/-- --- -:-- -:-- --
--/-- --- -:-- -:-- --
DATE CH START STOP
--/-- --- -:-- -:-- --
佡
• If the power is interrupted for more than 5 seconds (power failure, etc.) during timer recording, the Auto Clock Setting will
reset the time after the power is returned (the timer indicator on the multi-function display will flash.) but the timer settings will
be cancelled.
• Numbered buttons can be used instead of ∂/ƒ to set the data.
• If the cassette ends before recording all the programmes, the VCR will stop, turns its power off and ejects the tape
automatically.
• In Step (, if POWER is pressed with no cassette inserted, the TIMER indicator flashes for 5 seconds indicating that timer
recording is not possible.
• In Step (, if the inserted cassette is without the erasure protection tab, TIMER indicator flashes and the cassette is ejected.
• To stop timer recording, press STOP.
• If a button is not pressed within 3 minutes during the setting procedure, the screen will return to the normal screen.
• There are two timer setting screens (1/2, 2/2).