XG-C330X/C430X
1 – 2
[2] Parts Name and Basic Operation
MENU button
For displaying adjustment
and setting screens.
AUTO SYNC button
For automatically adjusting
images when connected to
a computer.
ENTER button
For setting items selected
or adjusted on the menu.
KEYSTONE button
For entering the Keystone
Correction mode.
STANDBY/ON button
For turning the power on and
putting the projector into
standby mode.
Remote control
sensor
Adjustment buttons
(///)
For selecting and adjusting
on-screen items.
Speaker
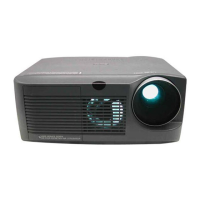
Focus ring
For adjusting the focus.
Zoom knob
For enlarging/
reducing the picture.
Air filter/Intake vent
(on the bottom of the projector)
Push both sides of the lens cap to
attach or remove.
RETURN button
For returning to the previous
display.
INPUT buttons
For switching input mode.
Volume buttons
For adjusting the speaker
sound level.
Temperature warning
indicator
Lamp indicator
Power indicator
Height Adjustment
button
Height Adjustment
button
Tilt dial
Adjustment foot
Adjustment foot
ECO/QUIET button
For lowering the noise of the
cooling fan and extending the
lamp life.
Projector
Top View
Front View
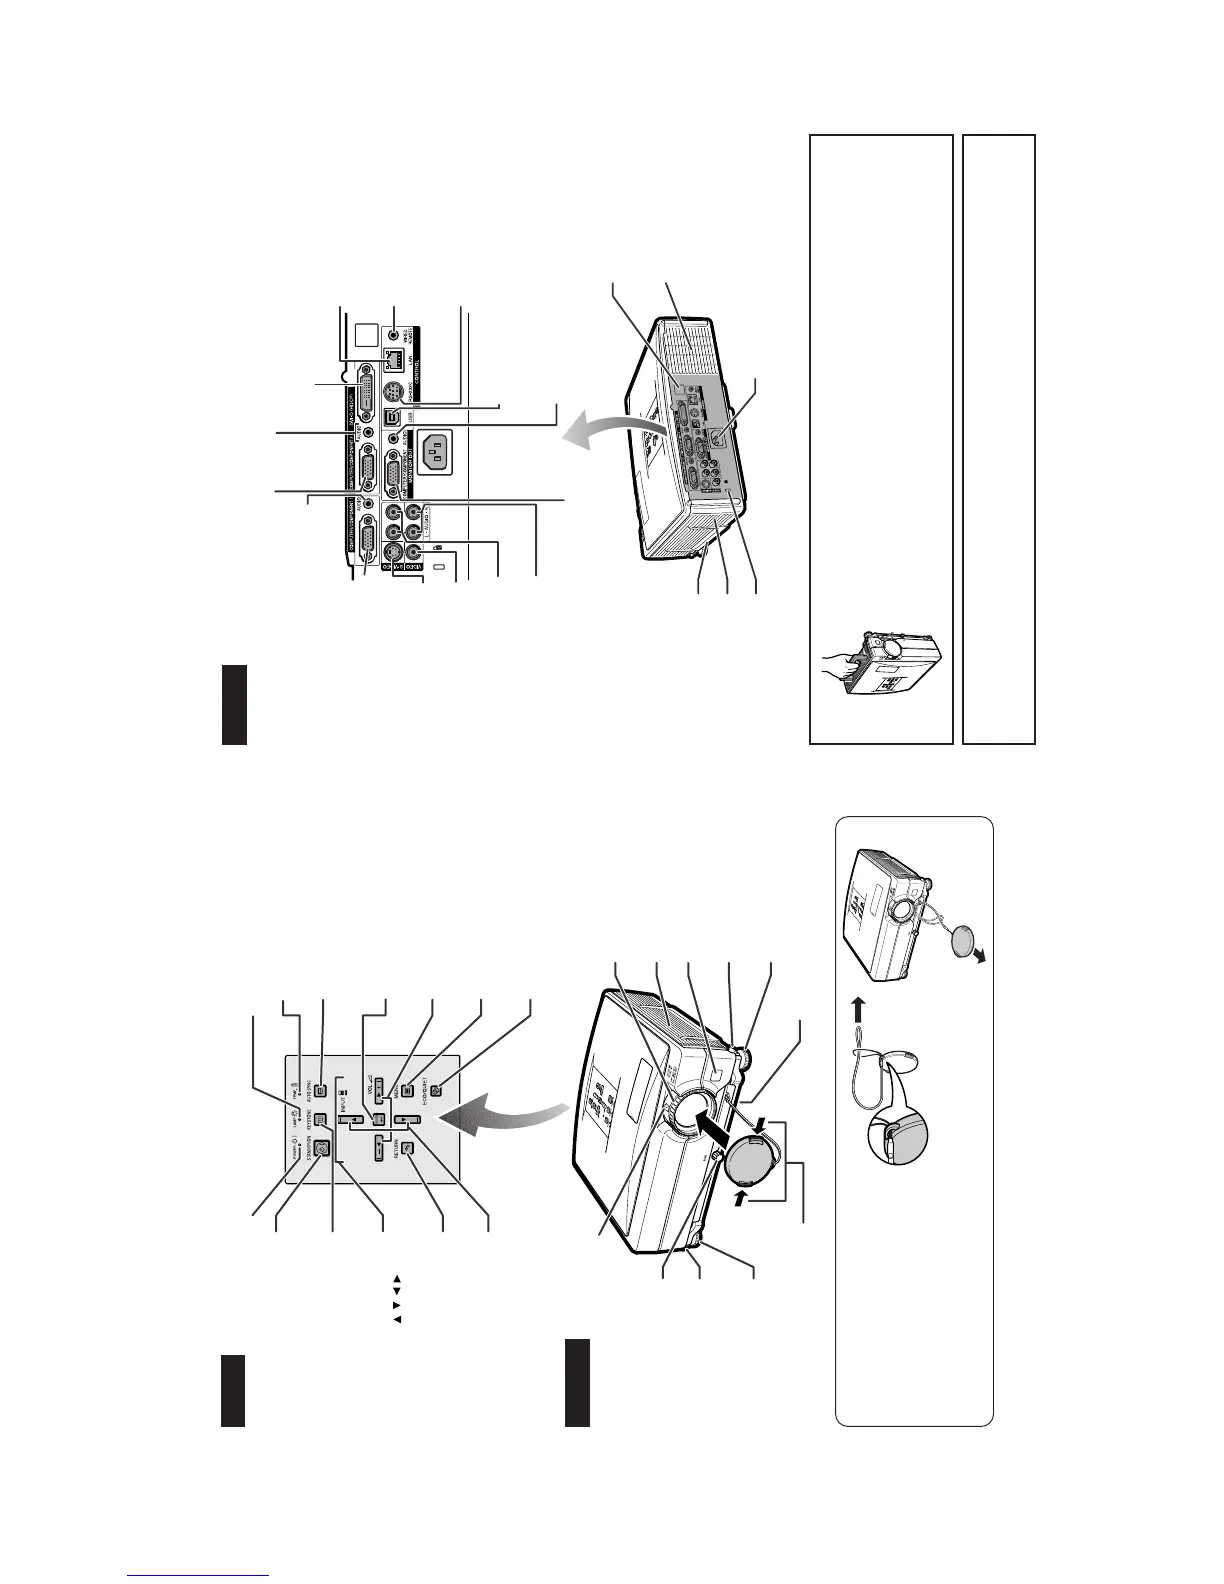
Attaching the lens cap
After putting the lens cap strap on the lens
cap, pass the other end of the strap
through the hole on the front side of the
projector, next to the lens, as shown in
the illustration.
Projector (Rear View)
* Using the Kensington Lock
• This projector has a Kensington Security Standard connector for use with a Kensington MicroSaver Security
System. Refer to the information that came with the system for instructions on how to use it to secure the
projector.
Intake vent
Carrying handle
Remote control
sensor
Exhaust vent
AC socket
Connect the supplied power cord.
* Kensington Security
Standard connector
LAN terminal
Terminal for controlling the
projector using a computer
via network.
RS-232C terminal
Terminal for controlling the
projector using a computer.
USB terminal
Terminal connecting with the USB terminal on the
computer for using the supplied remote control as the
computer mouse.
COMPUTER/COMPONENT 2 input terminal
Terminal for Computer RGB and Component signals.
á
á
25
23
á
DVI-D input terminal
Terminal for DVI Digital RGB and Digital Component
signals.
WIRED REMOTE terminal
For connecting the remote control
to the projector when the signals
from the remote control cannot
reach the remote control sensor.
AUDIO input terminal
Shared audio input terminal for COMPUTER/COMPONENT 2 and
DVI-D.
AUDIO output terminal
COMPUTER/COMPONENT 1
input terminal
Terminal for Computer RGB
and Component signals.
AUDIO input terminal
Audio input terminal for
COMPUTER/COMPONENT 1.
S-VIDEO input terminal
VIDEO input terminal
AUDIO input terminal
for Video
AUDIO input terminal
for S-video
MONITOR output terminal
Output terminal for Computer RGB and
Component signals.
Shared for COMPUTER/COMPONENT 1 and 2.
Terminals
Using the Carrying Handle
When transporting the projector, carry it by the carrying handle on the side.
• Always put on the lens cap to prevent damage to the lens when transporting the
projector.
• Do not lift or carry the projector by the lens or the lens cap as this may damage
the lens.