8 - HYDROSTATIC TRANSMISSION
128
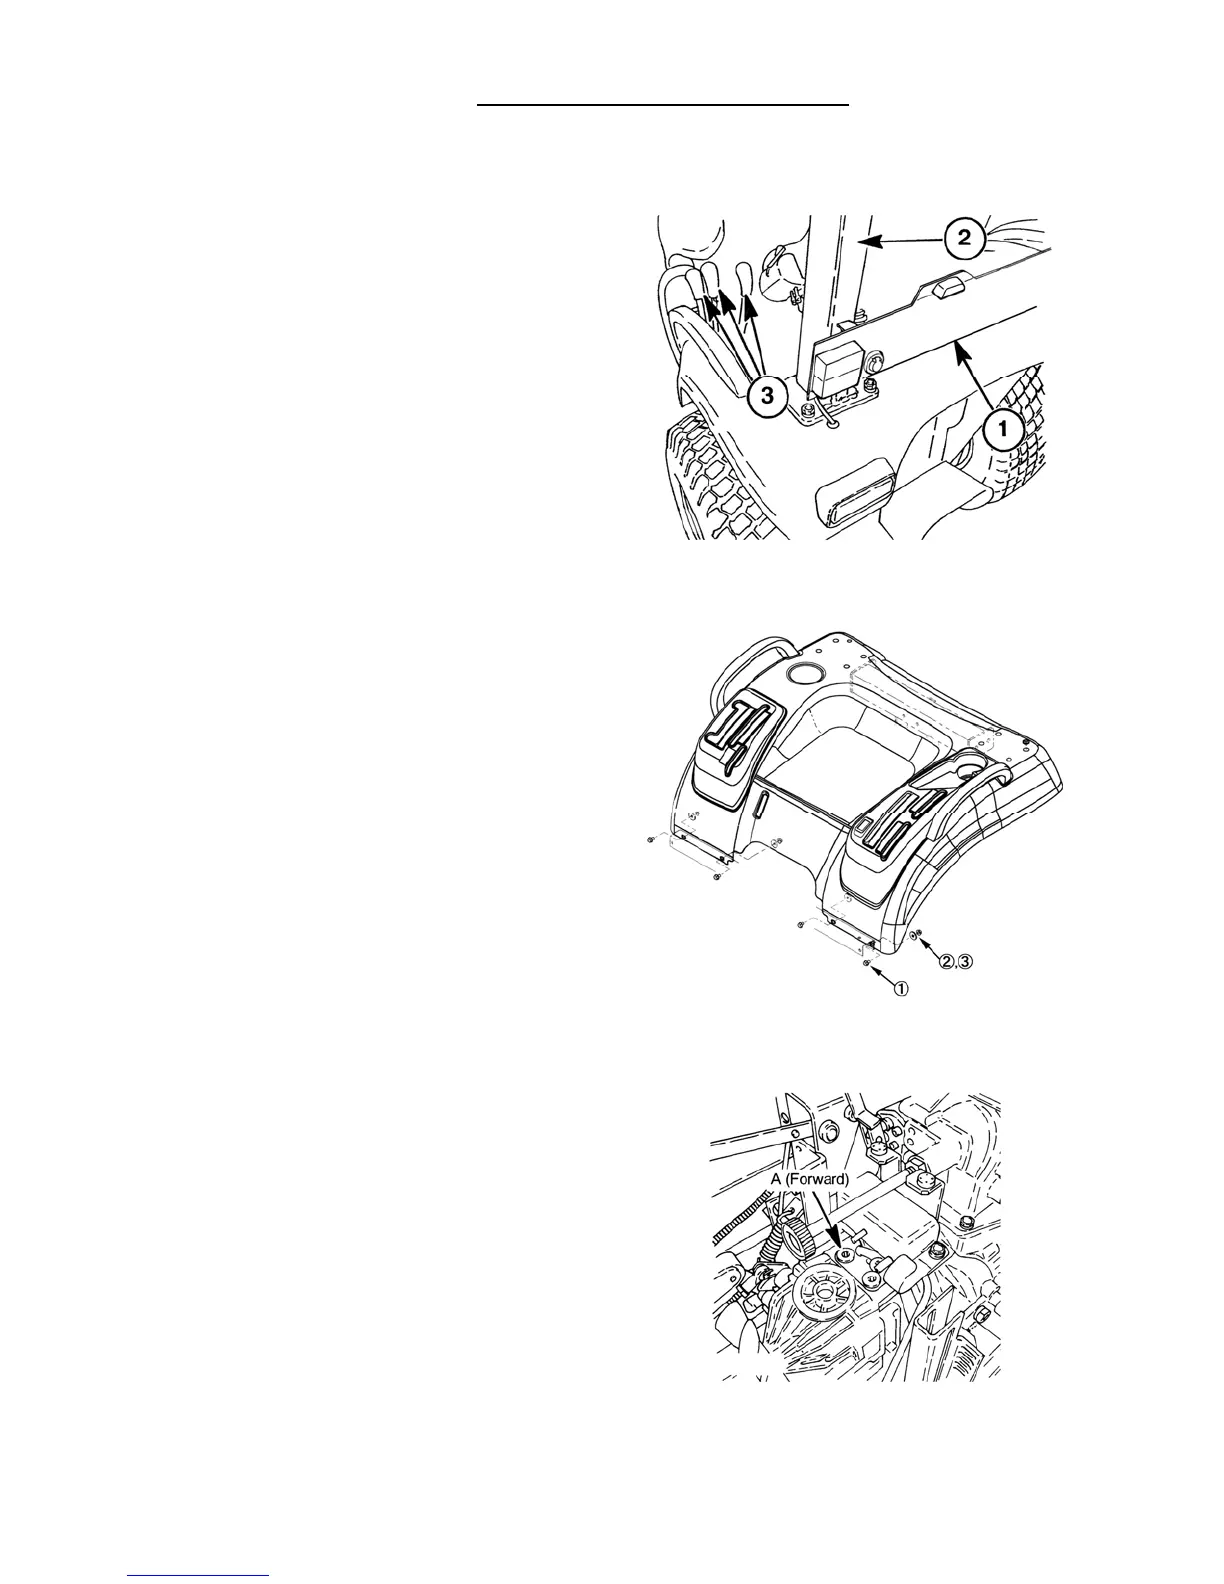
5. PRESSURE TESTING
1. Disconnect the wire harness plugs, under the fenders,
for the rear lights.
2. Remove the tool box, lights support, 1, and ROPS, 2,
from the tractor.
3. Remove the grips, 3, from the control levers.
4. Remove the four bolts, 1, washers, 2, and flanged
mounting nuts, 3, securing the lower front edges of
both fenders to the mounting struts under the foot
platform.
5. Lift the fender assembly straight up and off of the
tractor.
6. Use a floor jack to raise the tractor off the ground.
Support the tractor with jack stands. Be sure all
four wheels are off the ground, and jack stands do
not interfere with the tires.
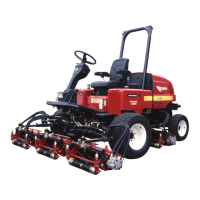
1) High Pressure Relief Valves
Forward Testing
1. Remove the plug from port “A” (forward) and
install a 0 – 35 MPa (0 – 350 kgf/c ㎡) gauge in the
port.
NOTE: Port “A” is used to check the high pressure
relief valve for forward travel of the HST.
2. Start the engine and place the range control lever
in the “High” range position.
3. Apply and hold the master brake pedal.
4. Depress the “Forward” pedal 1/3 of the way down.
5. Increase the engine speed to full throttle.
6. Observe the pressure gauge. Within 2 – 3 seconds,
the pressure reading should be approximately 17.2
MPa (175 kgf/c ㎡).
14
15
16