12 - POWER STEERING
222
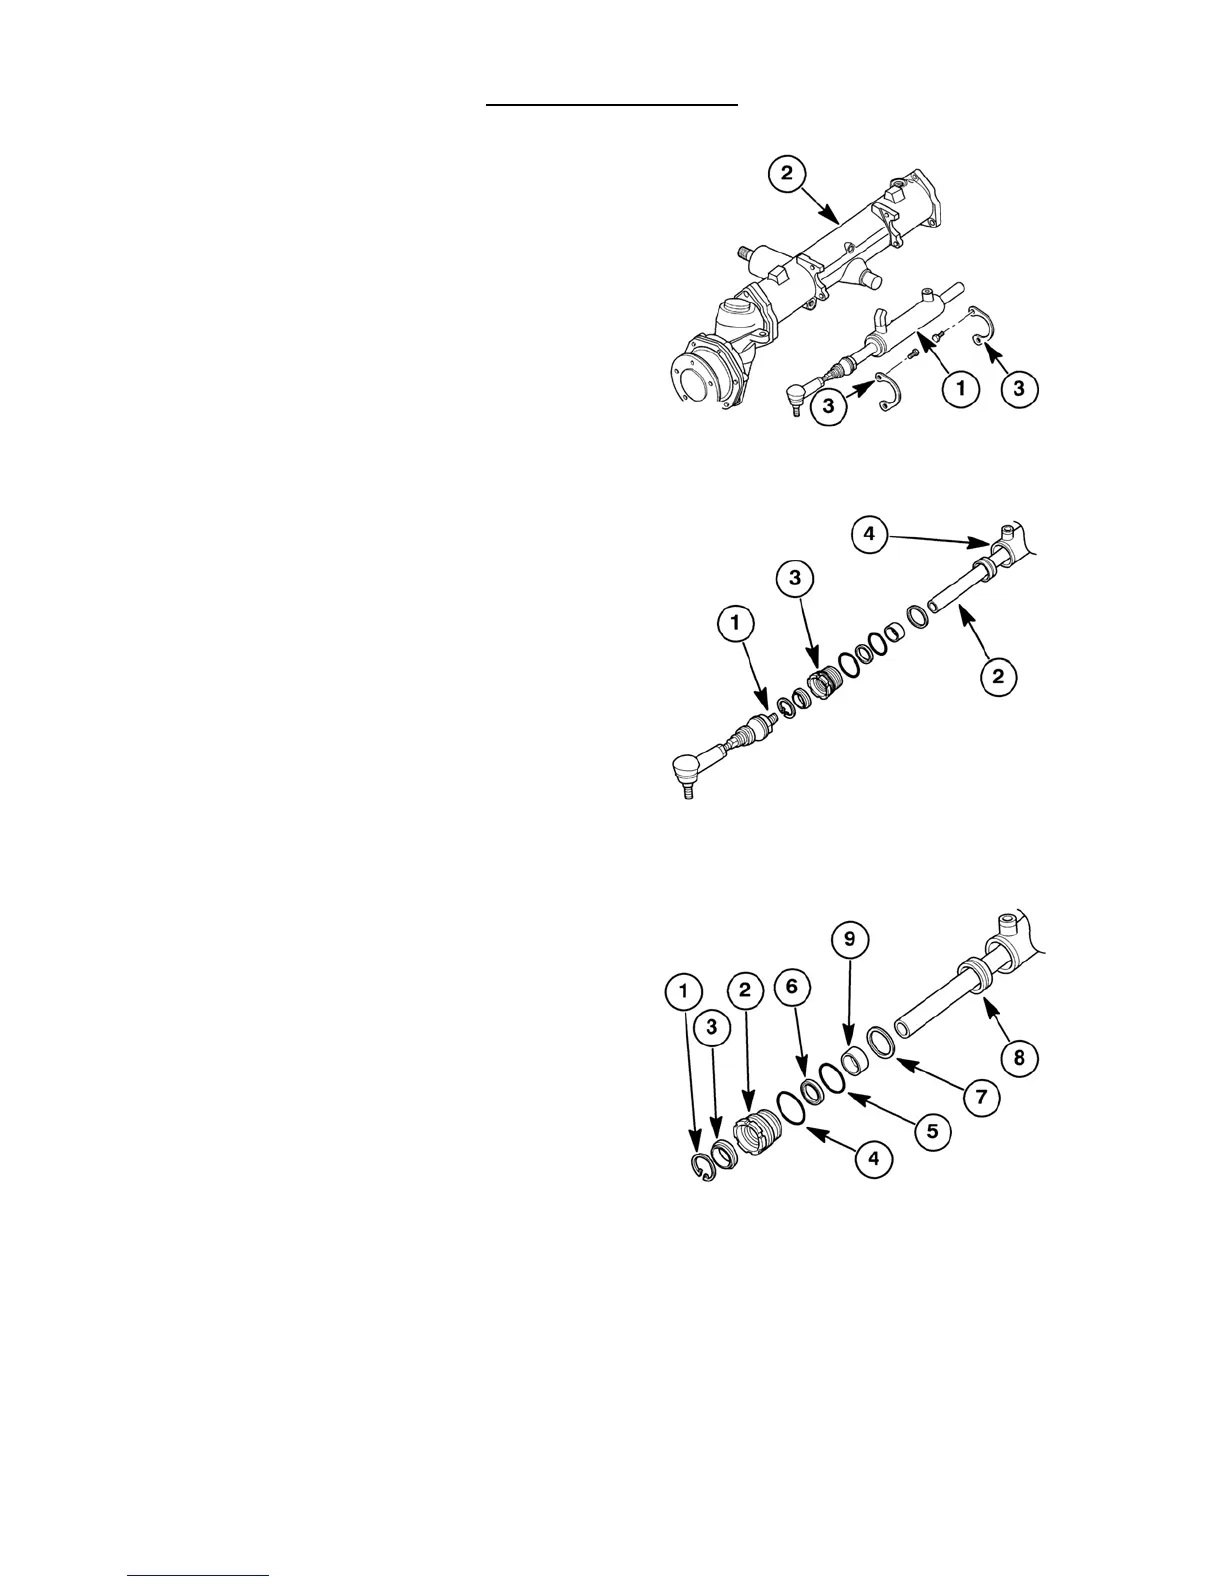
10. Remove the cylinder assembly, 1, from the front
axle assembly, 2, by removing the two mounting
brackets, 3.
2) Disassembly
IMPORTANT : Use a propane torch to heat the tie rod
end at the cylinder rod to soften the thread locking
compound to ease removal of the tie rod end from the
cylinder rod.
1. Heat the tie rod end, 1, at the cylinder rod, 2.
2. Remove the tie rod end from the cylinder rod.
3. Repeat for the opposite side.
4. Unscrew the gland assembly, 3, from the cylinder,
4.
5. Repeat for the opposite side.
6. Remove the retaining ring, 1, from the gland, 2.
7. Remove and discard the dust seal, 3.
8. Remove the O-rings, 4 and 5, from the gland.
9. Remove and discard the U ring, 6, from the gland.
10. Repeat for the opposite side gland assembly.
11. Remove and discard the piston ring, 7, from the
piston, 8.
12. Check rod to bushing, 9, clearance. If clearance is
above specs, remove bushing with a suitable tool.
13. Remove rod/piston from the cylinder.
3) Inspection
1. Clean all parts in a suitable solvent and air dry.
2. Inspect the inside of the cylinder barrel for excess
wear, scuffing or scarring.
3. Inspect the piston for scuffing, score marks, or
other damage. Replace with new components if
damaged.
4. Inspect the cylinder rod for excess wear,
straightness, and scoring. Replace if damaged.
5. Check the rod to gland head bushing clearance.
Replace the bushing, 9, if the clearance is in excess
of 0.3 mm.
6. On assembly, replace all O-rings and seals with
new.
52
53
54


 To Next Page