COD.642400 Rev. 1
15
AUTOMATIC GAUGE SETTING
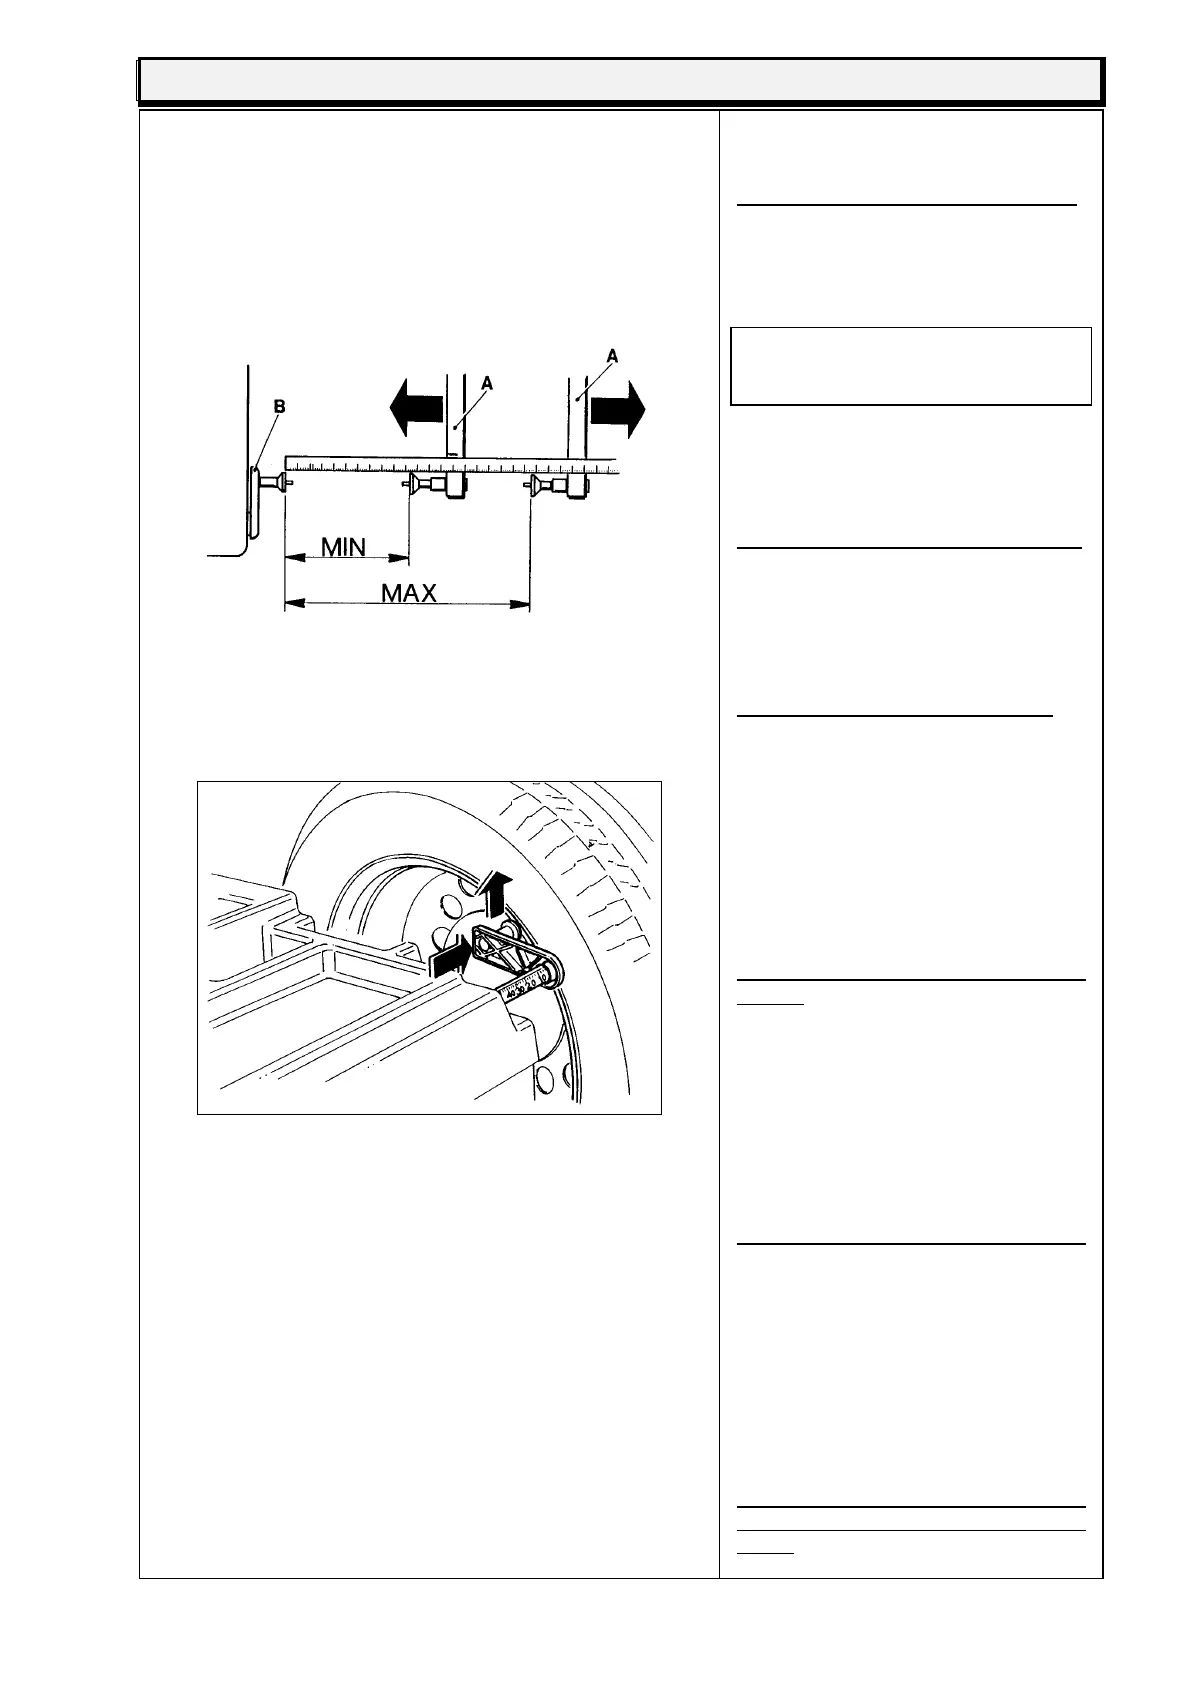
fig.21
fig.22
Pressing "C 3 2 E" gives access to the
automatic calibration gauge.
"D 1" appears on the left-hand display.
Move the millimetre slider B to the rest
position. On the keyboard set the the
number read on the millimetre rule.
N.B. each notch = 1mm.
The value to set in D1 is 2 (the fixed
figure given by the maker).
The measurement will appear on the
right-hand display. Check that the
cursor B is in the rest position, and
press "E".
On the left-hand display "D 2" appears.
Move the millimetre slider B to the
maximum open position and enter the
reading on the keyboard, then holding
it in position, press "E". Then return it
to the rest position.
The left display will now show "L 1".
Move cursor A to the maximum open
position and measure the distance
(with the ruler) between the millimetre
cursor and the external cursor (see fig.
21). keeping the stamped marks
aligned. Key the figure in mm on the
keyboard and the measurement will
appear on the right-hand display.
Maintaining this position, press "E".
Now "L 2" will appear on the left-hand
display.
Move the exterior cursor A to the
minimum open position, and keeping it
aligned, measure the distance between
the two stamped marks. Key the
measurement on the keyboard and the
measurement will appear on the right-
hand display. Keeping it in position,
press "E".
Now on the left-hand display "ALT"
(height) appears.
Mount a wheel on the machine (if
possible 13" - 14"). Move the millimetre
cursor with the stamped mark onto the
rim (see fig. 21). and enter the height
in inches of the wheel mounted on the
keyboard. Holding it in this position,
press "E".
To store the settings press "STOP
CAL 5 2 6 E", and wait for the "Beep"
signal.