4
Last update: 03.2014
KFVkeyless
Operating instructions
2.2 Installation of KFVkeyless module in the door sash
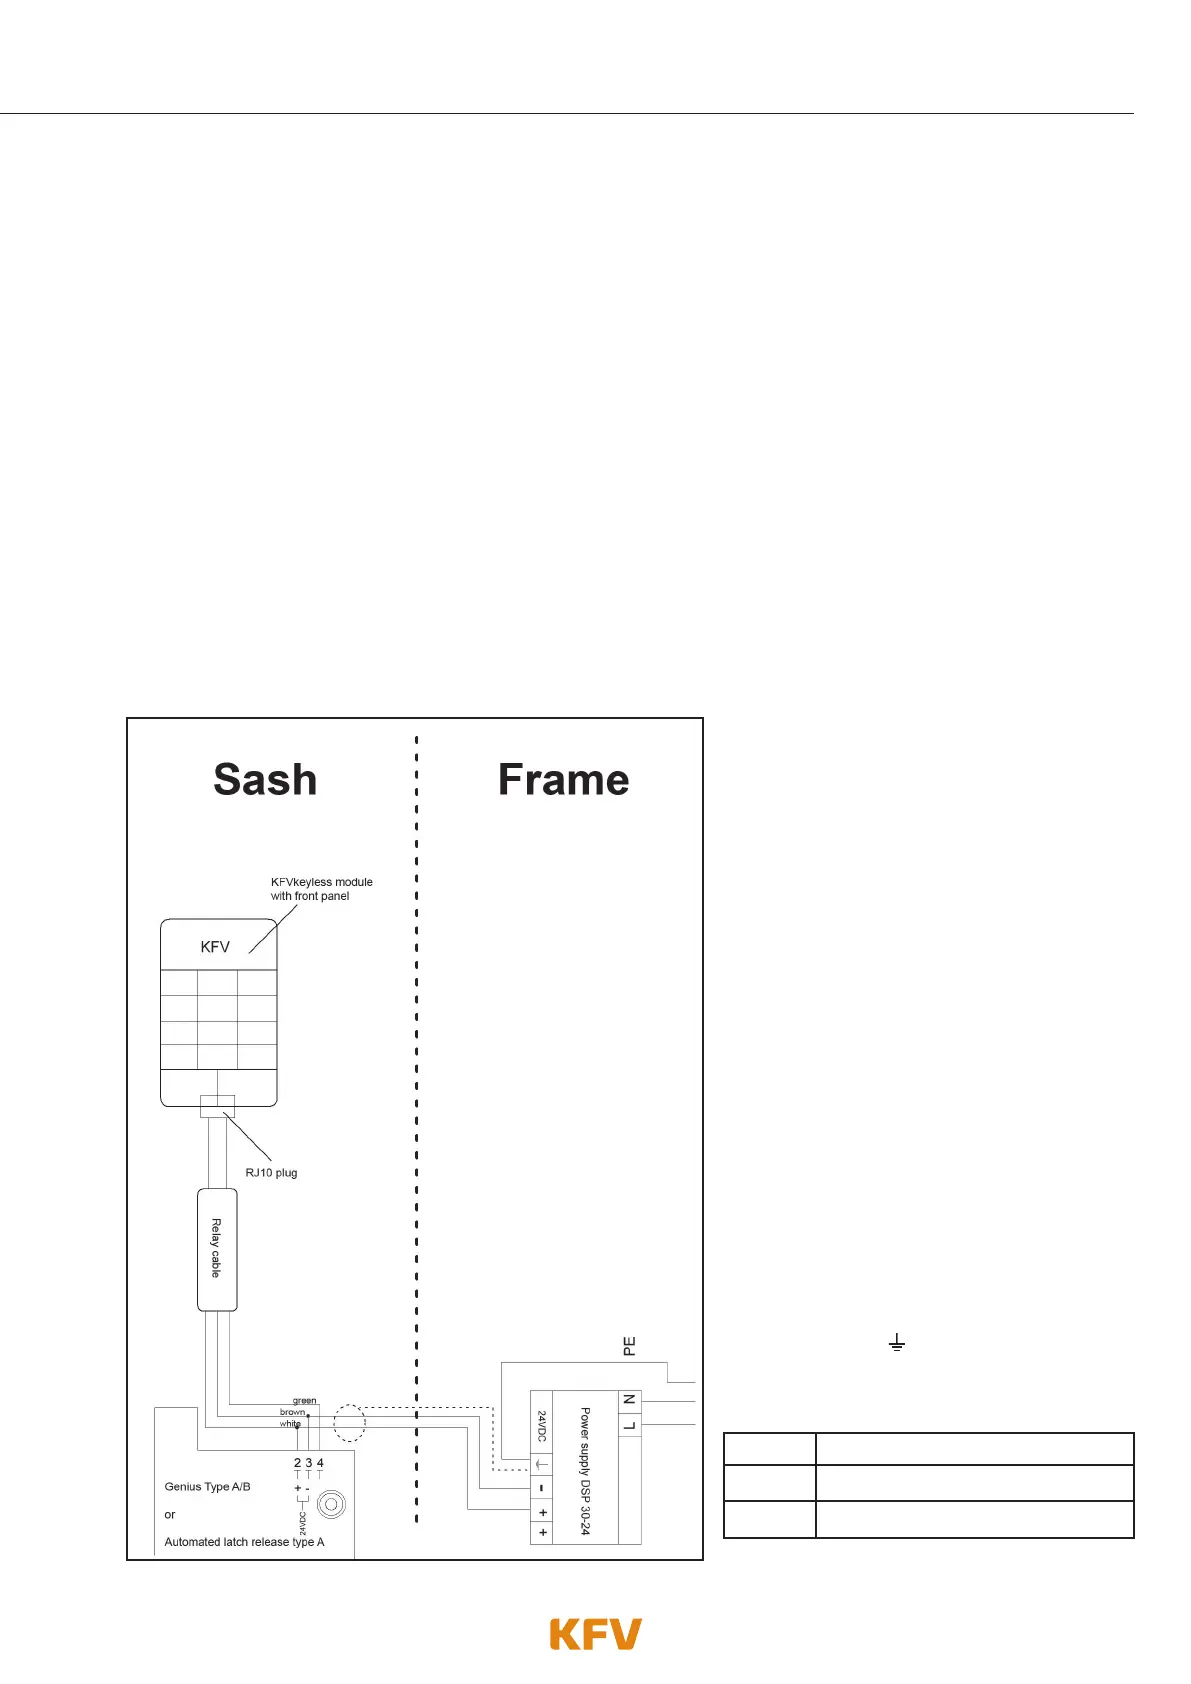
Attention! The power must be disconnected throughout the installation of the entire
system.
Holes of 20 mm in diameter should be drilled into the door sash in order to install the 1.5 m long relay
cable supplied with the system.
To ensure correct installation, please follow the steps below:
1. Switch off the supply voltage at the terminal.
2. Route relay cable according to wiring diagram (see diagrams below).
3. Connect the white cable with +24 V DC.
4. Connect the brown cable to the minus terminal.
5. Connect the green cable to terminal 4 of the KFV GENIUS or the KFV A opener.
6. Remove the front panel of the KFVkeyless module by pushing it upwards.
7. Position the black rubber sealing ring over the KFVkeyless module from the rear.
8. Clip the RJ10 plug into the corresponding bush of the KFVkeyless module.
9. Fit the KFVkeyless module into the prepared cut-out.
10. Fix the KFVkeyless module using the four side spring clips.
11. Screw the front panel onto the KFVkeyless module again from the top.
12. Switch on the supply voltage at the power supply.
Attention!
It is essential to connect the shield of the cable
on the power supply side with the connecting
terminal provided ( ) and also the earth con-
nection (PE) with the earthing terminal!
Green
Switching pulse
Brown
24 V DC Supply voltage Minus
White
24 V DC Supply voltage Plus