Installation instructions7SV512
V1
42
C53000---G1176---C91
5.2.1 Mounting and connections
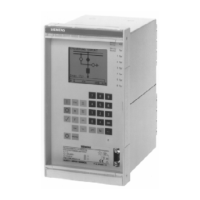
5.2.1.1 Model 7SV512K---KBKKK for panel sur-
face mounting
--- Secure the unit with four screws to the panel. For
the dimensions refer to Figure 2.2.
--- Connect the earthing terminal (Terminal 16)of the
unit to the protective earth of the panel.
--- Make a solid low-ohmic and low-inductance op-
erational earth connection between the earthing
surface at the side of the unit using at least one
standard screw M4, and the earthing continuity
system of the panel; recommended grounding
strap DIN 72333 form A, e.g. Order-No. 15284 of
Messrs Druseidt, Remscheid, Germany.
--- Make connections via screwed terminals.
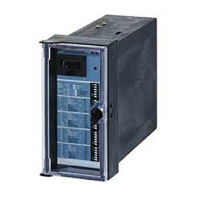
5.2.1.2 Model 7SV512K---KCKKK for panel flush
mounting or cubicle installation
--- Lift up both labelling strips on the lid of the unit
and remove coverto gain access to the fourholes
for the fixing screws.
--- Insert the unit into the panel cut-out and secure it
with the fixing screws. Forthe dimensions refer to
Figure 2.3.
--- Connect the earthing screw onthe rear of the unit
to the protective earth of the panel or cubicle.
--- Make a solid low-ohmic and low-inductance op-
erational earth connection between the earthing
surface at the rear of the unit using at least one
standard screw M4, and the earthing continuity
system of the panel or cubicle; recommended
grounding strap DIN 72333 form A, e.g. Order-
No. 15284 of Messrs Druseidt, Remscheid, Ger-
many.
--- Make connections via the screwed or snap-in ter-
minals of the sockets of the housing. Observe la-
belling of the individual connector modules to en-
sure correct location; observe the max. permissi-
ble conductor cross-sections. The use of the
screwed terminals isrecommended; snap-in con-
nection requires special tools and must not be
used forfield wiring unless proper strain reliefand
the permissible bending radius are observed.
5.2.2 Checking the rated data
The rated data of the unit must be checked against
the plant data. This applies in particular to the rated
current of the current transformers and rated d.c.
voltage of the substation battery.
5.2.2.1 Control d.c. voltage of binary inputs
When delivered from the factory, the binary inputs
are designed to operate in the total control voltage
range from 19 V to 288 V. If the rated control voltage
forthe binary inputs is110 Vor higher,it is advisable
to select a higher pick-up threshold to these inputs
to increase stability against stray voltages in the d.c.
circuits.
To select a higher pick-upthreshold ofapproximate-
ly 80 V for a binary input a solder bridge must be re-
moved. Figure 5.1 shows the allocation of these sol-
der bridges for the inputs BI 1and BI 2, and their lo-
cation on the basic p.c.b. (EPS) of the module. Fig-
ure 5.2 shows the assignment of these solder
bridges for the inputs BI 3 to BI 10 and their location
on the additional p.c.b. (EAZ---2).
--- Open housing cover.
--- Loosen the module using the pulling aids pro-
vided at the top and bottom.
Electrostatic discharges via the compo-
nent connections, the PCB tracks or the
connecting pins of the modules mustbe
avoided under all circumstances bypre-
viously touching an earthed metal sur-
face.
!
Caution!
--- Pull out module and place onto a conductive sur-
face.
--- Check the solder bridges according to Figure 5.1
and 5.2, remove bridges where necessary.
--- Insert module into thehousing; ensure that there-
leasing lever is pushed fully to theright beforethe
module is pressed in.
--- Firmly push in the module using the releasing le-
ver.
--- Close housing cover.
 Loading...