2 Safety and Care
Instructions for Use 2 - 31
Clean and disinfect the gel
warmer
Caution: To avoid damage to the gel warmer, do not immerse the gel warmer in
water or any solution.
Note: To facilitate cleaning, remove the cap at the bottom of the gel warmer. Rotate
the cap counterclockwise to remove the cap; rotate the cap clockwise to secure the
cap.
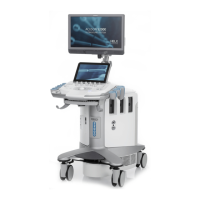
1. Remove the gel warmer from the ultrasound system.
a. Unplug the power cable attached to the gel warmer from the ultrasound system.
The connector on the ultrasound system is located on the right or left side of the
control panel, just behind the point of attachment for the gel warmer.
b. Reach under the gel warmer to locate the tab on the gel warmer. The tab
extends below the point of attachment to the ultrasound system.
c. Squeeze the tab towards the gel warmer and pull the gel warmer downward.
2. Unplug the power cable from the gel warmer.
3. Clean and disinfect the gel warmer using an approved disinfectant wipe.
4. Reattach the gel warmer to the ultrasound system.
a. Attach one end of the power cable accompanying the gel warmer to the
connector on the back of the gel warmer and then attach the other end of the
power cable to the connector on the ultrasound system.
b. Align the support on the gel warmer directly below the point of attachment on the
ultrasound system and firmly push upwards until the gel warmer snaps into
place.
 Loading...