42
GB
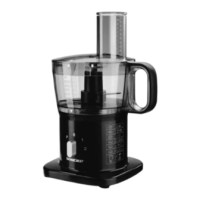
Required accessories:
-Axle9
- Working container8
- Adapter7
- Whisking disc17
-Lid3 with food pusher1
Work steps:
1. Figure B: place the axle9 on the base
unit12.
2. Figure C: position the working con-
tainer8 in position a on the base
unit12. Turn the working container
clockwise slightly until it audibly clicks
into position b.
3. Figure D: place the adapter7 on the
axle9.
4. Place the whisking disc17 on the
adapter7. Turn the whisking disc17
back and forth slightly until it sits on the
bottom.
5. Fill the ingredients into the working con-
tainer8. Further ingredients can be
added at a later time through the food
chute2.
6. Figure E: place the lid3 on the work-
ing container8. Turn the lid slightly in a
clockwise direction until it audibly clicks
into place.
7. Figure G: place the food pusher1
into the food chute2.
8. Connect the mains plug10 to a wall
socket.
9. Use the dial11 to select the desired
speed setting.
10. When the process is completed, switch
the dial11 to 0 and pull out the mains
plug10.
11.
Turn the lid3 with the food pusher1
slightly in an anticlockwise direction
and remove it.
12. Turn the working container8 slightly
anticlockwise and remove it.
13. Pull the axle9 downwards from the
working container8.
14. Remove the adapter7 together with the
whisking disc17 upwards and remove
the prepared food from the working
container8.
15. Clean all of the accessories that have
been used immediately if possible.
__355017_2004_Kuechenmaschine_B8.book Seite 42 Donnerstag, 24. September 2020 1:10 13
 Loading...