32
Domestic hot water circuit:
– open the isolation valves of the domestic hot water circuit (if
present)
– open one or more than one hot water valve to fill and bleed the
domestic hot water circuit
– once bleeding has been completed, close the hot water valves.
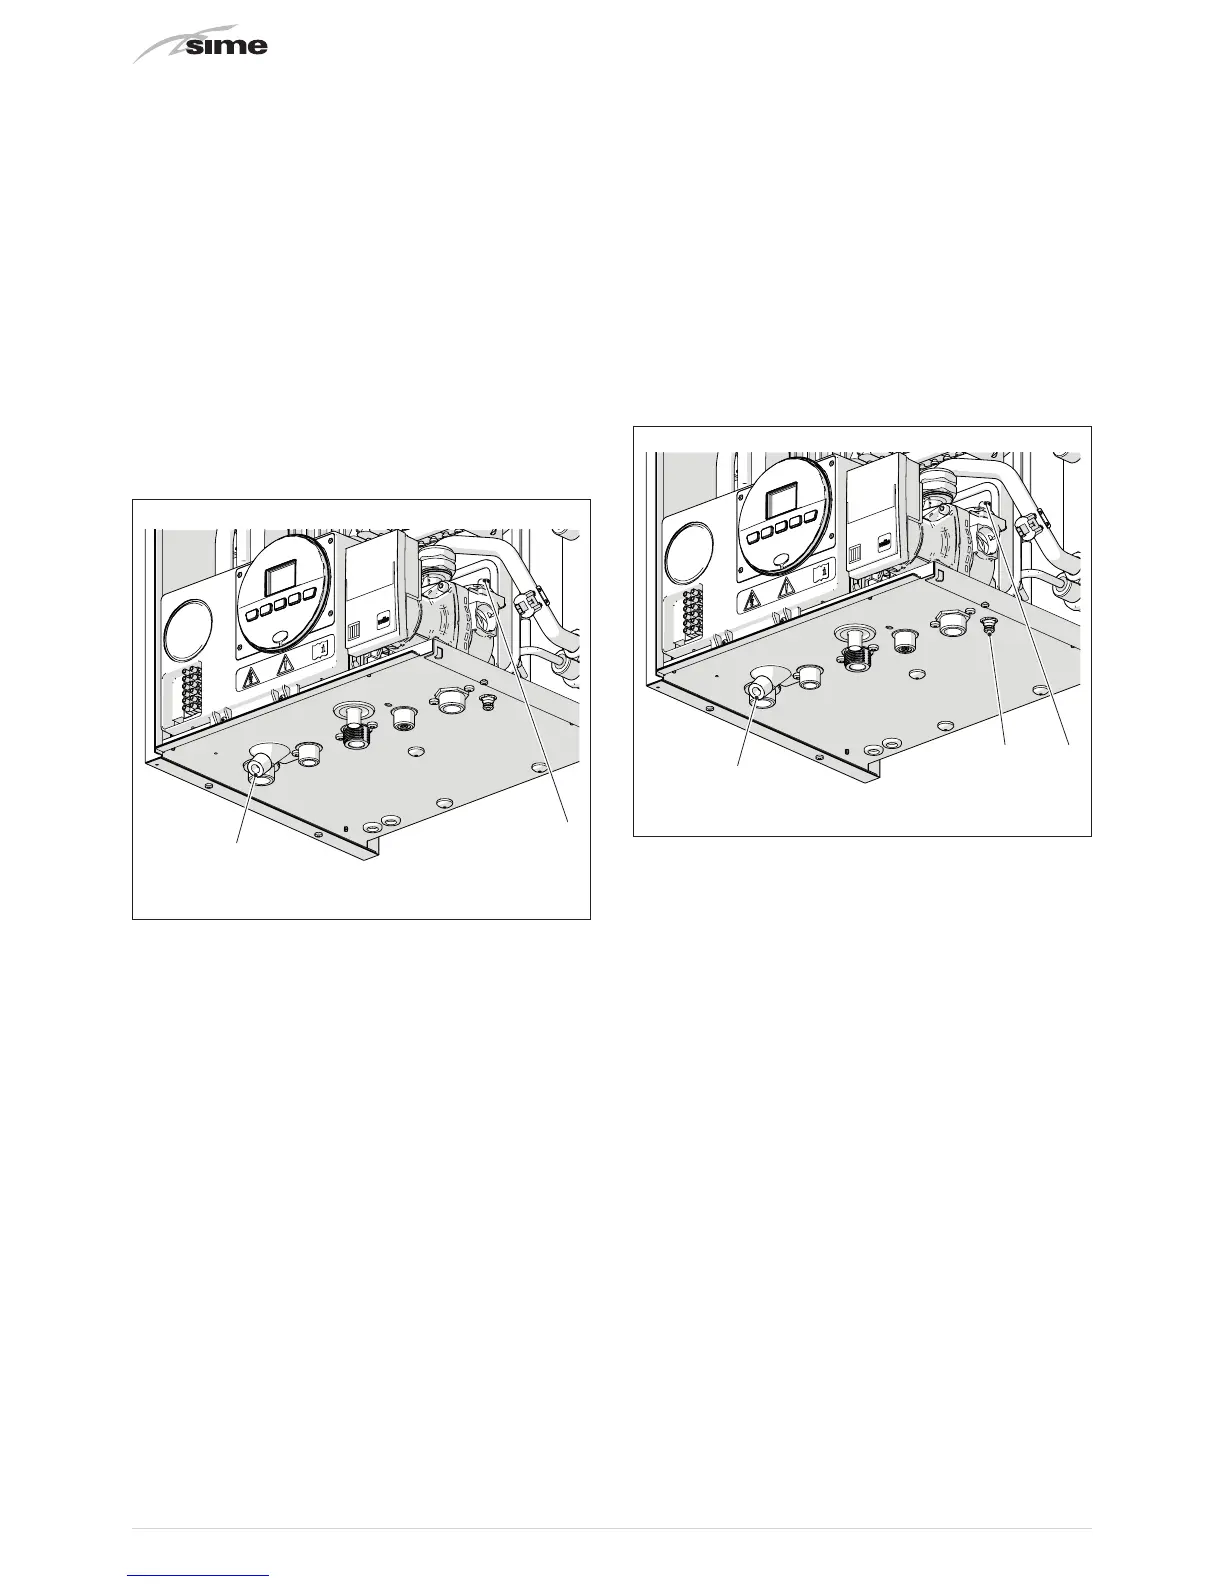
Heating circuit:
– open the isolation and air bleeding valves in the highest points
of the system
– loosen the automatic bleed valve (3)
– open the isolation valves of the heating circuit (if present)
– Open the filling valve (4)
– Fill until the water overflows from the air bleeding valves and
shut off the valves again
– Continue filling until the pressure reaches
1-1.2
bar as shown
on the display
– close the filling valve (4)
– check that there is no air in the system by bleeding all the
radiators and the circuit on the high points of the system
4
3
Fig. 39
NOTE:
to completely remove all air from the system, it is
recommended that this operation is repeated a number of times.
– check the pressure on the display and if necessary top up until
the correct pressure reading appears
– close the automatic bleed valve (3).
Refit the front panel of the boiler hooking it on at the top,
pushing it forwards and securing it with the screw (1) which was
removed previously.
6.13.2 EMPTYING operations
Domestic hot water circuit:
– close the domestic hot water circuit isolation valve
(prearranged in installation)
– open one or more than one hot water valve to fill and bleed the
domestic hot water circuit.
Boiler:
– loosen the automatic bleed valve (3)
– close the heating circuit isolation valves (prearranged in
installation)
– check that the filling valve (4) is shut-off
– connect a rubber hose to the boiler drain valve (7) and open it
– when it has fully emptied, close the drain valve (7)
– close the automatic bleed valve (3).
4
3
7
Fig. 40