EasyManuals Logo

Simplex 4007ES User Manual

Simplex 4007ES
44 pages
To Next Page IconTo Next Page
To Previous Page IconTo Previous Page
Page #11 background imageLoading...
Page #11 background image
2-5
Chapter 2 Installation
Power
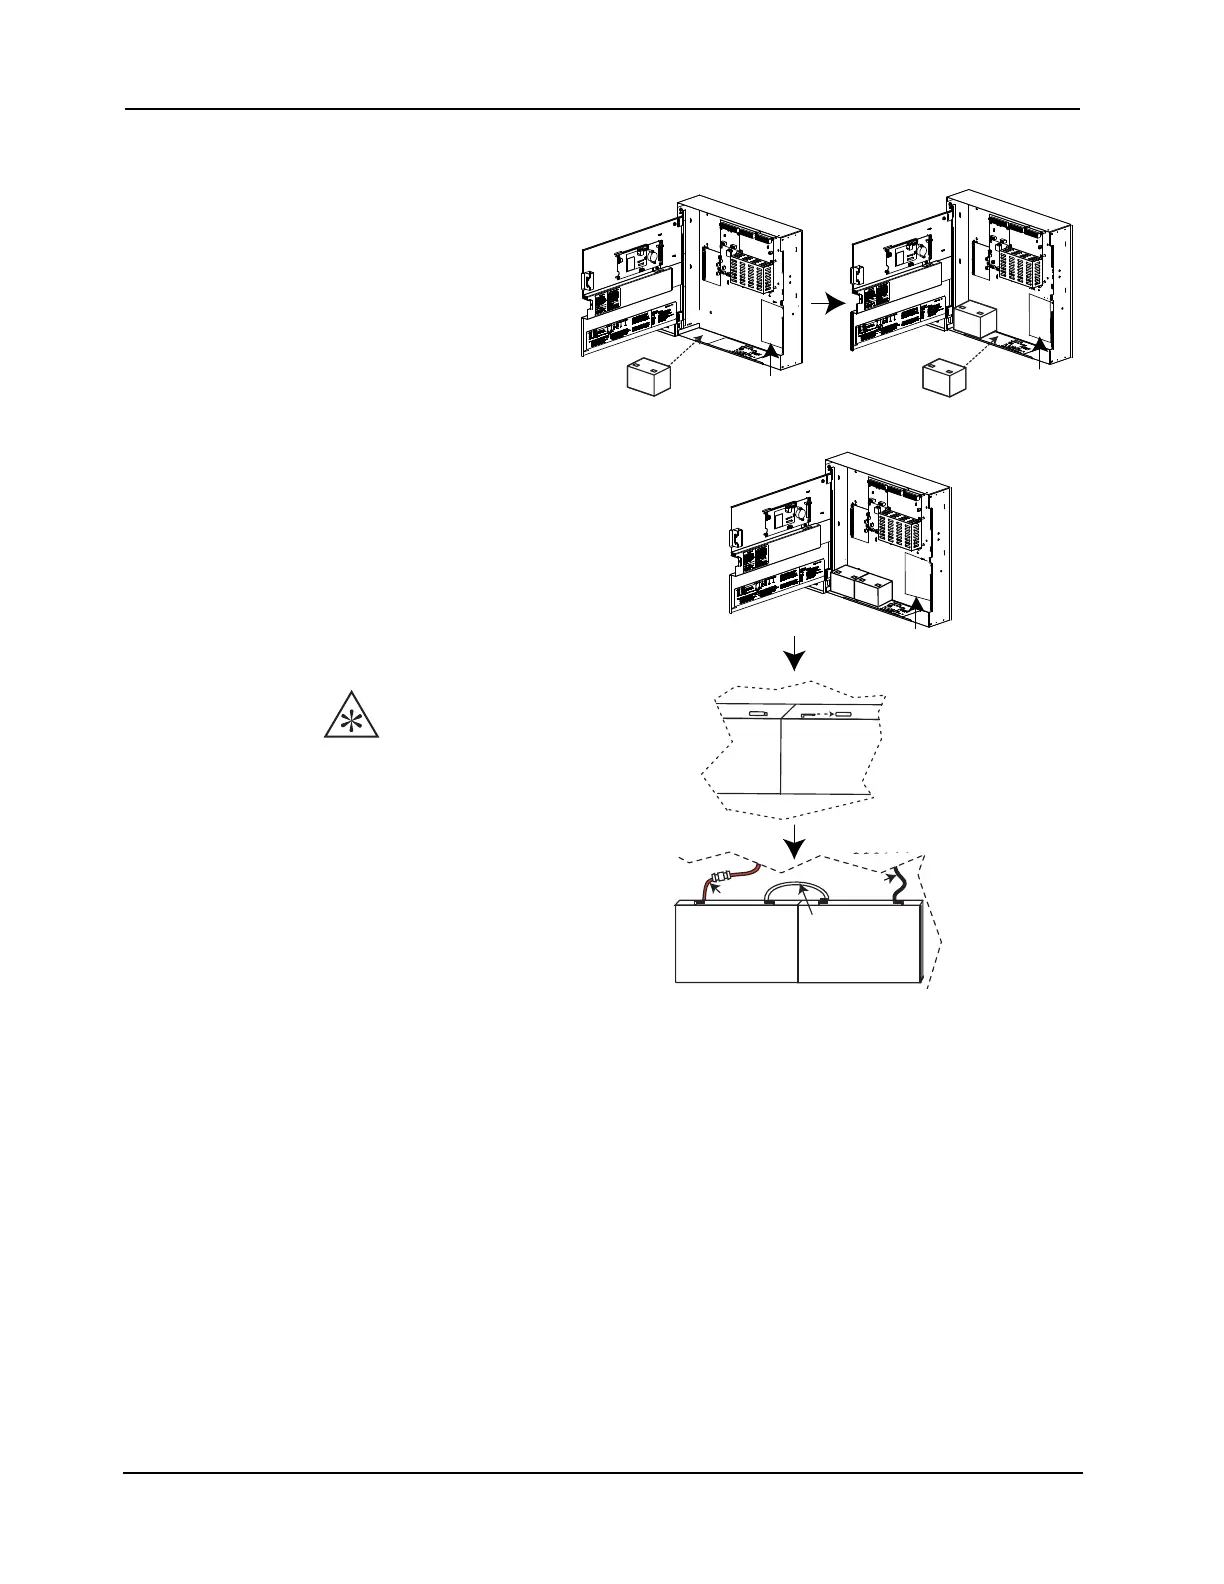
Final Installation To finalize the installation:
1. Reinstall the power supply and the electronics.
2. Follow the steps below to
install the batteries:
a. Place the first battery on
the left side of the panel
to avoid interference
with the DACT (if
installed).
Note:
The battery terminals should face
the front of the box.
b. Insert the second battery
and make sure it is
snugly positioned beside
the first battery.
c. Wire the batteries in
series such that you have
24 V. Use the white wire
provided to bridge the
batteries together. (see
Figure 2-7).
Power up the system:
1. Connect the negative lead
to the battery.
2. Apply AC.
3. Connect the positive to the
battery.
Figure 2-7. Power Supply
Jumper
Negative
Positive
SDACT
SDACT
SDACT
IMPORTANT:
Verify all field
wiring before
applying any
power to the panel.

Table of Contents

Other manuals for Simplex 4007ES

Questions and Answers:

Question and Answer IconNeed help?

Do you have a question about the Simplex 4007ES and is the answer not in the manual?

Simplex 4007ES Specifications

General IconGeneral
Model4007ES
CategoryFire Alarms
Operating Temperature32°F to 120°F (0°C to 49°C)
Humidity RangeUp to 93% RH, non-condensing
Display4.3-inch color touchscreen
Power Supply120/240 VAC, 50/60 Hz
Network ConnectivityEthernet, RS-232, RS-485
Addressable Points250
Communication ProtocolsMAPNET II
Notification Appliance Circuits4 NACs
Total Points250
AnnunciationYes
Max Devices250
Max Notification Circuits4
Communication PortsRS-232, USB

Related product manuals