• If used, the Class B motherboard (575-275) must be installed to the left of the relay cards. If a physical bridge is used with the Class B
motherboard, it must be to the right of any motherboards using NICs. This allows for earth ground detection via the physical bridge.
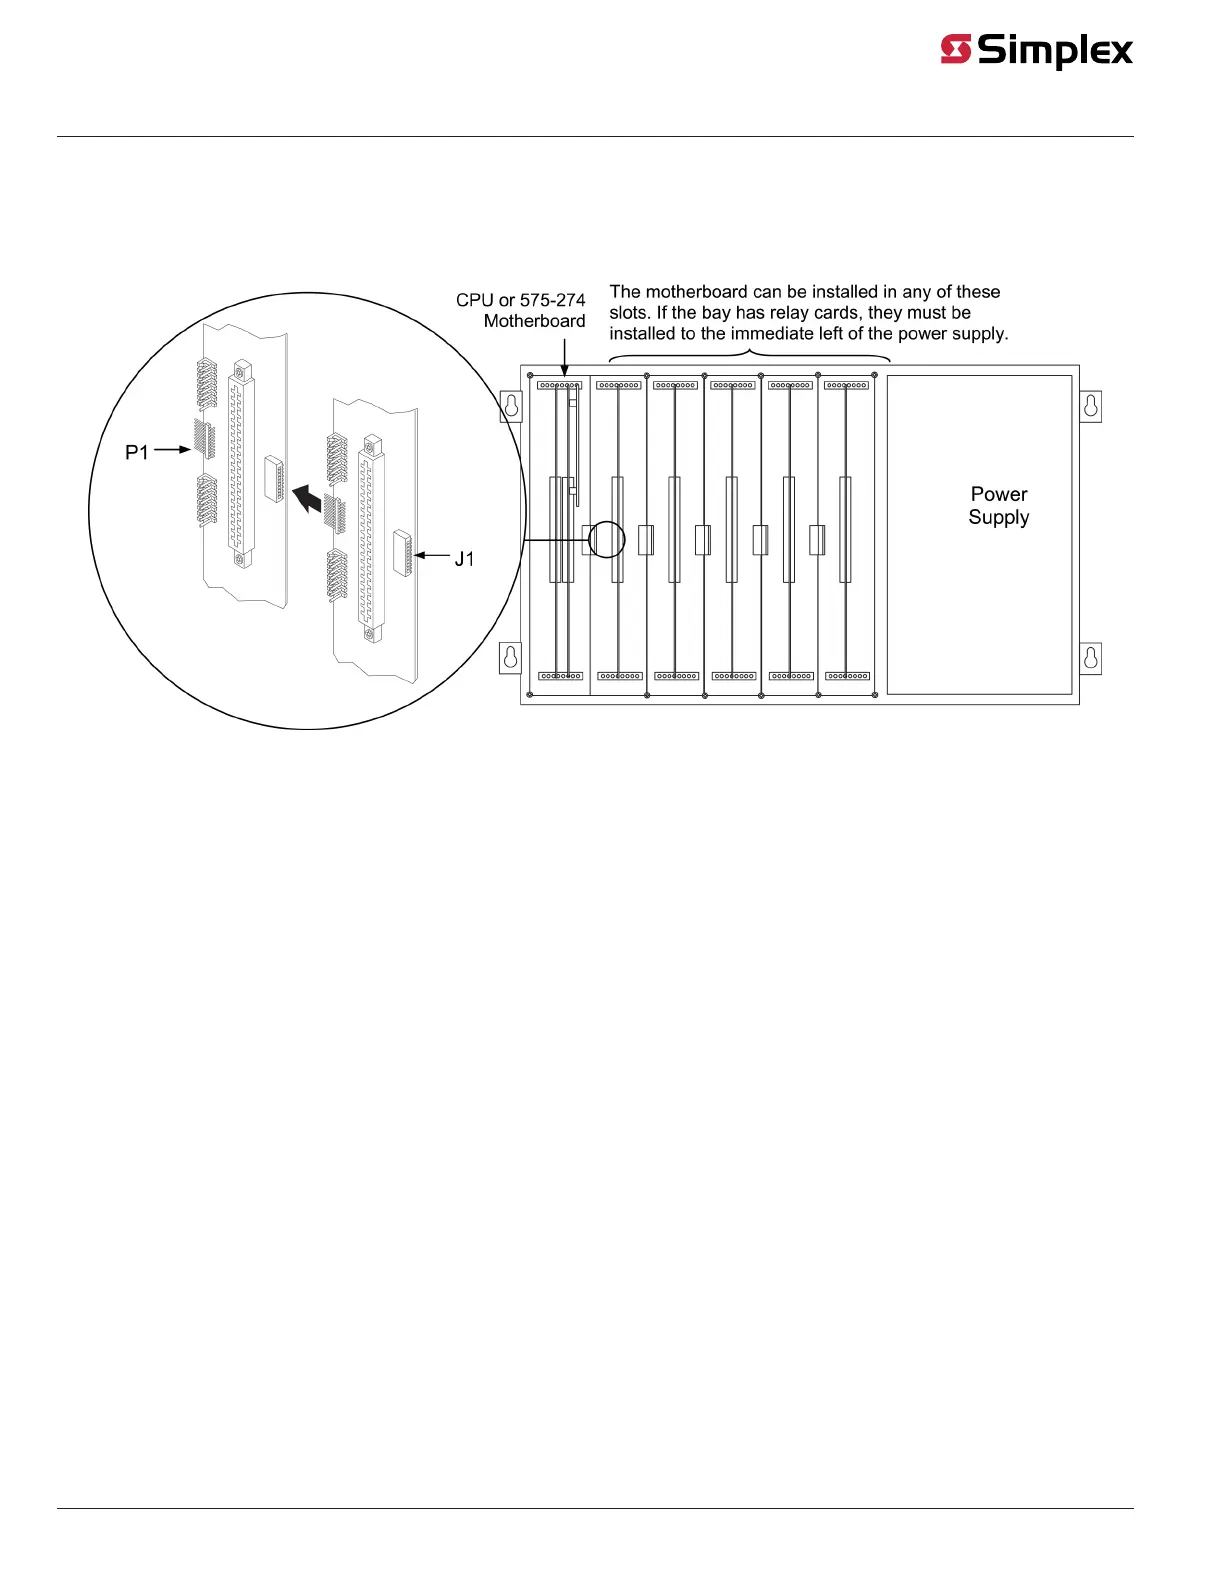
Install the motherboard as described below.
1. Orient the motherboard so that the connector labeled J1 is on the right and the header labeled P1 is on the left.
2. Slide the motherboard you are installing to the left until the pins are completely inserted in the connector of a previously installed motherboard.
3. Secure the motherboard to the chassis with four torx screws.
Figure 3: Installing the Motherboard into a 4100 Master Controller Bay
page 4 579-205 Rev. H
4010ES and 4100 4120-Series Class A/Class B Zone Modules Installation Instructions