Do you have a question about the Simrad 6kW and is the answer not in the manual?
Equipment compliance with FCC rules for digital devices and radio frequency energy.
Conditions for operation subject to Industry Canada regulations.
Declaration of compliance for Radar Processor with EU directives.
Navico's right to change products, owner's responsibility for installation/use, and liability disclaimer.
Information about the Navico warranty card.
Encourages user feedback for manual improvement.
Describes the radar system's components, connections, and protocols used.
Critical warnings regarding radar usage, safety, and high voltage hazards.
Lists essential components and checks for the Navico radar system before installation.
Guidelines for selecting the optimal scanner placement on a vessel to avoid interference.
Recommendations for installing the scanner on power boats to ensure optimal performance at speed.
Guidance on installing the scanner on yachts, considering heel angles for effective sweep.
Method for determining the ideal scanner height based on the A-B line for best performance.
Explains how to calculate the theoretical maximum detection range using a formula.
Strategies for minimizing false echoes and shadow zones by adjusting scanner placement.
Instructions for installing the open array scanner component after connecting the cable.
Guidance on fabricating and installing a scanner on a trestle or radar mast for mounting.
Instructions for installing the radar processor in a dry, accessible, and grounded location.
Best practices and precautions for wiring the radar system components to prevent issues.
Detailed steps for connecting the 6 kW scanner's interconnection cable to the scanner unit.
Steps for connecting the 10 kW scanner's interconnection cable to the scanner unit.
Instructions for connecting the 25 kW scanner's interconnection cable to the scanner unit.
Procedure for grounding the 10 kW scanner to the vessel's ground system for safety.
Procedure for grounding the 25 kW scanner to the vessel's ground system for safety.
Overview of the radar processor's interface connectors and their functions for various displays.
Steps for connecting the 6 kW interconnection cable to the radar processor unit.
Instructions for connecting 10/25 kW interconnection cables to the radar processor unit.
Details on connecting the power cable, including fuse/breaker requirements and wire stripping.
Procedure for connecting the radar processor's chassis ground wire to the vessel's hull or ground network.
Lists required components for connecting radar to GB40/8000i systems via Ethernet.
Guide for connecting radar to Simrad GB40 with SimNet heading sensor for MARPA.
Guide for connecting radar to N. 8000i/GB40 with NMEA 0183 heading for MARPA.
Checklist for verifying proper wiring and installation before interfacing with display heads.
Steps for setting up and starting the radar on GB40/8000i systems after installation.
Lists essential parts and connection kits for radar integration with NX40/NX45 and M84/M121.
Diagrams and guidance for connecting radar to NX40/45 and M84/M121 systems via various protocols.
Instructions for setting up the radar on NX40/45 and M84/M121 systems, including park position and bearing.
Lists required components and cables for connecting radar to Northstar 6000i/6100i systems.
Recommended connection method for radar processor to Northstar 6000i/6100i display unit.
Detailed wiring and pin assignments for the radar communications cable (NS003107) to the junction box.
Options for configuring remote power control for radar ON/OFF with a common power source.
Configuration for remote power control when using isolated power supplies or longer distances.
Comprehensive guide to setting up the radar system on Northstar 6000i/6100i displays.
Procedures for safely turning the radar system on and off, including preheating.
Steps to enable radar communication with the navigator via Port 2 setup for data exchange.
How to adjust radar display settings like Mode, Gain, Sea Clutter, and Rain Clutter.
Requirements for compatible heading sensors, including NMEA sentences and update rate.
Instructions on how to disable the heading sensor input if it is not installed or connected.
Guidance on calibrating the radar for accurate performance, including trigger delay and heading calibration.
Steps to prepare the radar system for calibration, ensuring correct power and interface.
Procedures for tuning the radar for optimal performance, including auto and manual modes.
How to select the appropriate STC curve based on scanner height to manage sea clutter.
Methods for setting the trigger delay (range offset) for accurate radar range offset and target display.
Calibrating radar heading with an installed sensor for accurate chart overlay alignment.
Calibrating radar heading without a sensor using a reference target for 0° alignment.
Restoring all radar settings to factory defaults, except for specific calibrations.
Restoring radar appearance settings (Auto, Harbor, etc.) to factory defaults.
Detailed manual tuning procedure for situations where automatic tuning is insufficient.
Routine maintenance procedures to keep the radar system clean, secure, and functional.
Specific maintenance tasks for the radar scanner unit, including cleaning and lubrication.
Periodic maintenance tasks such as re-setting heading calibration after structural changes.
Information on obtaining technical support, warranty, and service from Navico or distributors.
Troubleshooting steps for a scanner that fails to rotate or move.
Steps to diagnose and resolve issues when the radar image is missing or unstable.
Methods to identify and reduce noise and interference affecting the radar or other onboard electronics.
Verification steps for proper power supply, voltage, and wiring of the radar processor to prevent damage.
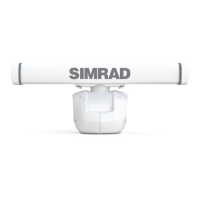
Dimensional drawings and specifications for the 6 kW scanner.
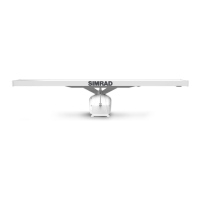
Dimensional drawings and specifications for the 10 kW scanner.
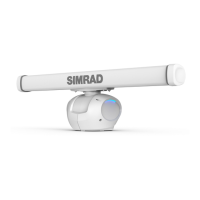
Dimensional drawings and specifications for the 25 kW scanner.
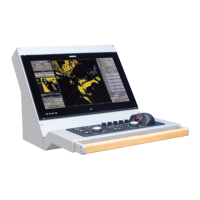
Dimensional information and layout of the radar processor unit.
Detailed technical specifications for the 6 kW Navico radar system.
Detailed technical specifications for the 10 kW Navico radar system.
Detailed technical specifications for the 25 kW Navico radar system.