PAGE | 20
FAULT REPAIR
¼ Note: Maintenance must only be carried out after the equipment has been switched o. Before commencing with repair
work, ensure the spare part is available and veried in good condition.
⚠
WARNING: The replacement operations must be carried out exclusively by skilled personnel with appropriate
equipment training.
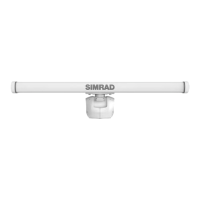
Motor replacement
Tools needed:
• Spare motor kit 000-16092-001
• 5 mm Allen
®
key
• T30 Torx
®
key
• Wire cutter
• Soft brush
• Thermal paste
Procedure
1 On the electric switchboard, switch OFF the radar main breaker, and attach a card stating:
“WORK IN PROGRESS - DO NOT SWITCH ON”.
2 On the R5000 PSU, switch the power switch to the OFF position, and attach a card stating:
“WORK IN PROGRESS - DO NOT SWITCH ON”.
3 On the radar pedestal, switch safety switch to the OFF position.
4 Use the 5 mm Allen
®
key to unscrew the four captive screws to open the starboard end cap to reveal the motor.
5 Disconnect the motor wiring connector from the transceiver module.
6 With the T30 Torx
®
key, loosen and remove the four M6 screws from the motor plate
7 Push the motor assembly upward and remove it from the radar pedestal.
8 Slowly turn the antenna by hand for a visual inspection of the main gear located on the main shaft. Clean with a soft
brush if required.
Install new motor
¼ Note: The spare motor P/N 000-16092-001 is factory assembled as one piece for simple and fast installation.
9 Align the two pin holes on the motor plate with the pin keys on the HALO chassis.
10 Insert the four M6 screws into the motor plate and secure with the T30 Torx
®
key.
11 Only light lubrication is required. If the gears are dry, add a few drops of grease such as WD-40
®
to the smaller gear
12 Turn the antenna by hand, and wipe away any excess grease to prevent dripping.
13 Remove the old thermal paste from the heat sink and replace with the new thermal paste included with the motor kit.