PAGE | 7
PREVENTIVE MAINTENANCE
Follow the procedures that are described in this chapter to ensure the radar system operates at its optimum.
¼ Note: All work performed on the radar must be recorded in the unit log book.
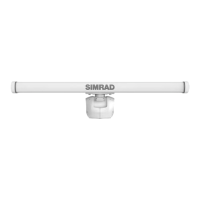
External radar pedestal inspection
The operation is performed twice a year.
1 On the electric switchboard, switch OFF the radar main breaker, and attach a card stating:
“WORK IN PROGRESS - DO NOT SWITCH ON”.
2 On the R5000 PSU, switch the power switch to the OFF position, and attach a card stating:
“WORK IN PROGRESS - DO NOT SWITCH ON”.
3 Place a card at the radar controls stating unit is being serviced.
4 Switch the safety switch to the OFF position.
5 Check that no parts of the plastic covering the antenna have been painted.
6 Check the state of the casing.
7 Unscrew and grease the 4 fastening screws in both endcaps to avoid corrosion and facilitate future inspections.
8 If paint has been scratched o at any point:
• Degrease the part to be painted
• Scu lightly with emery paper
• Dust o with a dry brush
• Apply a rust-resistance paint system suited to harsh environments. Refer to paint supplier’s instructions for
details.
9 Switch the safety switch to the ON position.
10 On the electric switchboard, set the radar main breaker to ON and remove the card reading:
“WORK IN PROGRESS - DO NOT SWITCH ON”.
11 On the R5000 PSU, switch the power switch to the ON position and remove the card reading:
“WORK IN PROGRESS - DO NOT SWITCH ON”.
Internal radar pedestal inspection
This operation should be performed every two years.
1 On the electric switchboard, switch OFF the radar main breaker, and attach a card stating:
“WORK IN PROGRESS - DO NOT SWITCH ON”.
2 On the R5000 PSU, switch the power switch to the OFF position, and attach a card stating:
“WORK IN PROGRESS - DO NOT SWITCH ON”.
3 Switch the safety switch to the OFF position.
4 Position the antenna so it’s facing the bow of the vessel.
5 Unscrew the four endcap screws.
6 Remove the endcap completely.
7 Check for any signs of water ingress.
Connector and cable inspection
1 Check the condition of all connectors’ contacts (pins and plugs).
2 Clean with a dry brush if necessary.
Mechanical inspection
1 Check the condition of the gears.
2 Add a thin coating of grease such as WD-40
®
if the main gear appears dry.
3 Check there are no loose screws.
4 Replace or tighten screws as necessary.

 Loading...