26 |
Installation | HS60 GPS Compass User Guide
Pole mount
Before pole mounting the HS60
• Determine your mounting orientation. See “Mounting Orientation”
on page 20 for more information.
• Choose a location that meets the mounting location requirements.
• Mark and drill the mounting holes as necessary for the threaded
pole.
Pole mounting instructions for HS60 (Inside Pole)
Required tools: 5 mm Allen key for M6 screws and adjustable
wrench to tighten jam nut.
1.
Insert mating cable through both the jam nut and 1” (25.4mm) mounting
adapter base
2. Place the jam nut on the pole followed by the 1” (25.4mm) adapter base.
Hand tighten the base to the desired orientation.
3. Adjust the jam nut to secure the orientation.
4. Connect the mating end of the cable to the HS60 connector located on the
bottom of the unit.
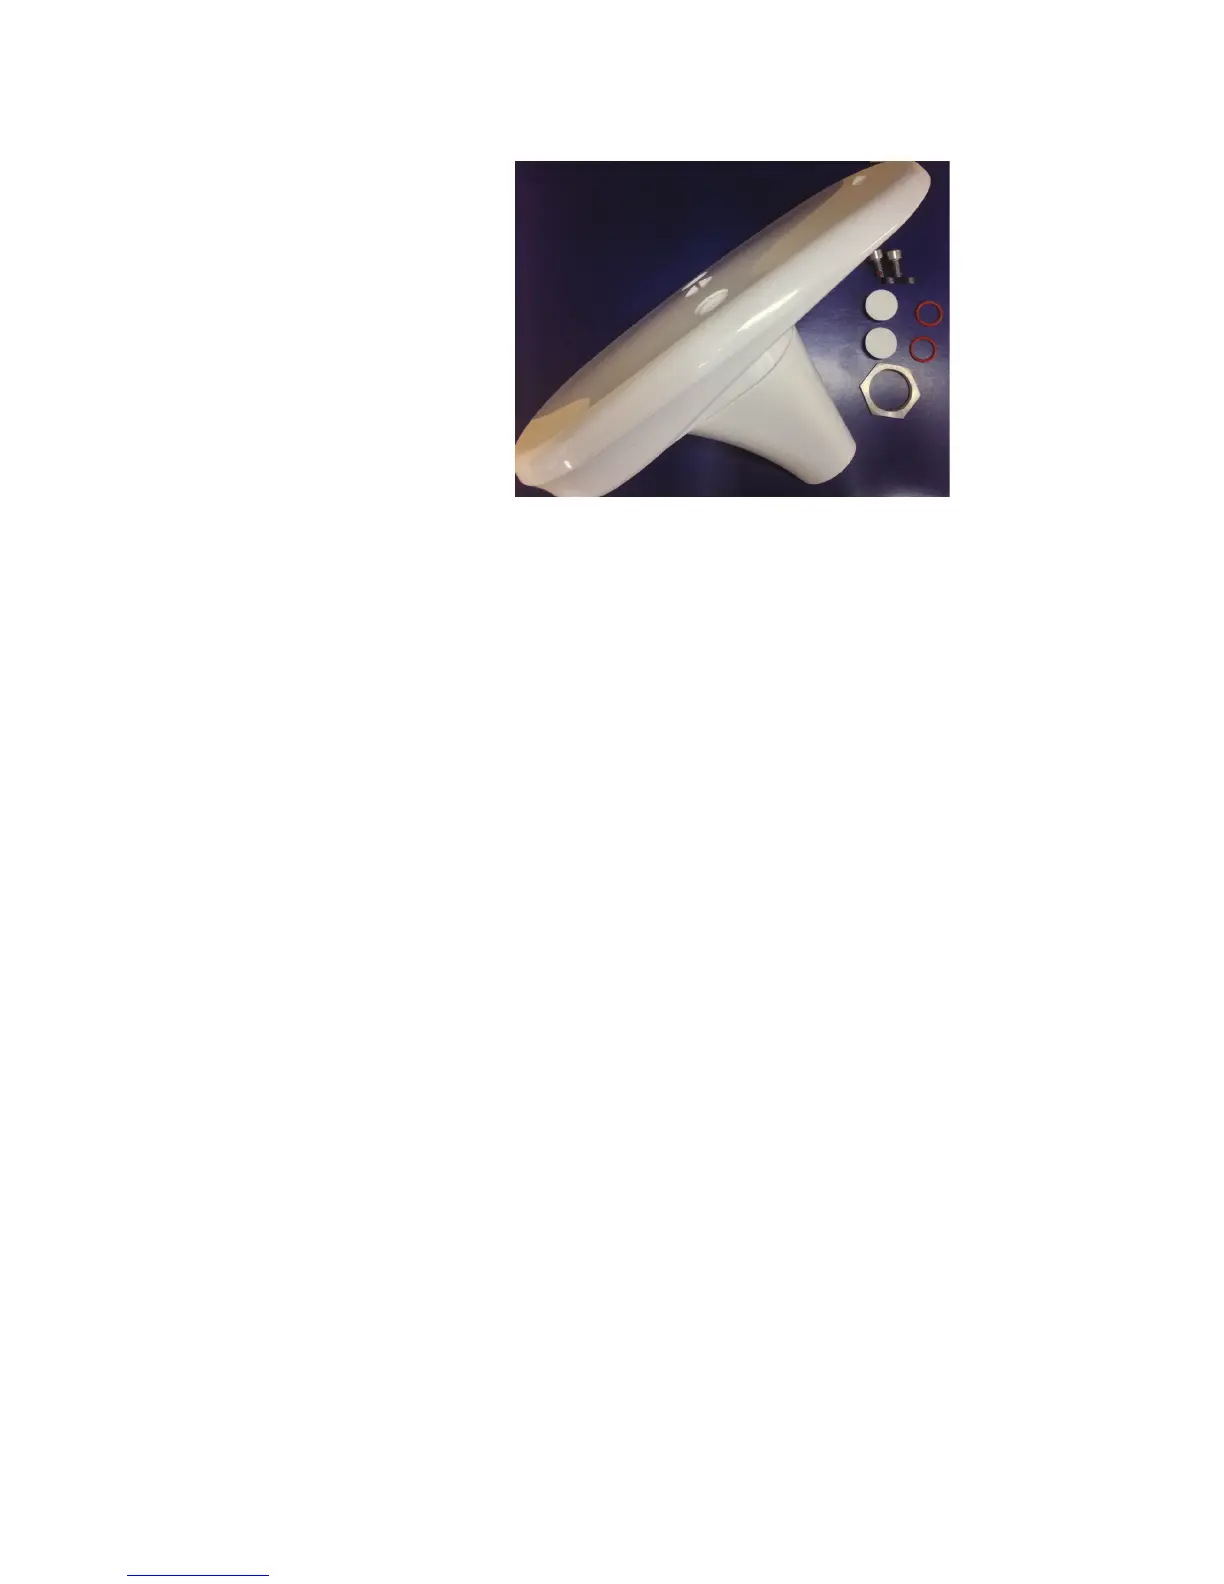
5. Insert the base adapter into HS60 by placing the tongue of the base into
the groove of the HS60 unit. When the tongue is properly seated in the
groove, the rest of the base can be pressed into place to create a smooth
seam between the base and HS60 unit.
6. Use 5 mm Allen key to fasten two M6 screws to secure HS60 onto adapter.
Use 15 in-lb torque
7. Insert each o-ring onto a plastic cap
8. Install plastic cap with o-ring onto HS60 unit (rectangular notch faced
towards the outside)
9. Align and set the direction of HS60 unit, while using the jam nut to secure
the unit (hand-tighten).