56 |
Installation | RS40/RS40-B User Guide
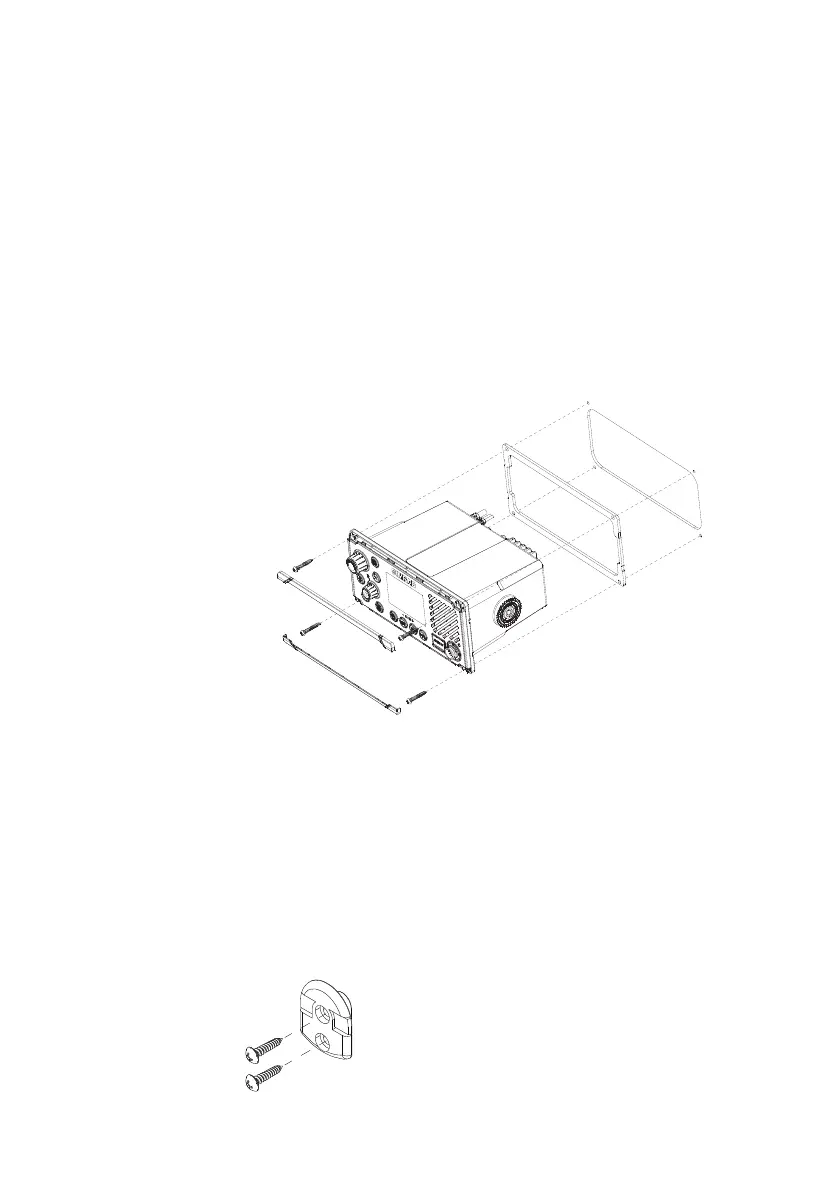
Flush installation
1. Tape the installation template onto the chosen mounting location.
2. Cut out the area marked by the solid dark line (the dashed line
indicates the total area that will be covered by the radio fascia after
installation).
3. Use a 2.5 mm (3/32” ) drill bit to drill the 4 pilot holes.
4. Remove the installation template.
5. Fit the gasket to the radio.
6. Slide the radio into the cavity.
7. Using a Phillips screwdriver, secure the radio using the supplied
3.5x20 mm selftapping screws to the mounting location.
8. Fit the bezel trim to cover the 4 mounting screws.
Install the hand mic bulkhead bracket
1. Hold the hand mic bulkhead bracket at the chosen location and
mark the screw hole positions on the mounting surface.
¼ Note: Ensure that the microphone curly cable will comfortably reach
this location BEFORE you drill.
2. Use a 2.5 mm (3/32” ) drill bit to drill the 2 pilot holes.
3. Using a Phillips screwdriver, secure the Mic mount using the
supplied 3.5x20 mm selftapping screws to the mounting location.
4. Hang the fist mic on the mount.