SPECIAL
INSTRUCTIONS
FOR
MACHINE
271K2
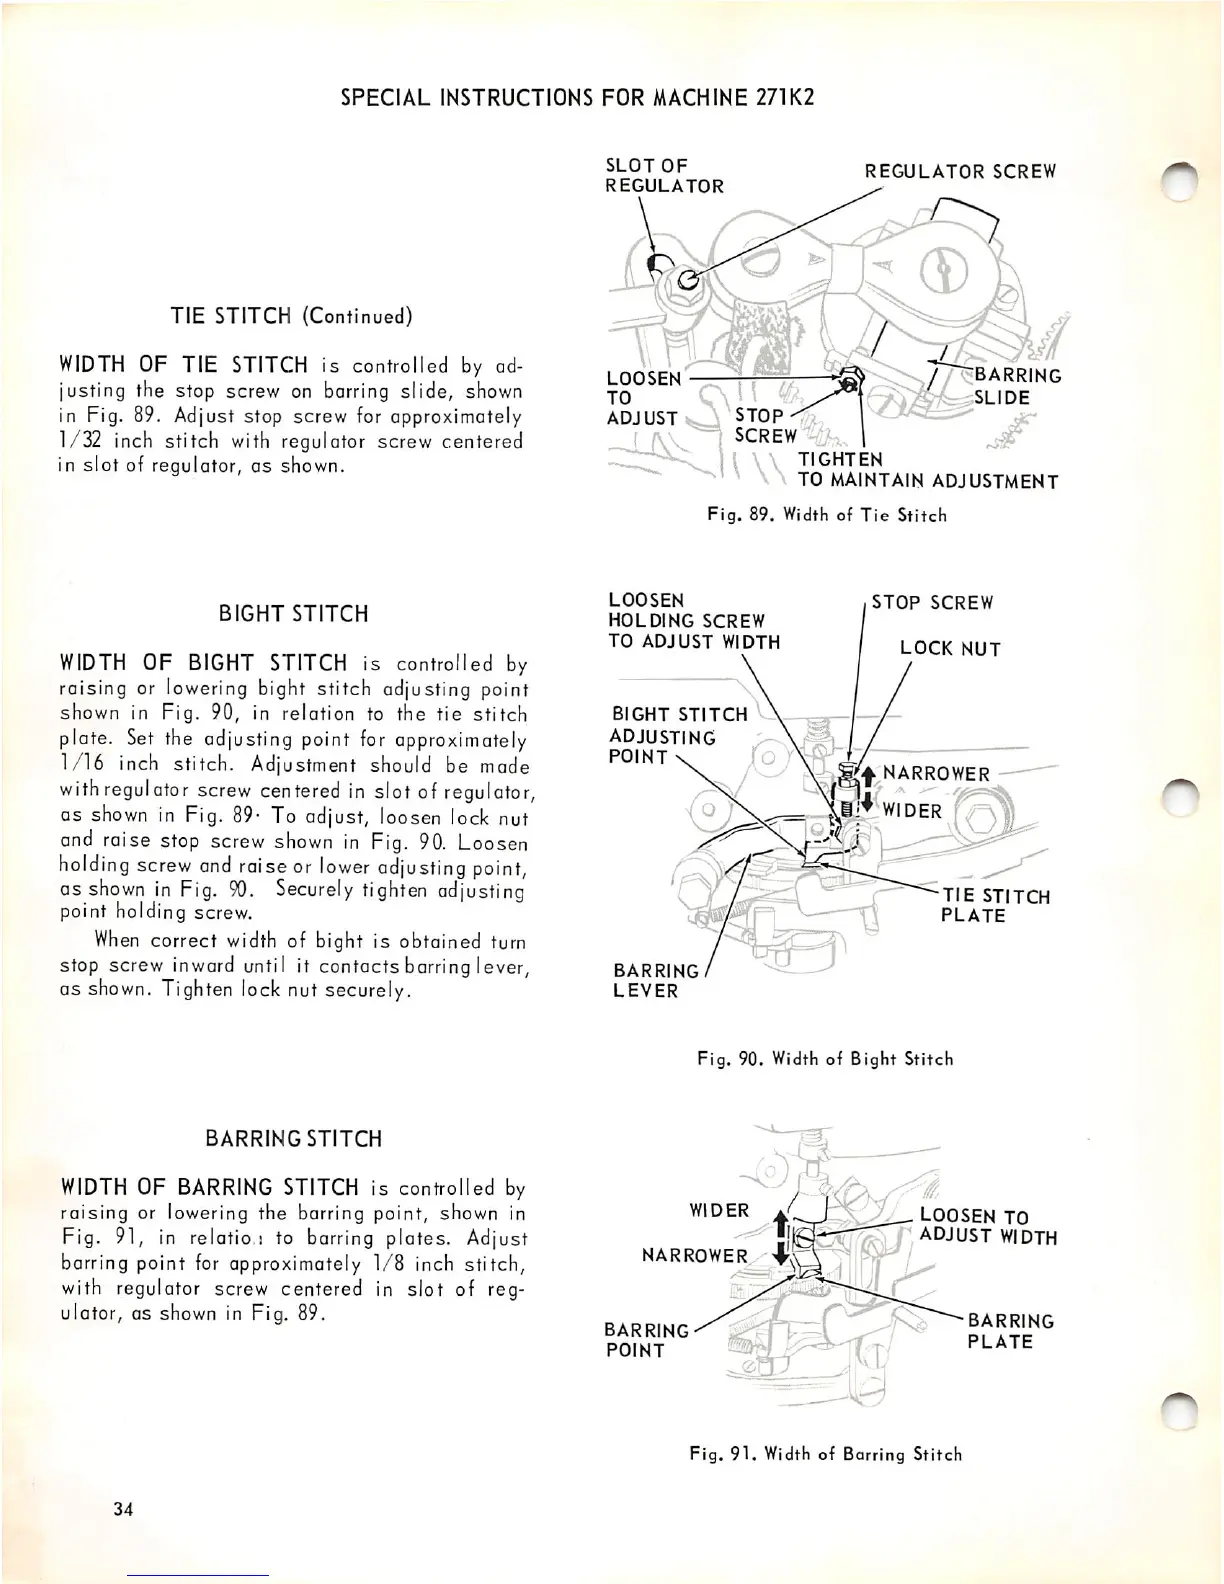
TIE STITCH (Continued)
WIDTH
OF TIE
STITCH
is controlled by ad
justing the stop screw on barring slide, shown
in Fig. 89. Adjust stop screw for approximately
1/32 inch stitch
with
regulator screw centered
in
slot
of regulator, as shown.
BIGHT
STITCH
WIDTH
OF
BIGHT
STITCH
is controlled by
raising or lowering bight stitch adjusting point
shown
in
Fig.
90, in relation to the
tie
stitch
plate.
Set
the adjusting
point
for
approximately
1/16 inch stitch. Adjustment should be made
with
regul
ator
screw
centered
in
slot of regulator,
as
shown
in
Fig.
89-
To adjust, loosen lock nut
and
raise
stop
screw
shown
in
Fig.
90.
Loosen
holding
screw
and
raise or
lower
adjusting
point,
as
shown
in
Fig.
90.
Securely
tighten
adjusting
point holding screw.
When
correct
width
of bight is obtained turn
stop screw inward until it contacts barring lever,
as
shown.
Tighten
lock nut securely.
BARRING
STITCH
WIDTH
OF
BARRING
STITCH is controlled
by
raising
or lowering the barring point, shown in
Fig. 91, in relatio.j to barring plates. Adjust
barring point
for
approximately 1/8 inch stitch,
with regulator screw centered in slot of reg
ulator, as shown in Fig. 89.
34
SLOT
OF
REGULATOR
ADJUST STOP
SCREW
\
TIGHTEN
REGULATOR
SCREW
y/7
^barring
SLIDE
TO MAINTAIN
ADJUSTMENT
Fig.
89. Width of
Tie
Stitch
LOOSEN
HOLDING
SCREW
TO
ADJUST
WIDTH
BIGHT
STITCH
^
adjusting
POINT
BARRING
LEVER
STOP
SCREW
LOCK
NUT
f
NARROWER
4
TIE
STITCH
PLATE
Fig.
90. Width of
Bight
Stitch
WIDER
NARROWER
V
BARRING
POINT
loosen
to
ADJUST
WIDTH
BARRING
PLATE
Fig.
91. Width of Barring
Stitch
r^