32 –EN
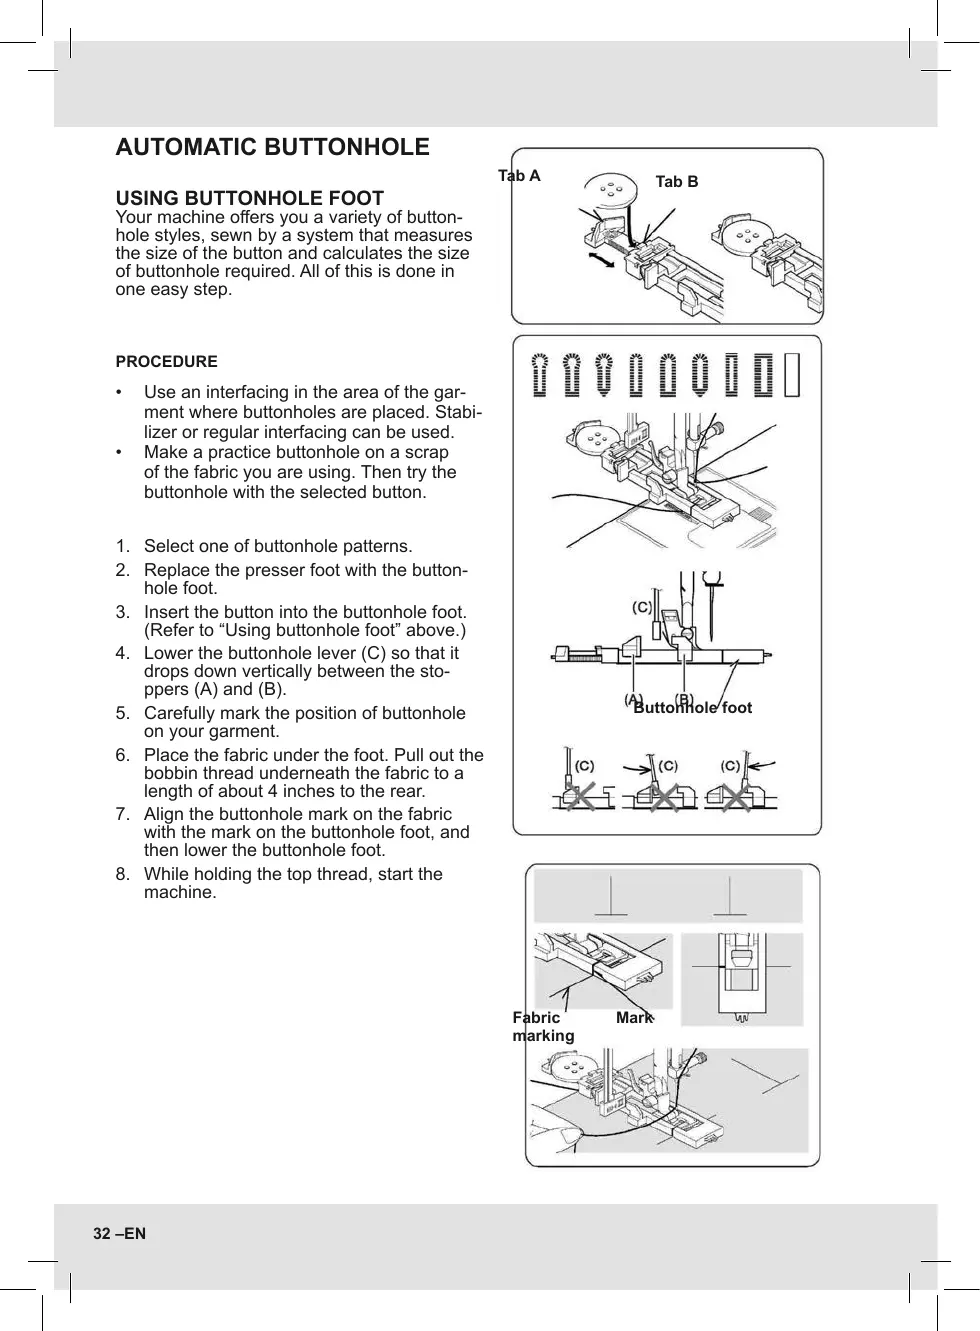
Tab A
Tab B
Buttonhole foot
Fabric
marking
Mark
AUTOMATIC BUTTONHOLE
USING BUTTONHOLE FOOT
Your machine oers you a variety of button-
hole styles, sewn by a system that measures
the size of the button and calculates the size
of buttonhole required.
All of this is done in
one easy step.
PROCEDURE
• Use an interfacing in the area of the gar-
ment where buttonholes are placed. Stabi-
lizer or regular interfacing can be used.
• Make a practice buttonhole on a scrap
of the fabric you are using. Then try the
buttonhole with the selected button.
1. Select one of buttonhole patterns.
2. Replace the presser foot with the button-
hole foot.
3. Insert the button into the buttonhole foot.
(Refer to “Using buttonhole foot” above.)
4. Lower the buttonhole lever (C) so that it
drops down vertically between the sto-
ppers (A) and (B).
5. Carefully mark the position of buttonhole
on your garment.
6. Place the fabric under the foot. Pull out the
bobbin thread underneath the fabric to a
length of about 4 inches to the rear.
7. Align the buttonhole mark on the fabric
with the mark on the buttonhole foot, and
then lower the buttonhole foot.
8. While holding the top thread, start the
machine.