EN– 7
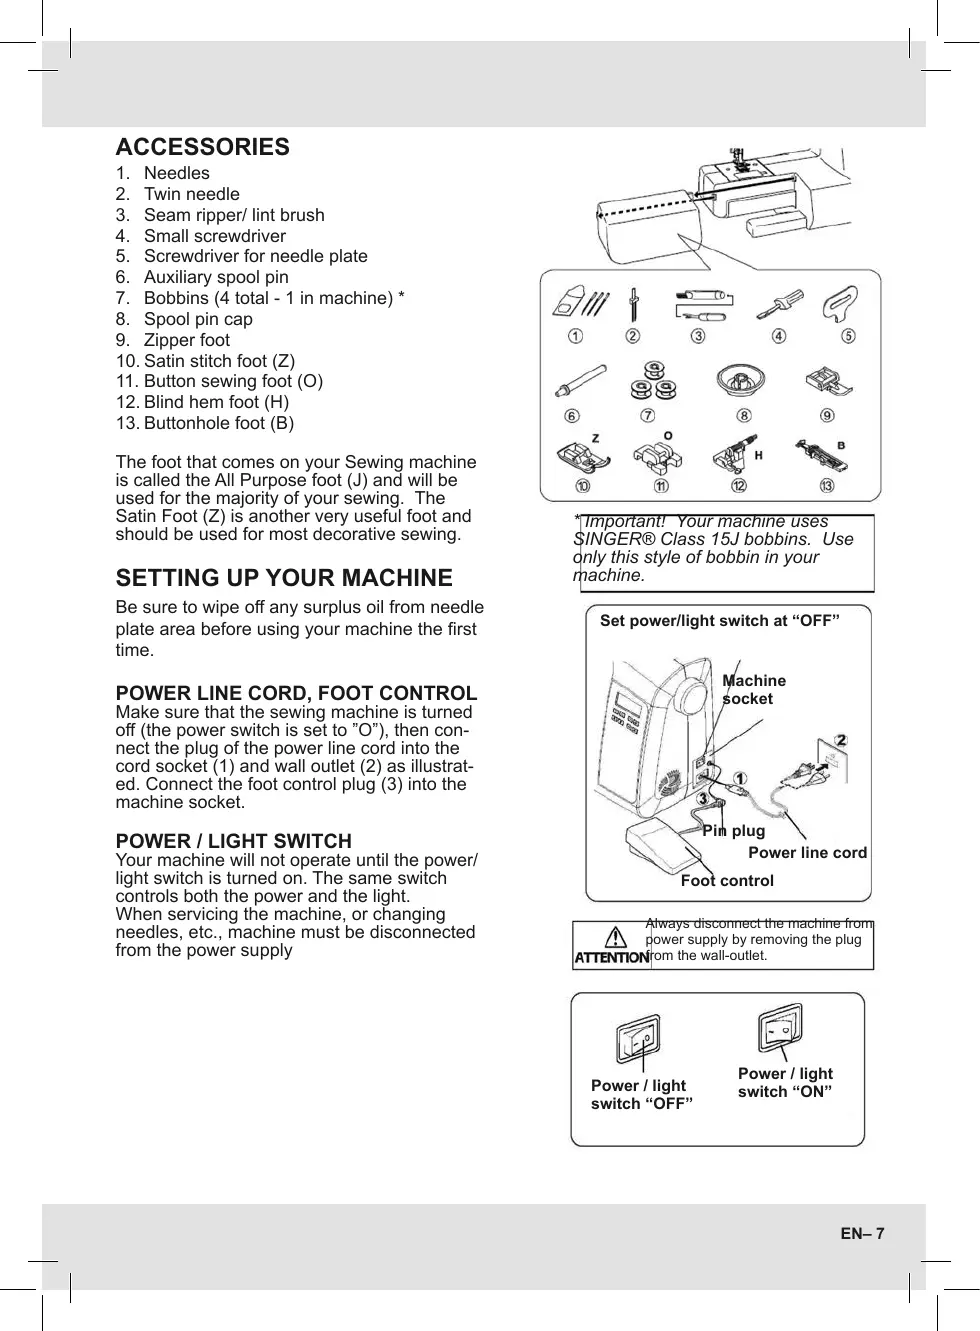
ACCESSORIES
1. Needles
2. Twin needle
3. Seam ripper/ lint brush
4. Small screwdriver
5. Screwdriver for needle plate
6. Auxiliary spool pin
7. Bobbins (4 total - 1 in machine) *
8. Spool pin cap
9. Zipper foot
10. Satin stitch foot (Z)
11. Button sewing foot (O)
12. Blind hem foot (H)
13. Buttonhole foot (B)
The foot that comes on your Sewing machine
is called the All Purpose foot (J) and will be
used for the majority of your sewing. The
Satin Foot (Z) is another very useful foot and
should be used for most decorative sewing.
SETTING UP YOUR MACHINE
Be sure to wipe o any surplus oil from needle
plate area before using your machine the rst
time.
POWER LINE CORD, FOOT CONTROL
Make sure that the sewing machine is turned
o (the power switch is set to ”O”), then con-
nect the plug of the power line cord into the
cord socket (1) and wall outlet (2) as illustrat-
ed. Connect the foot control plug (3) into the
machine socket.
POWER / LIGHT SWITCH
Your machine will not operate until the power/
light switch is turned on. The same switch
controls both the power and the light.
When servicing the machine, or changing
needles, etc., machine must be disconnected
from the power supply
* Important! Your machine uses
SINGER® Class 15J bobbins. Use
only this style of bobbin in your
machine.
Set power/light switch at “OFF”
Machine
socket
Power line cord
Foot control
Pin plug
Always disconnect the machine from
power supply by removing the plug
from the wall-outlet.
Power / light
switch “OFF”
Power / light
switch “ON”