Install the remote controller wire where it will not be directly influenced by heat.
Mounting Remote Controller
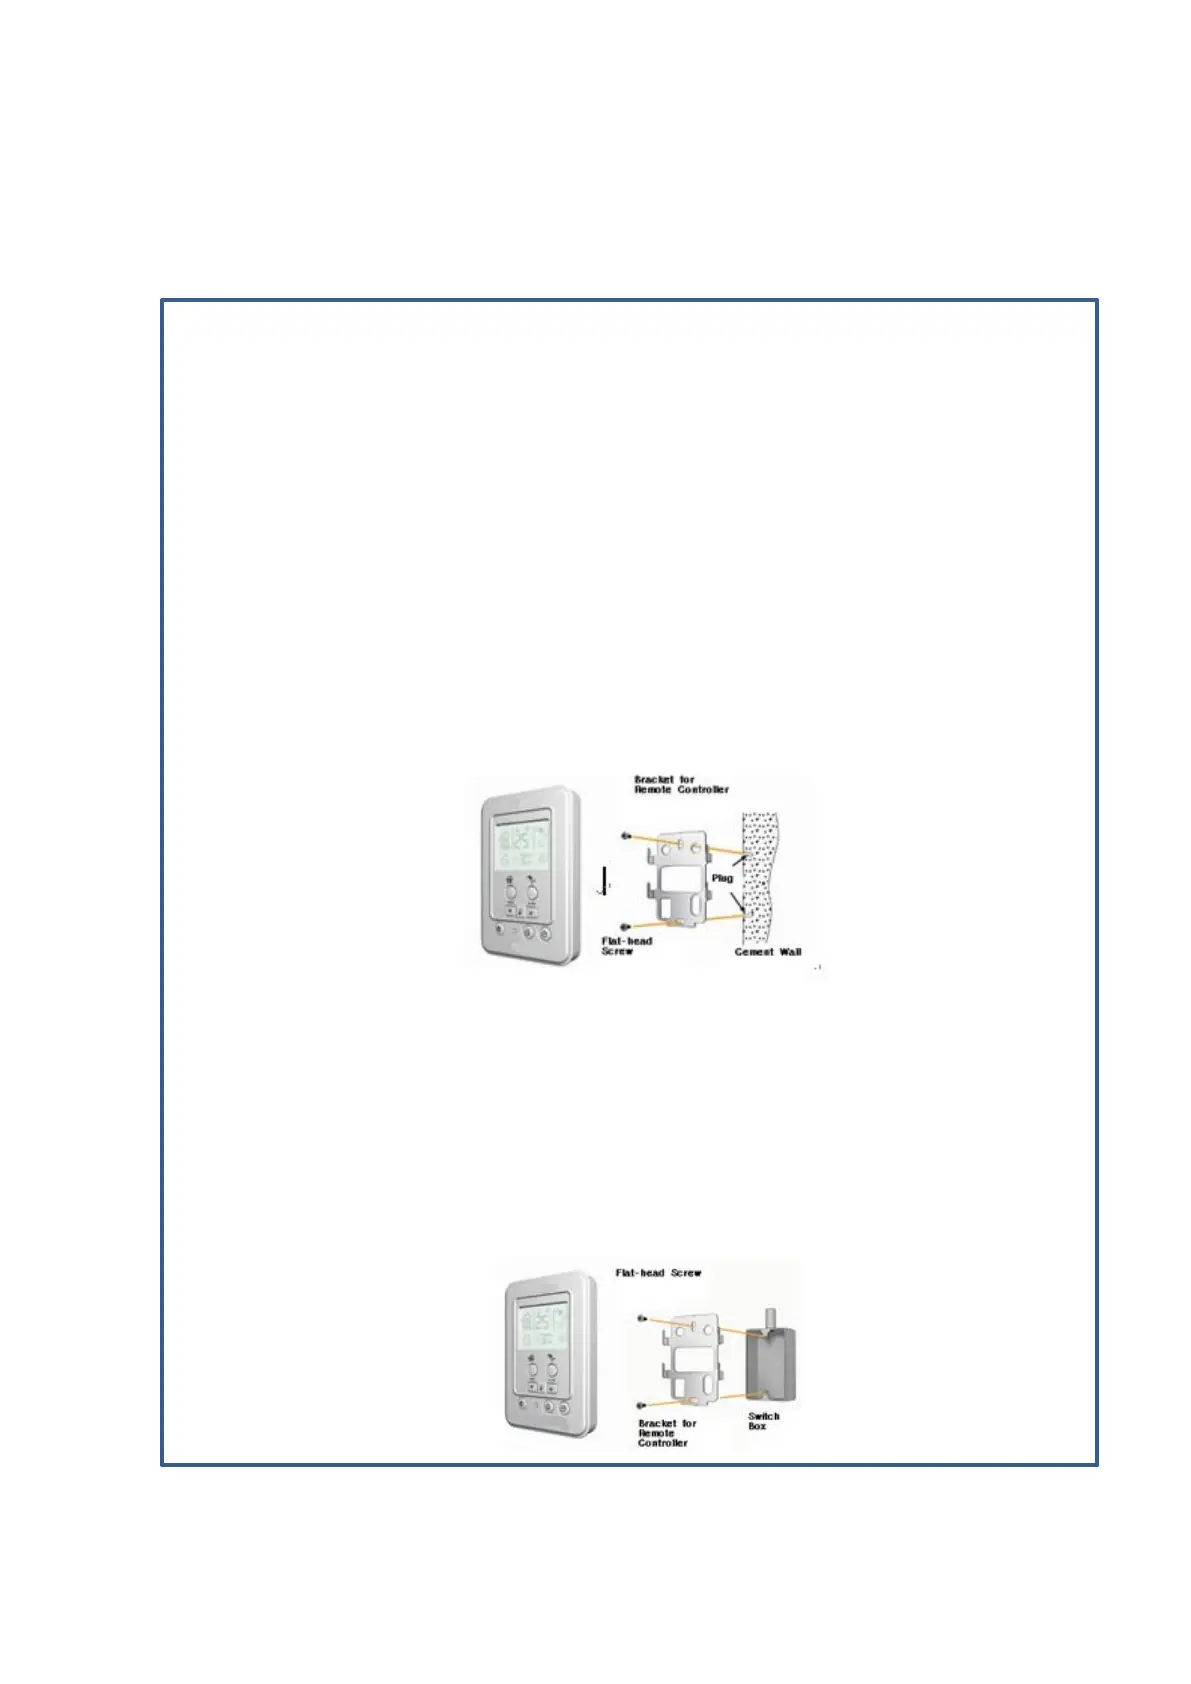
Wall Mounting
- Drill the hole for the plug on the wall (6.0 x 35~40mm deep). Insert the plug. The hole must
be drilled at a right angle.
- Disassemble the bracket for remote controller using the flat-head screwdriver.
Excessive force may damage the remote controller.
- Mount the bracket using the flat-head screws and mount the remote controller.
Other types of screws may not fit to the remote controller causing it to not mount on the
bracket.
- To pull the remote controller wire from the bottom of the remote controller, pull the wire
between the opening at the bottom center of the remote controller and the opening at the
bottom of the bracket.
-
Mounting on Switch Box
- Separate the bracket from the remote controller and fix the bracket using the flat-head
screws contained in the package.
- Connect the remote controller wire and mount the remote controller on the bracket.
- Do not over-fasten the flat-head screws. Excessive fastening may distort the bracket so that it
may be difficult to fix the bracket or it may not be properly controlled.
-
How to Install Remote Controller