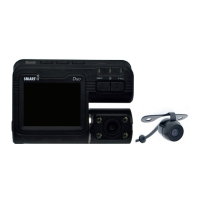
Emergency Video Lock Button
• Function 1: Video Locking
If there is an incident during recording, press the video lock button to protect valuable video
evidence. Previous footage will be saved and extended for an extra 3 minutes recording. To
unlock the video, press the video lock button again.
Please Note: This video will not be overwritten during loop recording
• Function 2: Movement Detection On/Off
To switch on movement detection, press the video lock button for 3 seconds under standby.
Press it again for 3 seconds to turn off the movement detection.
• Function 3: Confirmation
Press the video lock button to use as a confirm/ok button under the menu interface.
• Function 4: Switch of Cameras
When a second camera has been connected to the recorder, press the video lock button to
switch between cameras.
REC/Page Up
• Function 1: Activate Video Recording
To start video recording, press the REC button under standby mode. Press it again to stop the
video recording.
• Function 2: Page Up
REC button functions as page-up button under the menu and the playback interface.
• Function 3: Non-Invert Display
To non-invert the display, press the REC button under power on status for 3 seconds.
MIC/Page Down
• Function 1: Audio Recording On/Off
To stop recording audio in videos, press MIC button. To record audio, press the MIC button
again.
7