SMART LightRaise Installation and User's Guide 5
Control Panel Features
After installation, access the functions of the SMART LightRaise projector mount
using the console's control panel.
With one firm press of a control panel button, you can switch the
video image, data and, if available, audio source.
To power on the LightRaise mount, simply press the System On button.
To switch projector input sources, press one of the source selection
buttons on the control panel's right side. For more details, see page 53.
System On
Button
System Off
Button
Volume Control Buttons
Volume Level Indicator
Source Selection Buttons
Source Indicators
System On
Indicator
System Off
Indicator
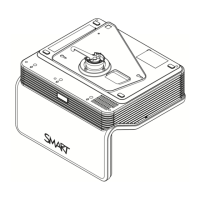
Care and Cleaning
The SMART LightRaise projector mount should be periodically dusted using a soft cloth.
Fingerprints can be removed with a damp cloth and, if required, mild detergent.
For information on care and cleaning of your SMART Board interactive whiteboard, see the
SMART Board User's Guide
. For information on care and cleaning of your projector, see your
projector's user manual.
If you must service your projector, lower the LightRaise boom and remove the projector. See
page 56 for information on servicing.
IMPORTANT:
Don't service the projector while it's attached to the boom. You may damage
the LightRaise mount.